Can the colored 3D model files (OBJ) obtained from 3D scanning be directly used for 3D printing?
Yes, they can be used for printing, but you need to ensure the model is a closed, defect-free mesh.
For example, in Bambu Studio, follow these steps:
Click “File” in the top right corner → “Import,” and select the corresponding OBJ file.
If the model has holes or defects after importing, use the 3DeVOK Studio software or Geomagic Wrap “Repair” and “Fill Holes” functions to fix the mesh, ensuring it is ready for printing. Consider support structures, printer size, material, and other limitations as well.

Why does the “Smart Surface” function in QUICKSURFACE sometimes create surfaces with holes?
This is usually because the original mesh model is not fully closed (it contains holes or gaps). The “Smart Surface” function generates surfaces based on the mesh topology, and if the mesh has defects, the generated surface will also be incomplete.
Recommended Action: Before using “Smart Surface,” use functions like “Fill Holes” or “Mesh Repair” to ensure the mesh is fully closed, which will avoid this issue.

In QUICKSURFACE, if I accidentally zoom or pan too far and lose sight of my object, how can I quickly bring it back into view?
Simply right-click on any empty area in the viewport and select “Zoom to Fit” from the context menu. This will immediately center and resize the view to display all visible objects.

This will quickly reposition the object to the center of the view and adjust it to fit the display.

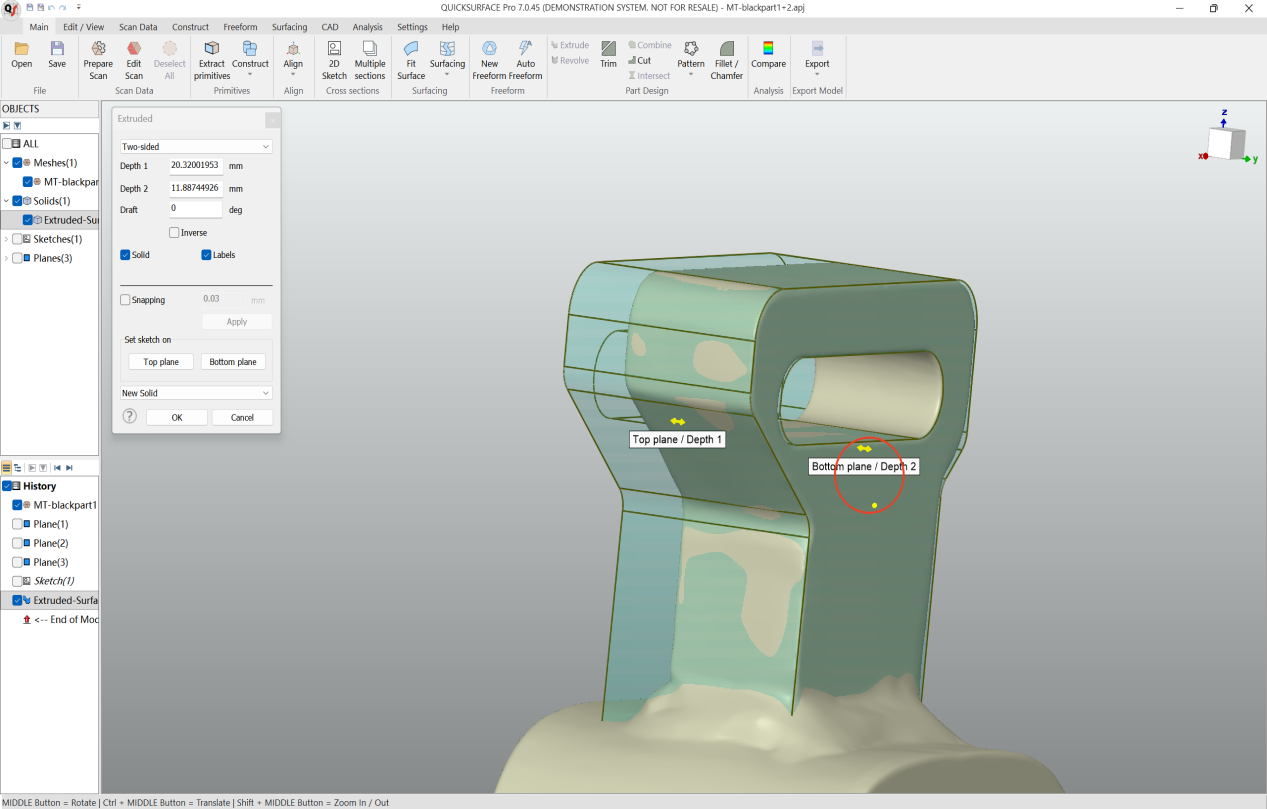
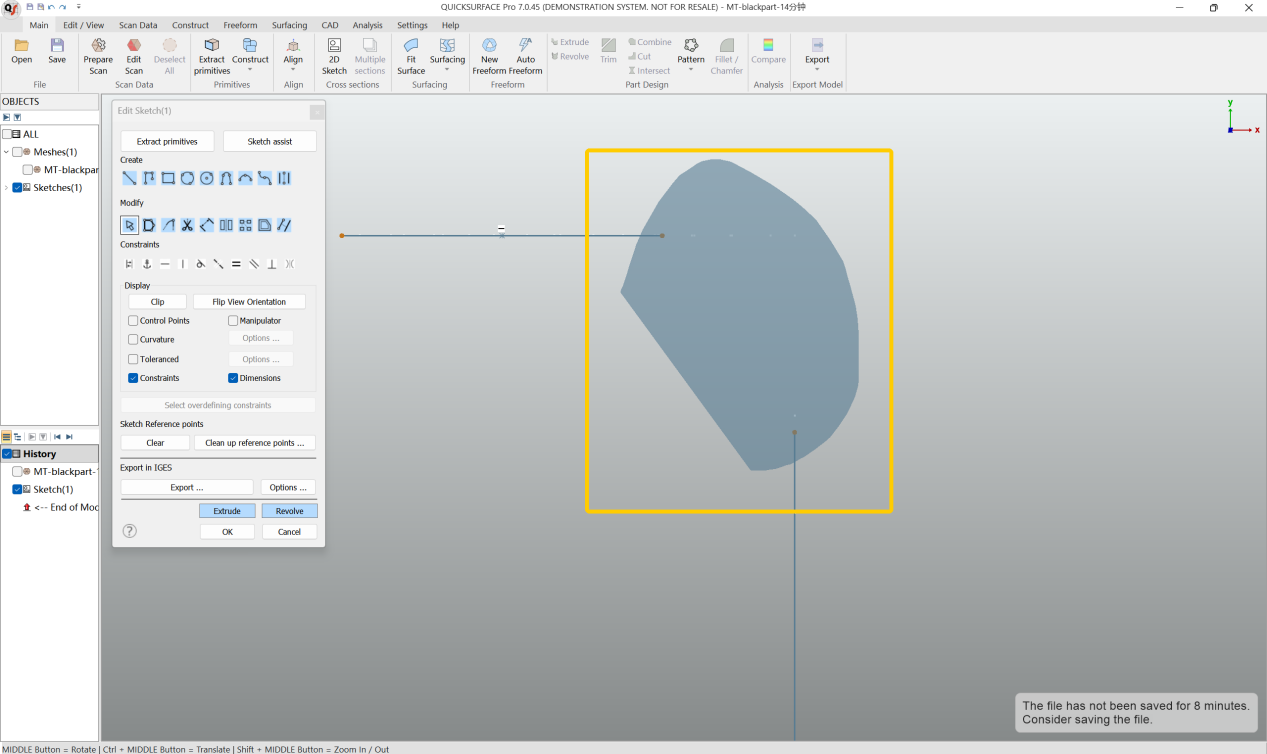
In QUICKSURFACE, what are the quick methods for extruding a 2D sketch?
Within the extrusion feature, first click and drag the yellow arrow on the top or bottom face to freely extrude the solid. While holding down the Ctrl key, move the cursor to the target plane you want to align with—the geometry will snap to it. The same method applies to both the top and bottom faces. Click OK to confirm and finish.

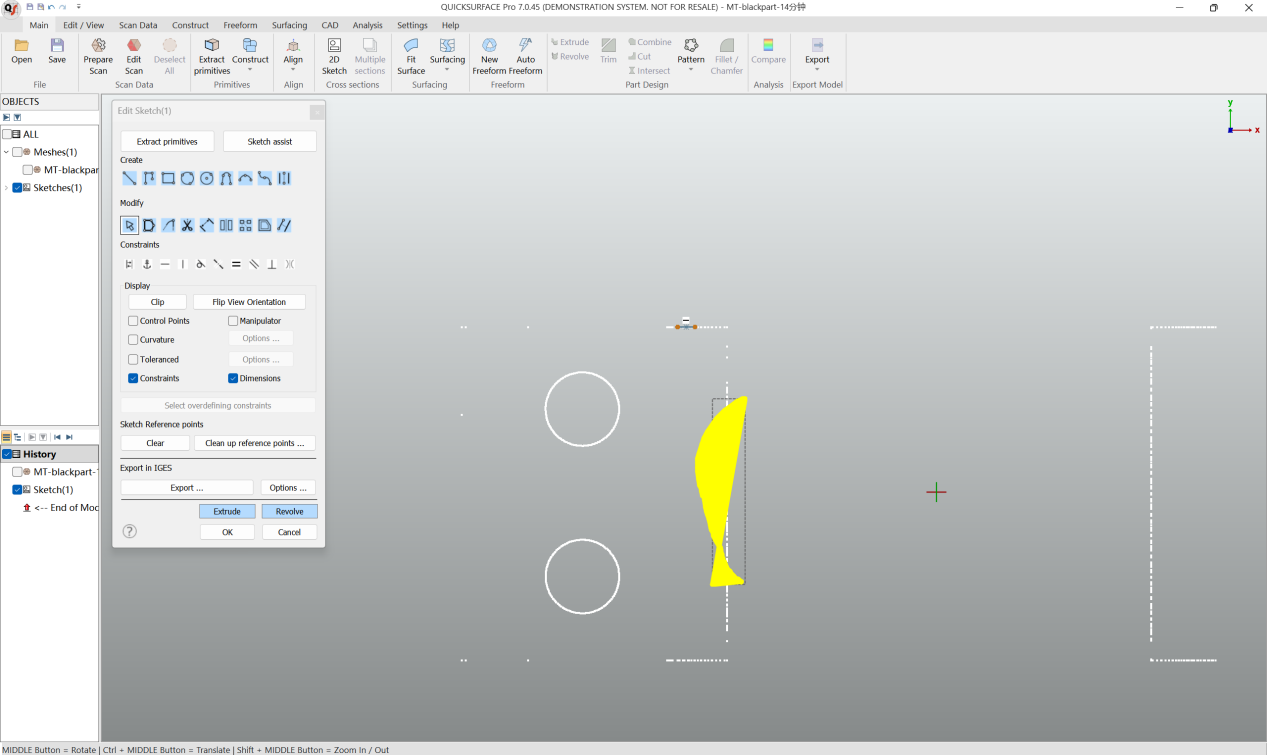
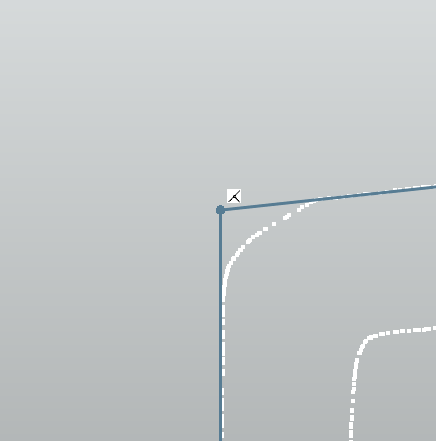
In QUICKSURFACE, what are the quick operations and shortcuts for drawing 2D sketch lines and fillets?
After geometric features have been extracted, you can quickly generate lines and arcs based on the sketch by holding down the Shift key and using a lasso selection.

For connecting two sketch segments at a corner, hold down the Ctrl key, then click and drag the left mouse button to create a lasso selection. Ensure the selection area encompasses the end points of both segments.

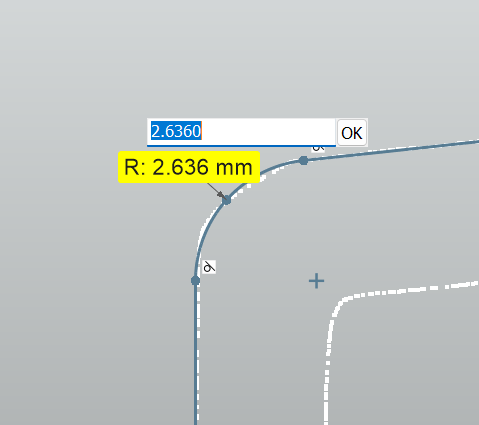
After the lasso selection, the lines will become connected. Repeating the lasso operation on this connection will convert the corner into a fillet. You can then set the value for the radius (R).
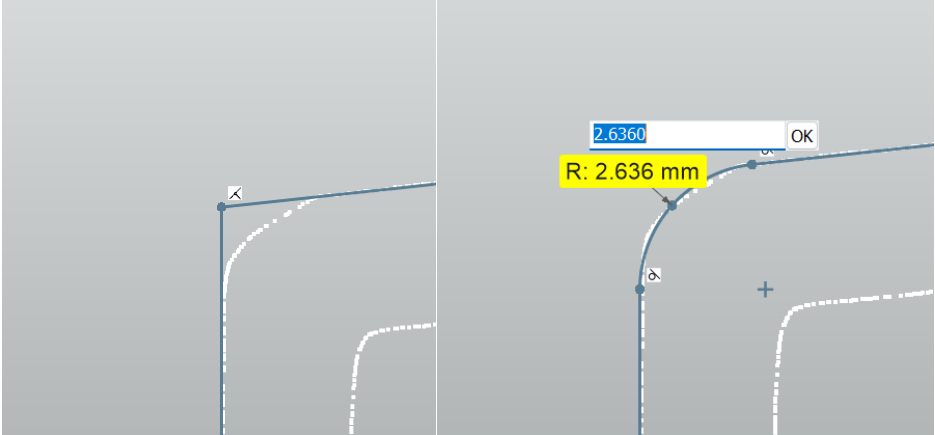
After setting the Radius (R) value, click “OK” to confirm and complete the operation.
In QUICKSURFACE, what are the quick methods for extruding a 2D sketch?
Within the extrusion feature, first click and drag the yellow arrow on the top or bottom face to freely extrude the solid. While holding down the Ctrl key, move the cursor to the target plane you want to align with—the geometry will snap to it. The same method applies to both the top and bottom faces. Click OK to confirm and finish.
In QUICKSURFACE, what are the quick operations and shortcuts for drawing 2D sketch lines and fillets?
After geometric features have been extracted, you can quickly generate lines and arcs based on the sketch by holding down the Shift key and using a lasso selection.
For connecting two sketch segments at a corner, hold down the Ctrl key, then click and drag the left mouse button to create a lasso selection. Ensure the selection area encompasses the end points of both segments.
After the lasso selection, the lines will become connected. Repeating the lasso operation on this connection will convert the corner into a fillet. You can then set the value for the radius (R).
After setting the Radius (R) value, click “OK” to confirm and complete the operation.
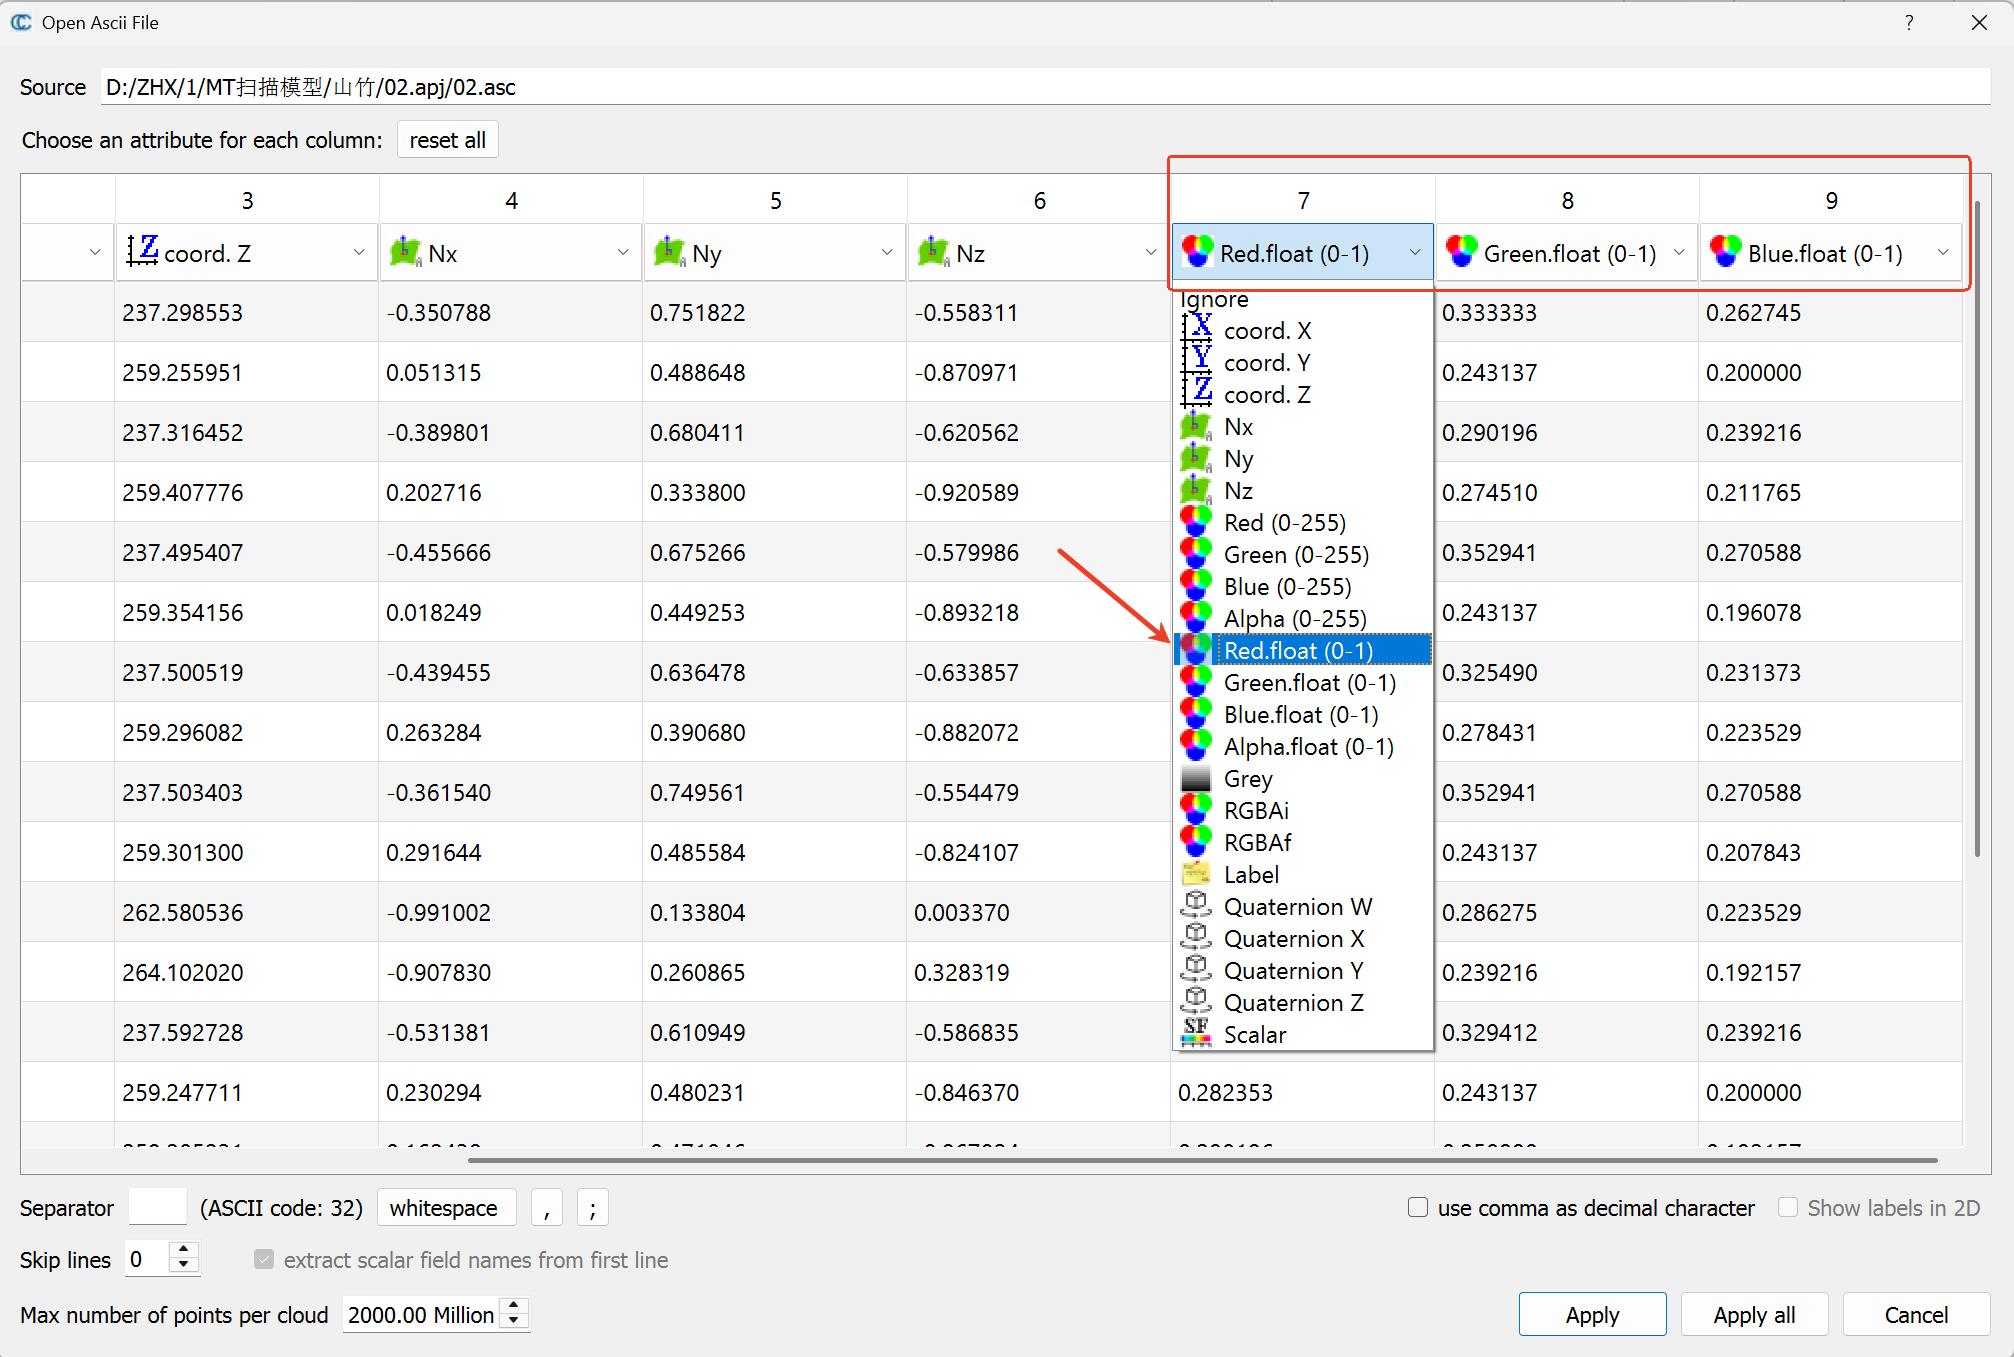
How to Import a Colored ASC Point Cloud into CloudCompare:
-Open CloudCompare and import your ASC file by either dragging it in or going to 【File】> 【Open】.
-In the pop-up “ASCII file import” dialog, you need to manually assign the color channels.
-Set columns 7, 8, and 9 as follows:
Column 7 → Red (float 0-1)
Column 8 → Green (float 0-1)
Column 9 → Blue (float 0-1)
-Click 【OK】 or 【Apply】 to import the colored point cloud.
In the QUICKSURFACE software, how can I delete the excessive individual mesh data (floating-point data) with one click?
1. Select “Edit Scan Data”(Access the scan data editing module)
2. Click “Edit”(Identify floating/sub-mesh datasets)
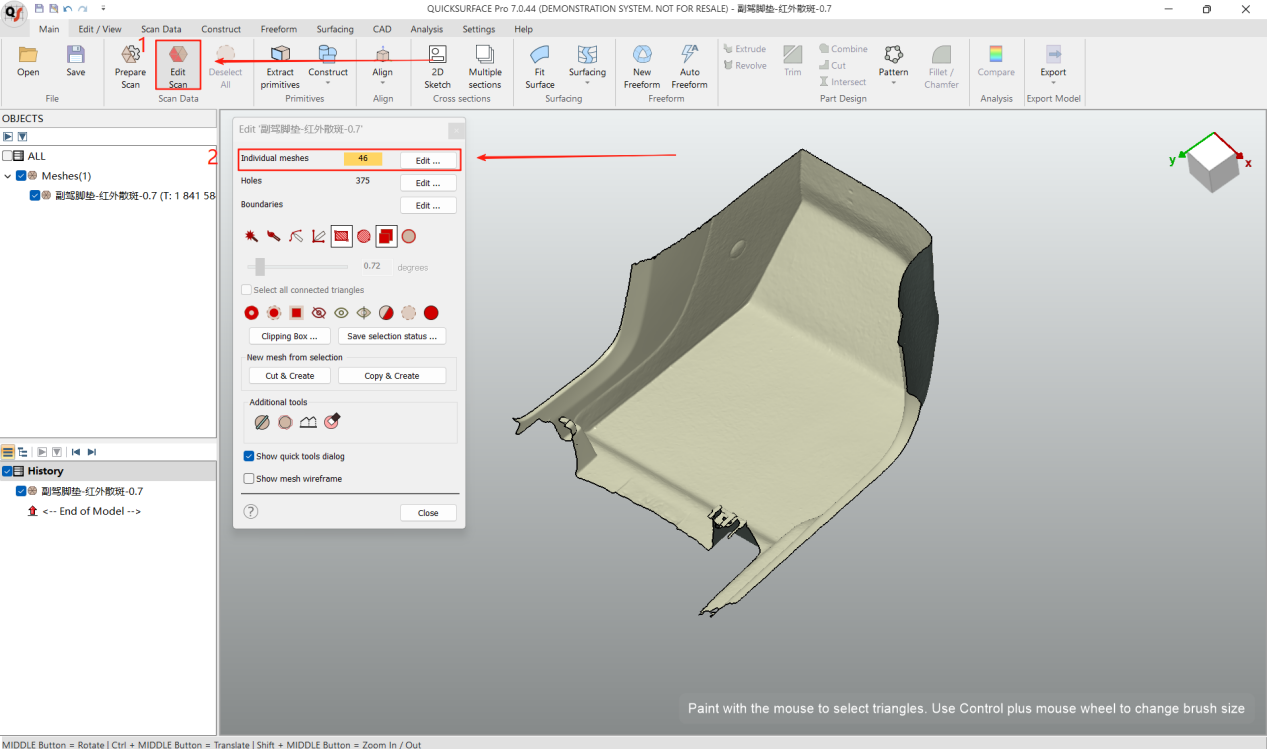
3. Select target primary mesh → Click the “①” button
Retain only the designated principal mesh
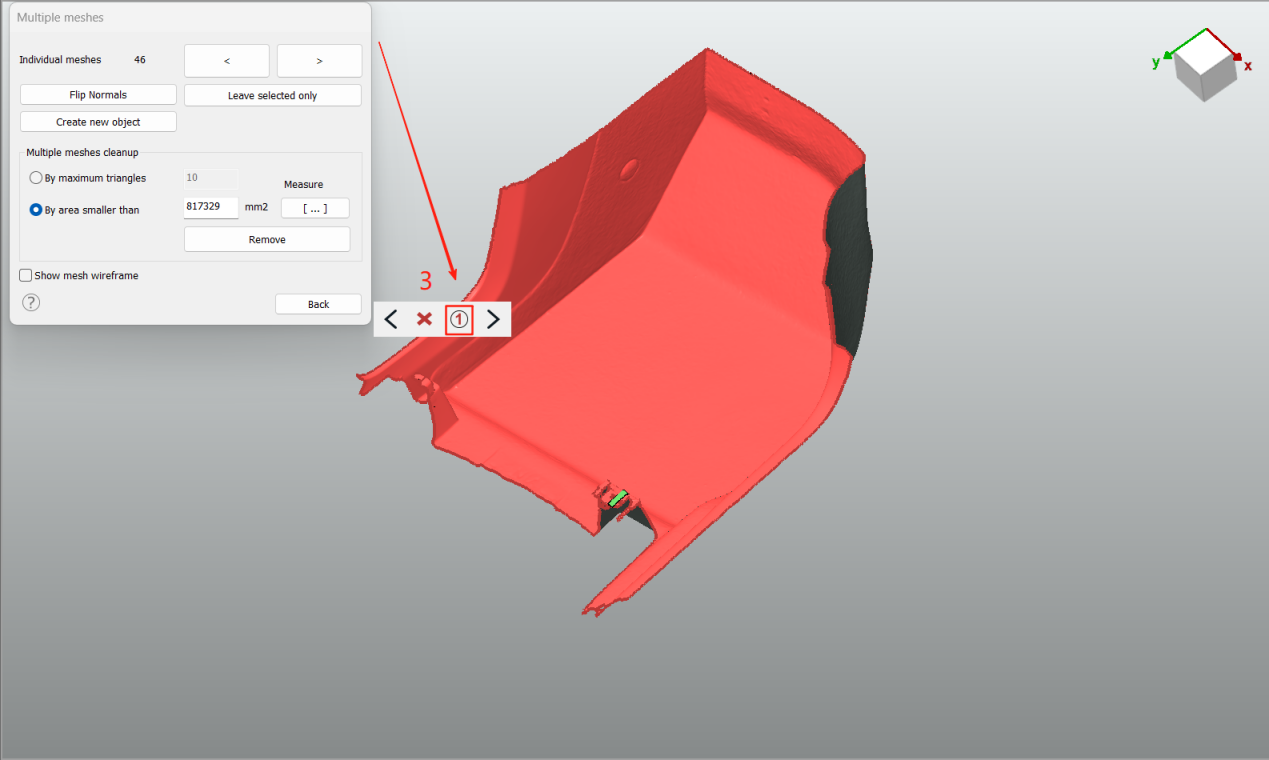
Result: Non-selected secondary mesh data will be permanently deleted.
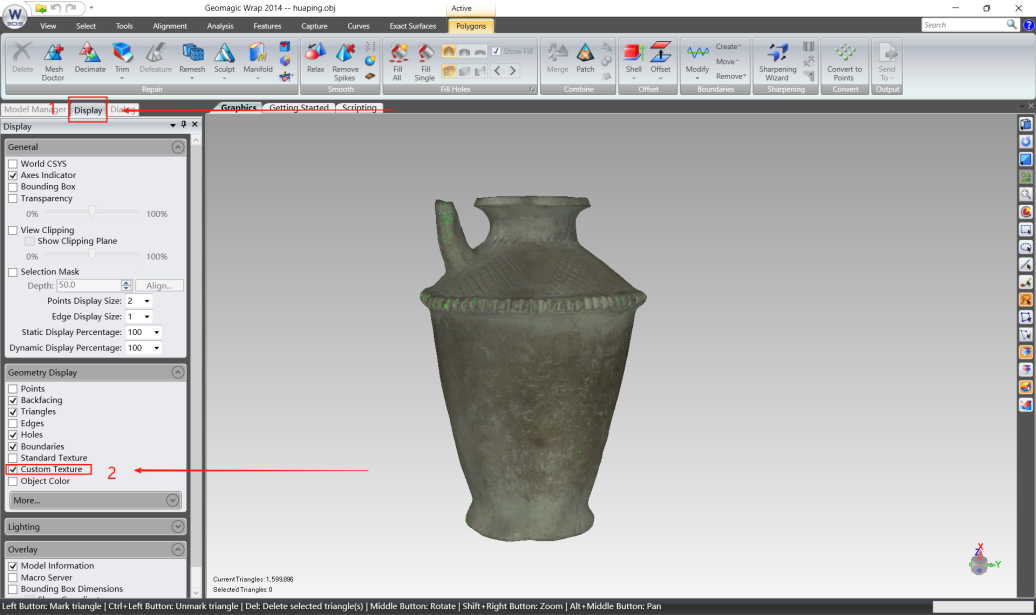
In Geomagic Wrap software, how can I view the white geometric model from textured OBJ data?
- Navigate to the “Display” interface in the left-side floating panel
- Uncheck the “Custom Textures” option