How can I use the “Manual Point Alignment” function in Absolute Orientation?
Aligning corresponding points: The grid needs to be in the same viewport as the photo image. Use the ALT key to zoom in on a local area. Select corresponding points with the left mouse button. Press the space bar to switch between the grid and the photo. When there are at least 6 pairs of corresponding points, click {Align} – corresponding points alignment.

When using 3DeVOK Mapping Software to fix textures, random UV split lines cause the areas that require Photoshop processing to not be fully displayed in the texture map. How can this be resolved?
You can repair one side of the UV split line first, then the other. After handling the UV boundaries, use the color blending function in Photoshop to create color transitions along the edges and eliminate seams. Alternatively, you can start with a full edit in Photoshop, and if issues persist, use Blender for additional touch-ups (please note: Blender’s texture editing tools only offer a stamping feature and may run with noticeable lag).
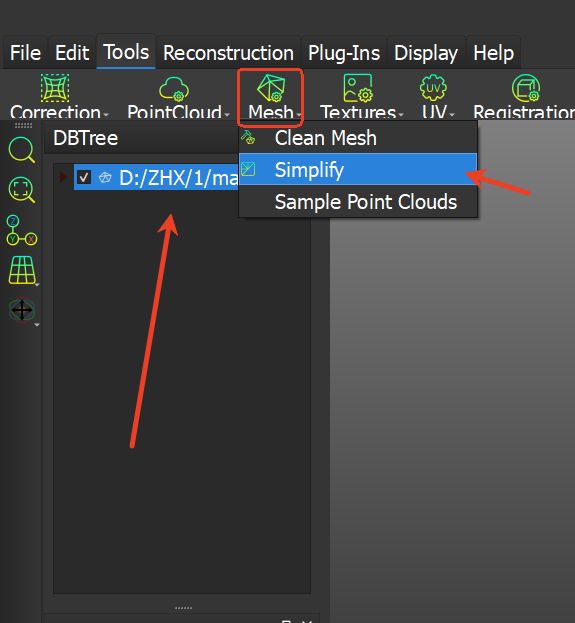
How to simplify a colored OBJ model in 3DeVOK Mapping Software?
– Import the model: Import the colored OBJ model into the software and select it in the interface.
– Start simplification: Click the “Mesh” menu in the toolbar and select the “Simplify” function.
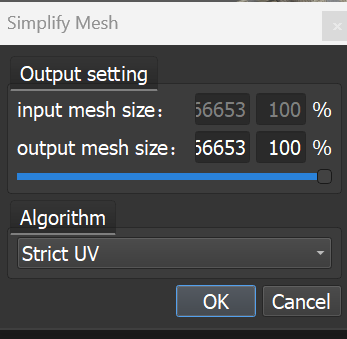
– Set parameters: Adjust the simplification ratio as needed, then confirm by clicking “OK.”
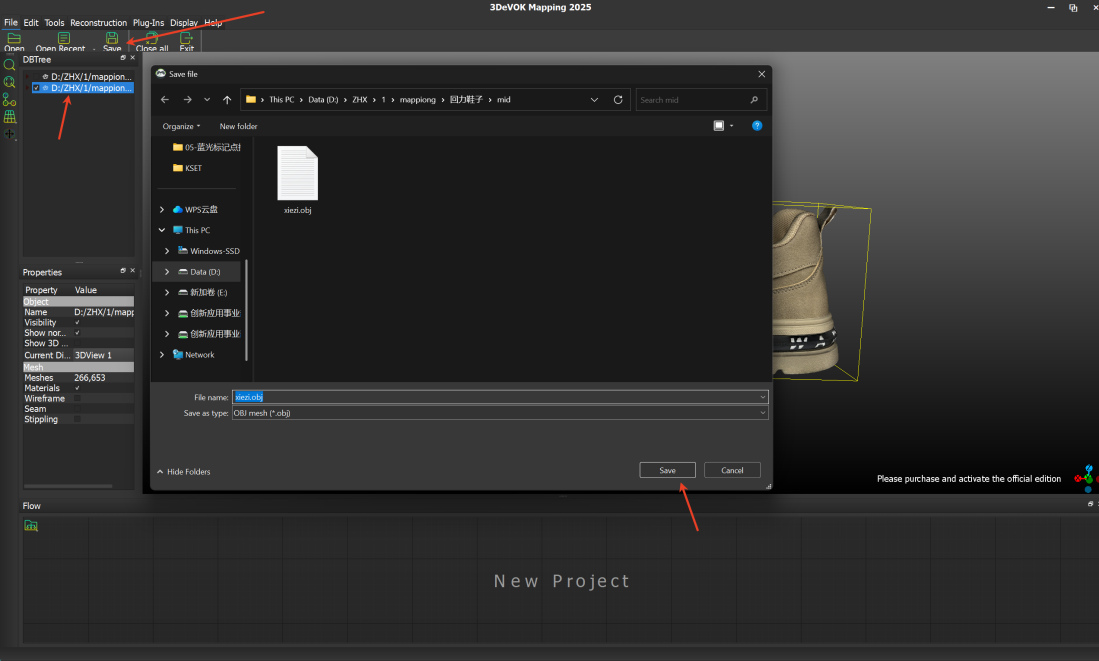
– Save the result: After simplification is complete, the system will automatically generate a new model data. Select this data and click “Save” to export the simplified colored OBJ file.


How to simplify a colored OBJ model in 3DeVOK Mapping Software?
– Import the model: Import the colored OBJ model into the software and select it in the interface.
– Start simplification: Click the “Mesh” menu in the toolbar and select the “Simplify” function.
– Set parameters: Adjust the simplification ratio as needed, then confirm by clicking “OK.”
– Save the result: After simplification is complete, the system will automatically generate a new model data. Select this data and click “Save” to export the simplified colored OBJ file.
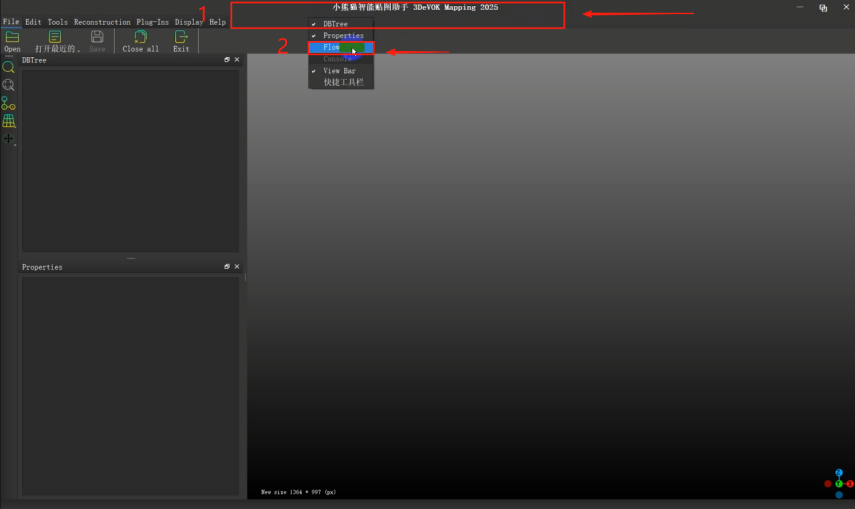
Solution for Recovering the “Workflow” Panel in 3DeVOK Mapping Software
Case 1: When the panel completely disappears from interface
▸ Right-click on the menu bar area (marked by red box)
▸ Select “Workflow” from the pop-up context menu
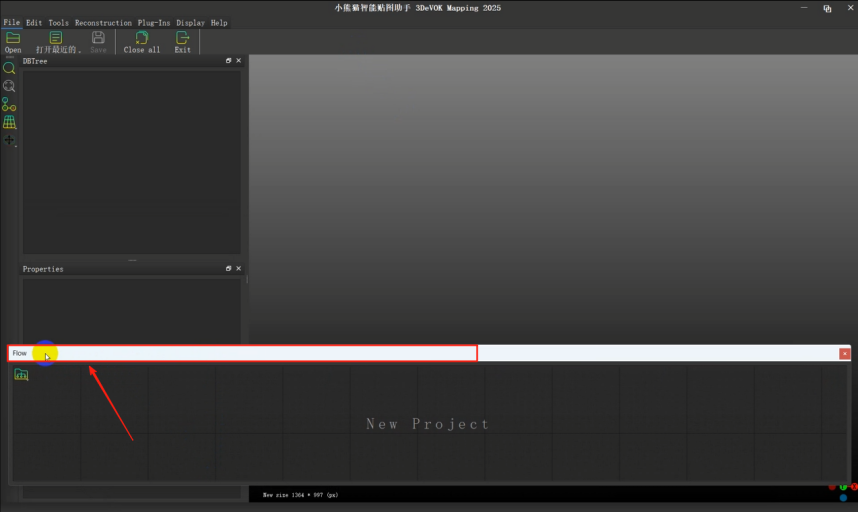
Case 2: When the panel floats as a detached window
▸ Double-left-click on the title bar of the floating “Workflow” panel (marked by red box)
How to Evaluate Data Quality in the Relative and Absolute Orientation Stages?
Relative Orientation Stage
- Camera Spatial Pose Check
– For circular shooting, the spatial distribution of cameras should form a circle.
- Sparse Point Cloud Check:
– Sparse point clouds should show no obvious misalignment.
– For objects with fewer surface features, dense reconstruction can help assess the point cloud quality.
After confirming that the relative orientation results are accurate:
– Proceed to absolute orientation and align individual photos to refine the global alignment.
– After completing register, return to the absolute orientation stage to randomly check the camera alignment. If there are no issues, you can proceed to the texturing stage.
Absolute Orientation Stage
- Photo Alignment Check:
– If most photos are correctly aligned but a few are not, it may indicate issues with the relative orientation results.
- Overall Alignment Check:
– If all photos fail to align, it likely indicates errors in absolute orientation.
– For objects with fewer surface features, consider using point cloud and model matching to achieve absolute orientation.
By following these steps, you can systematically ensure the quality of your data.
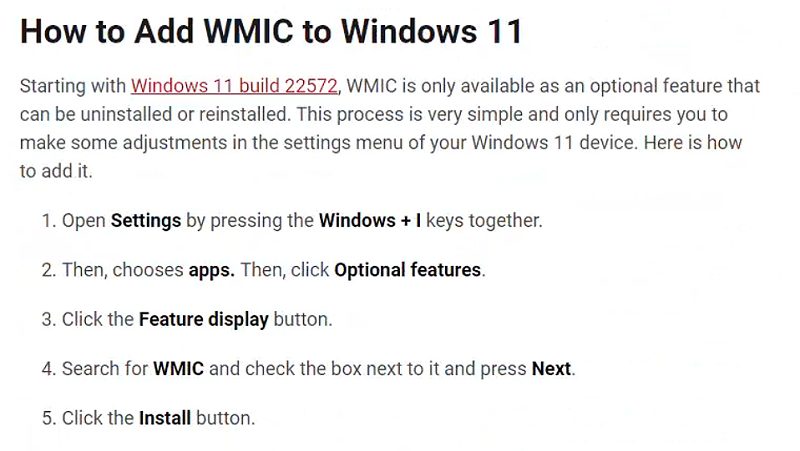
After installing the 3DeVOK Mapping Software, the software shows a “Machine Not Compatible” error when launched. How to resolve this issue?
This issue is caused by the absence of the Microsoft WMIC tool. Please follow instructions in the photo and reinstall the Microsoft WMIC tool and try launching the software again.
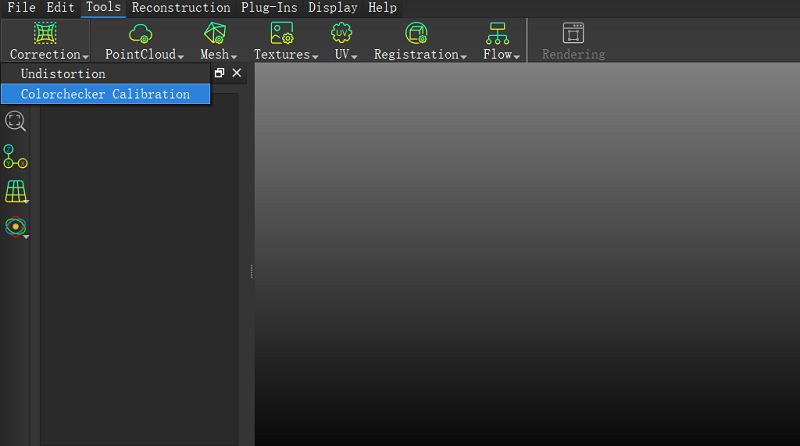
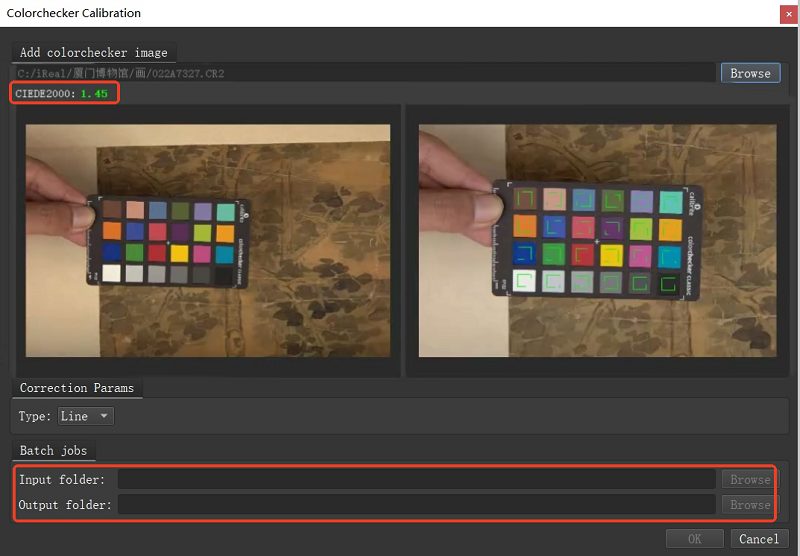
How to use the ColorChecker Calibration function in the 3DeVOK Mapping Software?
- Click on the Calibration module in the Tool and select ColorChecker Calibration.(Supports automatic detection of 24-color swatches, recommended: XRiteColorChecker Classic)
- Click Browse to import a model photo with a colorchecker (For optimal correction, utilize RAW and CR2 formats; CIEDE2000 value below 2.5 signifies precise color calibration.).
- Browse the input folder to import the pre-calibration photos and the output folderto save the post-calibration photos.
- Click OK to complete the calibration.
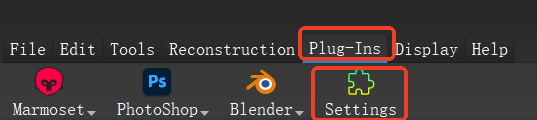
How to set the plugin path?
Open the 3DeVOK Mapping Software, and find “Plug-ins” in the menu bar, Click on “Settings” , which will open a window to set the plugin path.
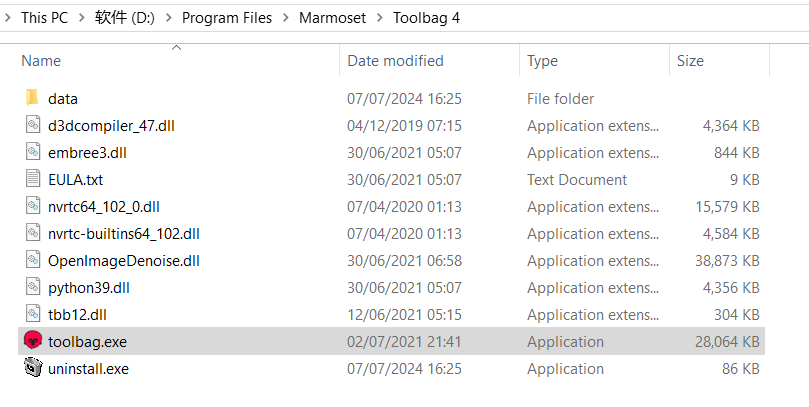
Click “Open” and locate the plugin application .exe file. (If you can’t find the installation location, right-click the software on your desktop, and select “Open file location” to check the installation path.)
Click “OK” to complete the plugin path setting.

After opening the project file, the mesh data node shows that the path does not exist?
Please open the directory where the project file is located, find the Mesh folder, and check if there is any obj file inside. If the obj files exist, please ensure that the project directory name and the obj file names are consistent. If they are not, please modify them to be consistent.
After reinstalling the computer’s operating system, do I need to reapply for authorization for the 3DeVOK Mapping Software?
No, you do not need to reapply for authorization. The ID is bound to the hardware.
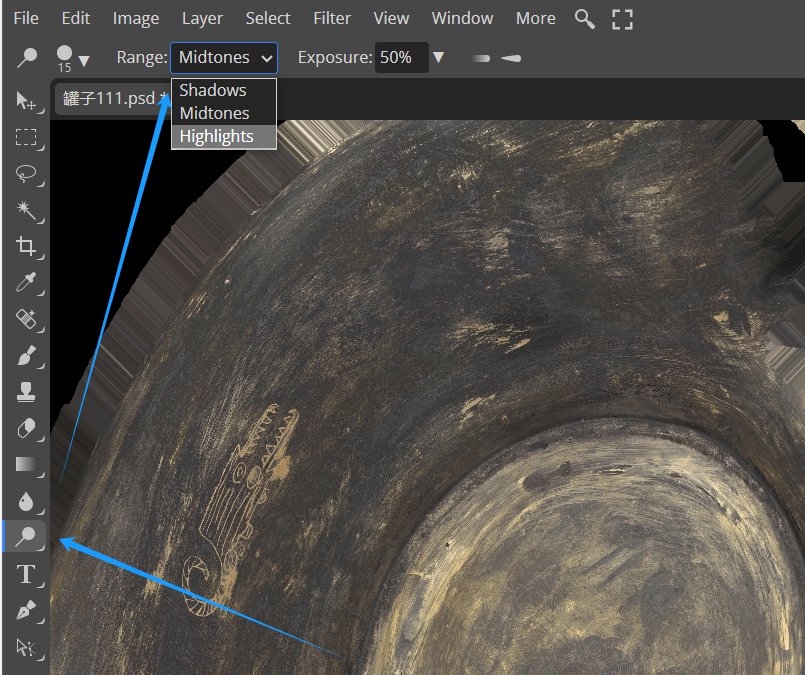
Due to inconsistent photo brightness, the model texture has lighting issues. How can this be resolved?
First, ensure the texture is clear. Then, use the Burn Tool in Photoshop to adjust the brighter areas and the Dodge Tool to adjust the darker areas. Customize the tool settings in the options bar (such as “Brush Size,” “Range,” and “Exposure”) to achieve the desired effect.