How Accurate is the iReal 2E 3D Scanner?

09/27/22

iReal 2E, a professional-grade handheld 3D scanner, has four alignment modes: feature alignment, texture alignment, mixed alignment and marker alignment. Users can choose the most suitable mode according to different situations.

Since the first three alignment modes mainly rely on geometric/texture features to finish the splicing, the alignment accuracy will depend on the richness of the surface features, scanning technique, and scanning path.

For example, in the case of scanning items of the same length with the same geometric features, one is a flat engraving (the scanning path cannot form a closed loop) and the other is a three-dimensional engraving (the scanning path can form a closed loop), the accuracy of the geometric feature splicing is about 1 mm/m and 0.3 mm/m respectively.

Given the first three alignment modes, all have strong uncertainty in terms of accuracy and consistency, therefore, when encountering situations with high accuracy requirements (such as reverse engineering design), it is often necessary to use the marker alignment mode (relying on a certain number of marker points pasted on/around the surface of the scanned object to perform data splicing), which can ensure that the alignment accuracy is stable within 0.3 mm/m.

Here we verify the accuracy of our handheld structured light scanner – iReal 2E under the marker alignment mode by testing the following four application scenarios.

Test 1: Standard Length Part Calibration

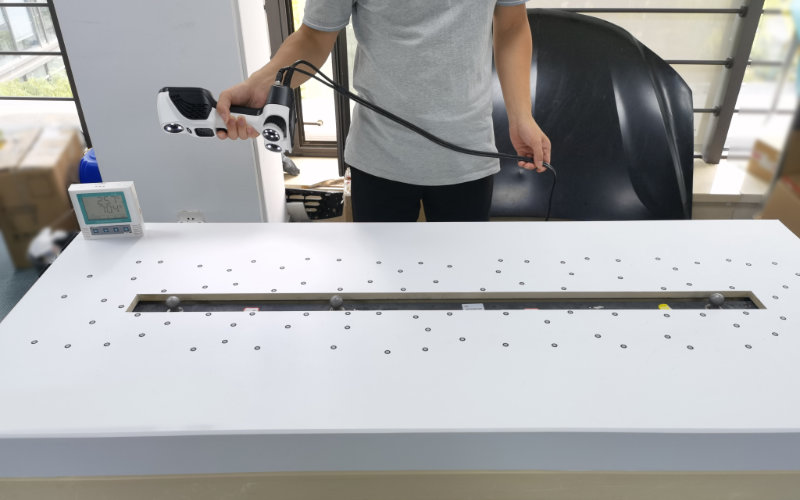
Under the marker alignment mode, scan the standard length part, and the deviation of the spherical center distance between the acquired spheres from the standard value is the splicing error value (accuracy value). This is a more general way to test length accuracy for 3D scanners.

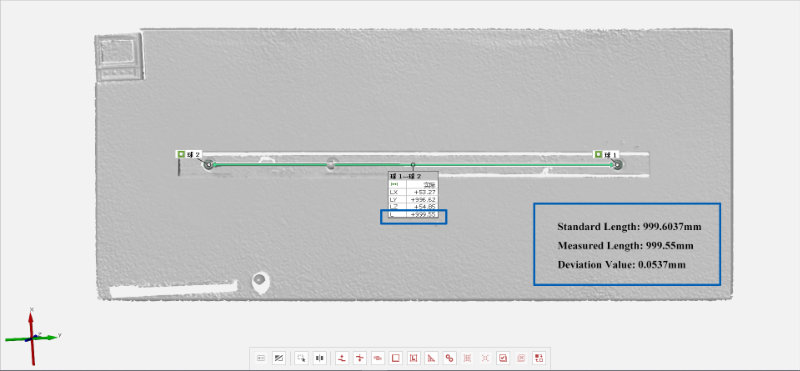
As shown in the figure below, when scanning this 999.6037 mm part, the 3D data of two standard spheres were obtained by iReal 2E scanning, and then the spherical centers of the two spheres were fitted by GOM Inspect 3D inspection software, which in turn calculated the two spherical center distance to be 999.55 mm with a deviation value of 0.0537 mm.

ireal 2e 3d scanner
standard length measurement

In addition, we also tested two other groups of different lengths of ball bat, after a non-sufficient accuracy test (the same equipment, stitched together with marker points for 6 groups of tests), with the following deviation values (see the test report for details).

  • 799.766 mm bat test results.
  • -0.11 mm ± 0.038 mm (min -0.072 mm, max -0.148 mm)
  • Test results for a bat of 529.901 mm.
  • -0.09 mm±0.024 mm (min: -0.066 mm, max -0.114 mm)

Notes:

1. The above test data are only the test results of a single device.

2. iReal 2E can not follow the standard of an industrial-grade 3D scanner due to its cost limitation, its raw material standard, manufacturing standard, and calibration standard, so its accuracy consistency can not be compared with the industrial-grade 3D scanner.

3. If there are strict accuracy requirements (such as scanning mechanical parts to do testing), it is recommended to purchase the industrial-grade handheld laser 3D scanner from Scantech.

Test 2: 3D scanning of sheet metal parts

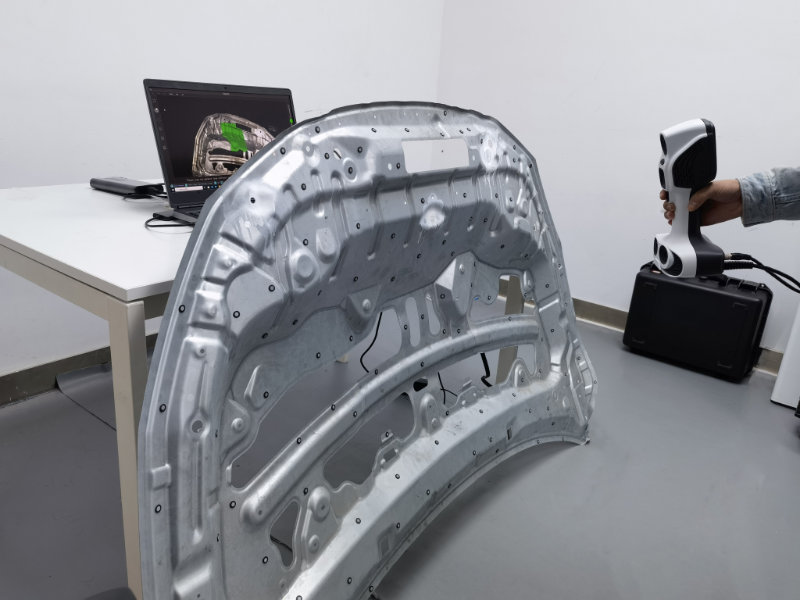
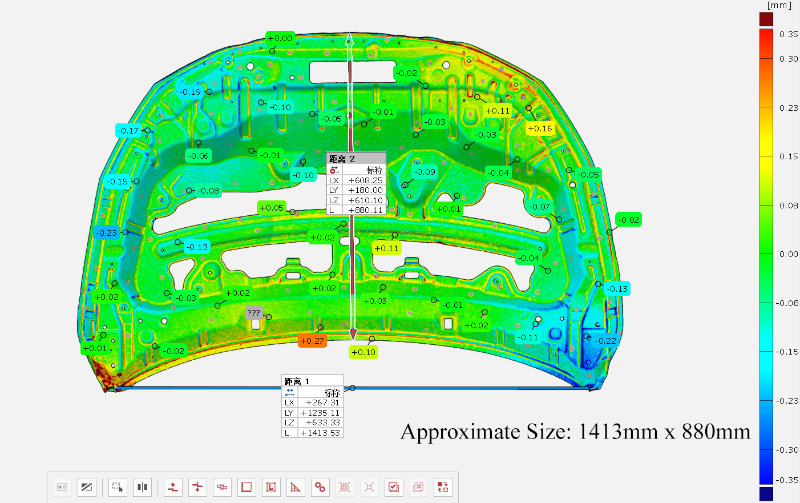
By comparing the iReal 2E 3D scan data with the KSCAN-Magic laser 3D scanner, the size of the sheet metal part (single side) is about 1440 x 880 mm, and the test result: the deviation is within 0.3 mm.

3d scan stamping part
3d data of stamping part

There is another scanning test we did on iReal 2E handheld 3D scanner and SIMSCAN 3D laser scanner, which is about 3D scanning deep holes.

Test 3: Small Item Scanning Test

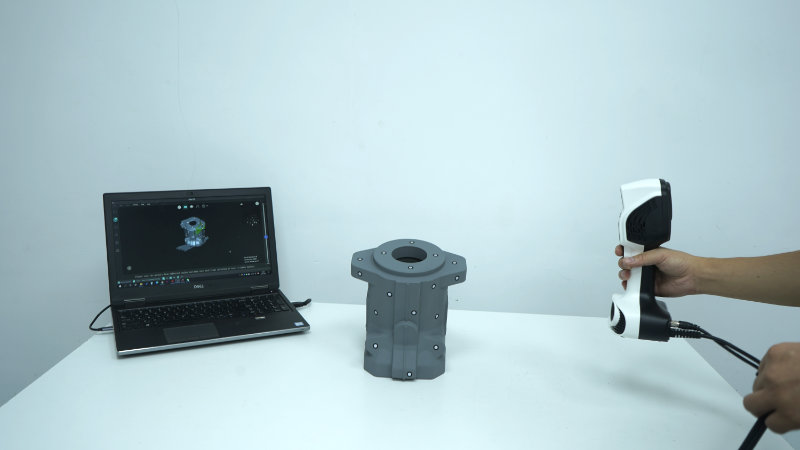
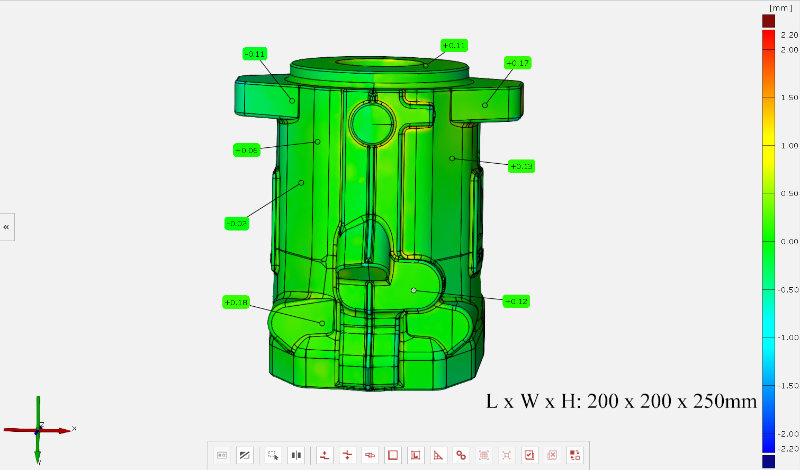
See the figures below. By comparing the iReal 3D scan data with the production drawing, the dimensional deviation of the entire industrial model (L x W x H: 200 x 200 x 250 mm) is basically within 0.2 mm.

3d scan industrial part
3d data of industrial part

Test 4: 3D scanning of car body

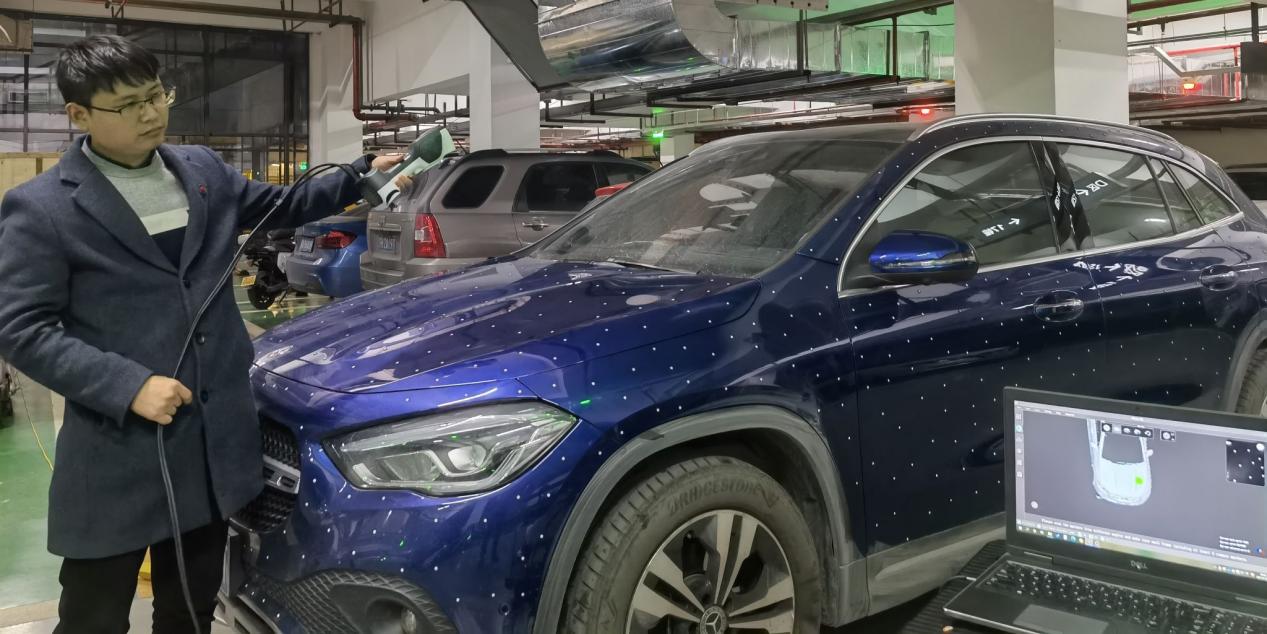
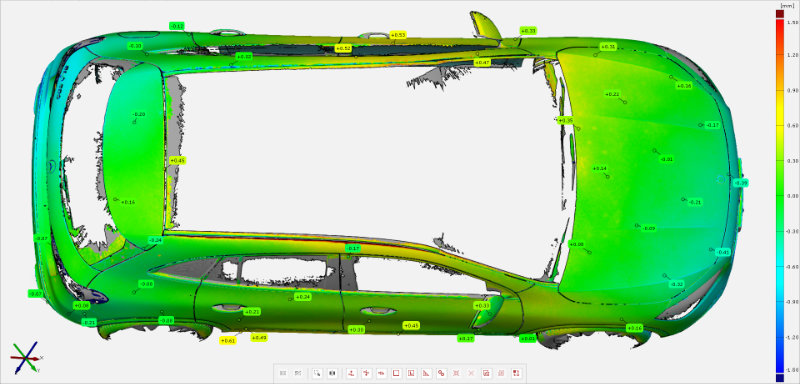
We conducted a 3D scanning test on a 4.3 m long and 1.7 m wide Mercedes-Benz car. A total of 2 staff members were involved in this test to collect the complete 3D data of the body.

  • Resolution: 1.0 mm
  • Preparation: 15 minutes to paste marker points, about 1000 marker points needed
  • Scanning time: about 20 minutes (the finer the scan data, the more complete the data requirements, the longer the scanning time)
  • Post-processing time: about 15 minutes
3D scanning of car body

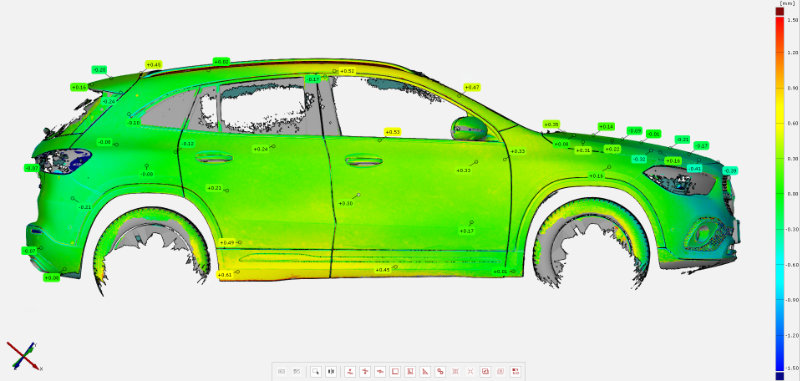
Result: Overall accuracy deviation within ±1 mm (12 m circumference)

3d model of vehicle
3d data of vehicle

iReal 2E stitching accuracy test summary

iReal 2E is an entry-level professional 3D scanner with infrared scattering structured array light technology. This type of structured light 3D scanner software is different from the laser scanners of Scantech in terms of hardware composition and technical principles. For example, the KSCAN-Magic scans standard object measurements up to 0.02 mm + 0.015 mm/m, while the iReal 2E is 0.3 mm/m.

Industrial-grade accuracy tests typically enforce strict standard limits, such as ambient temperature, humidity, and test criteria. However, Scantech iReal 2E color 3D scanner is generally used in non-industrial applications, such as artistic design, portrait scanning, and some industrial reverse design with low accuracy requirements such as cast products. Therefore, the above-mentioned tests are not performed under strict constraints.

The accuracy of iReal 2E when scanning based on the texture/geometric features is not clearly illustrated by values as it can be affected by feature richness, scanning skill, and scan path. The scanning accuracy of the iReal 2E we mentioned is based on the reference in marker alignment mode.

Compared to the iReal 2E from Scantech, the industrial-grade laser 3D scanner offers faster-scanning speed, higher accuracy (up to 0.02+0.015 mm/m), better data quality, better material adaptability (meaning it does a better job with strongly reflective and darker objects), and more complete 3D data.

In summary, you should fully understand the alignment accuracy of iReal 2E in different modes and evaluate if it can meet your scanning needs according to your needs and budget, since the 3DeVOK scanner price is relatively cheaper than 3D laser scanners. If you have very strict requirements for accuracy, we recommend you purchase a 3D laser scanner from Scantech.