Technical Solution for 3D Scanning of the Human Torso | Applications of High-Precision 3D Scanning in Medicine and Ergonomics
03/25/26
High-fidelity, quantifiable 3D data of the human torso is the core digital foundation for precise assessment and personalized design. This is particularly critical in the fields of personalized medicine, digital ergonomics, and rehabilitation aid development. A standardized 3D scanning process efficiently converts complex human torso morphology into high-precision STL 3D models for a wide range of downstream applications, including:
- Posture Analysis and Spinal Assessment
- Custom Orthotic Brace Design
- Rehabilitation Aid Modeling
- Ergonomic Product Development
- Medical-Grade 3D Printing
This article will demonstrate how to quickly and accurately capture complete 3D data of the human torso using the 3DeVOK MT professional-grade 3D scanner.
Pre-Scan Preparation: Key Steps to Ensure Accuracy of Human 3D Data
Environment and Equipment Preparation:
①Ensure the scanning environment is clean, tidy, and free of clutter.
②Lighting should be even and soft.
③The 3D scanner must be powered on and preheated for at least 15 minutes, and calibration should be completed.
④Reserve a circular operating space with a radius of no less than 1 meter.
Subject Preparation and Posture Guidelines:
Clothing Requirements
The subject must either wear tight-fitting, matte, solid-colored cotton clothing (such as a tight vest) or be bare-chested for the upper torso scan. Avoid shiny, silky, or patterned clothing, as this can affect data accuracy.
Posture Control
Guide the subject to adopt a natural standing posture, relaxed but stable. Use a posture support frame (if available) to help them maintain a stable stance. The subject should remain still and avoid deep breathing during the entire scanning process. Minor body sway is a primary cause of layer misalignment in the point cloud.
 Figure 1: Reference for subject’s clothing requirements and standing posture
Standard Scanning Posture Selection: Analysis of T-Pose and A-Pose Application Scenarios
To accommodate different application scenarios and data requirements, we primarily use the following two validated standard postures. They optimally balance data quality, operational efficiency, and subject comfort.
①T-Pose: The subject stands naturally with feet together or slightly apart, and arms extended horizontally and straight out from the sides, forming a “T” shape. In this posture, the underarms and lateral torso are fully exposed. The scanning path is the shortest, making it suitable for medical-grade posture analysis and high-precision orthotic modeling.
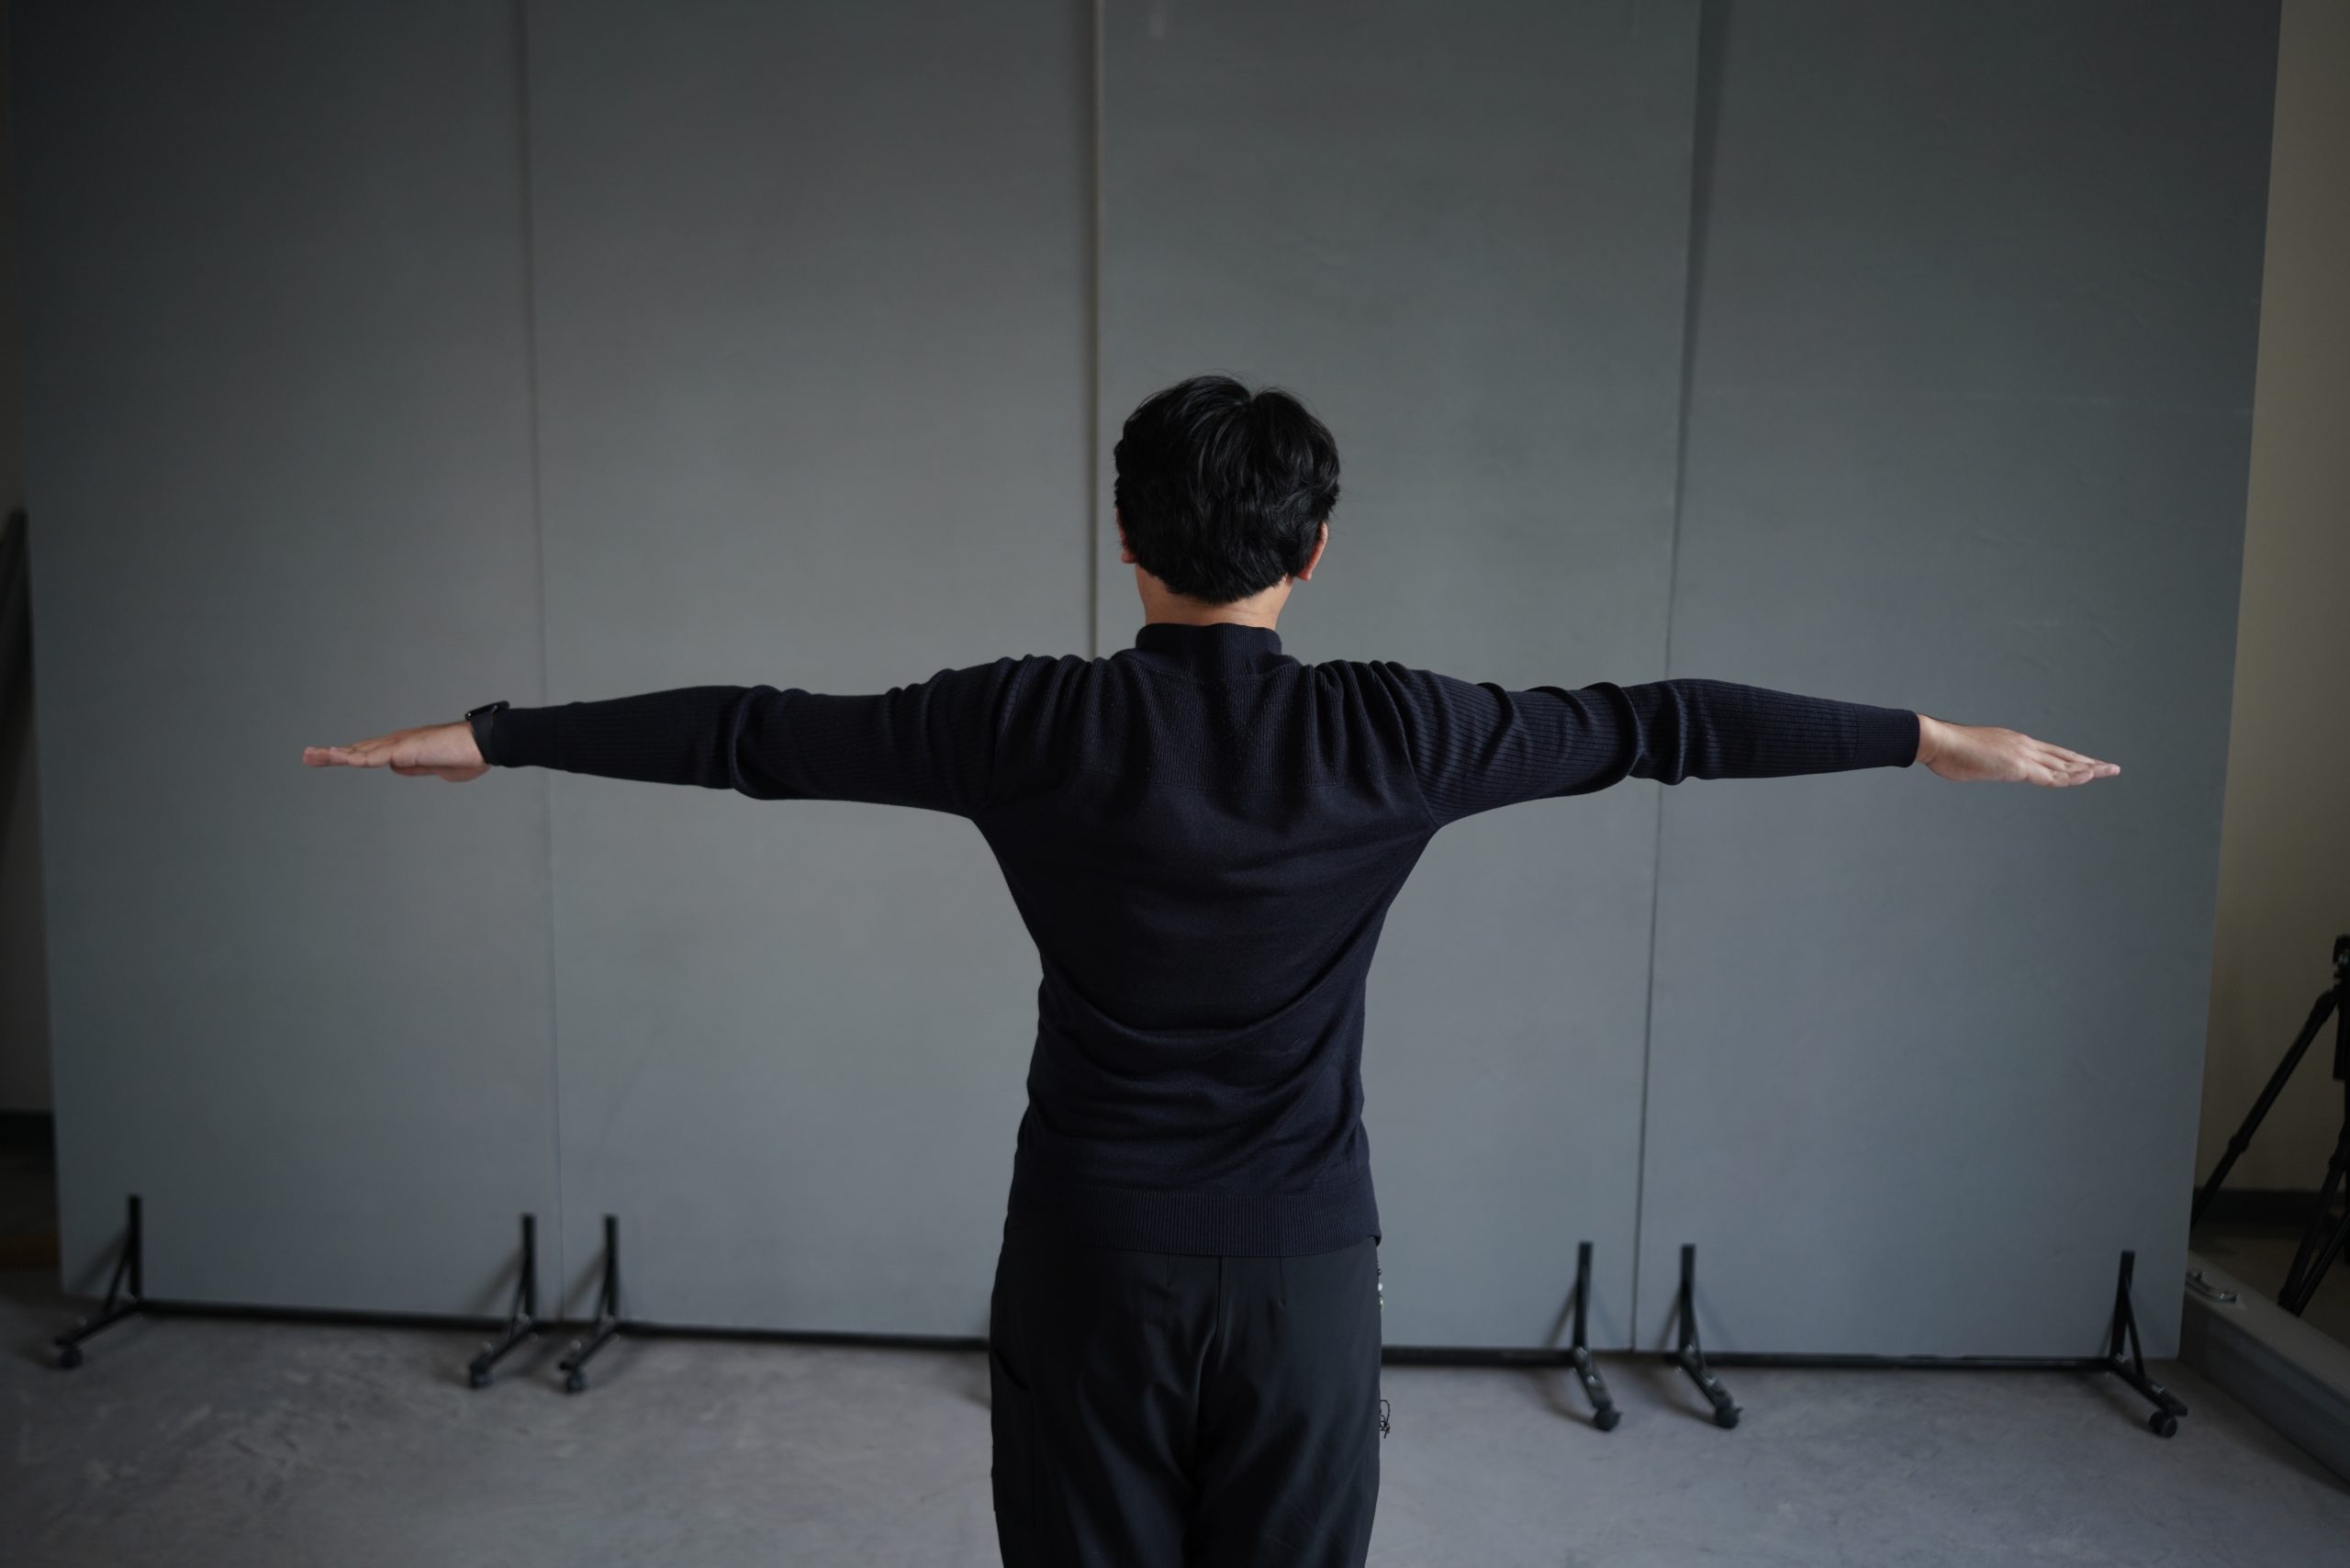 Figure 2: “T-pose” standing posture
②A-Pose: The subject stands naturally with feet together or slightly apart, and arms hanging down naturally, forming an angle of approximately 10-30 degrees with the torso, creating an “A” shape. This posture is more space-efficient and comfortable than the T-Pose, making it suitable for scenarios requiring longer scan times.
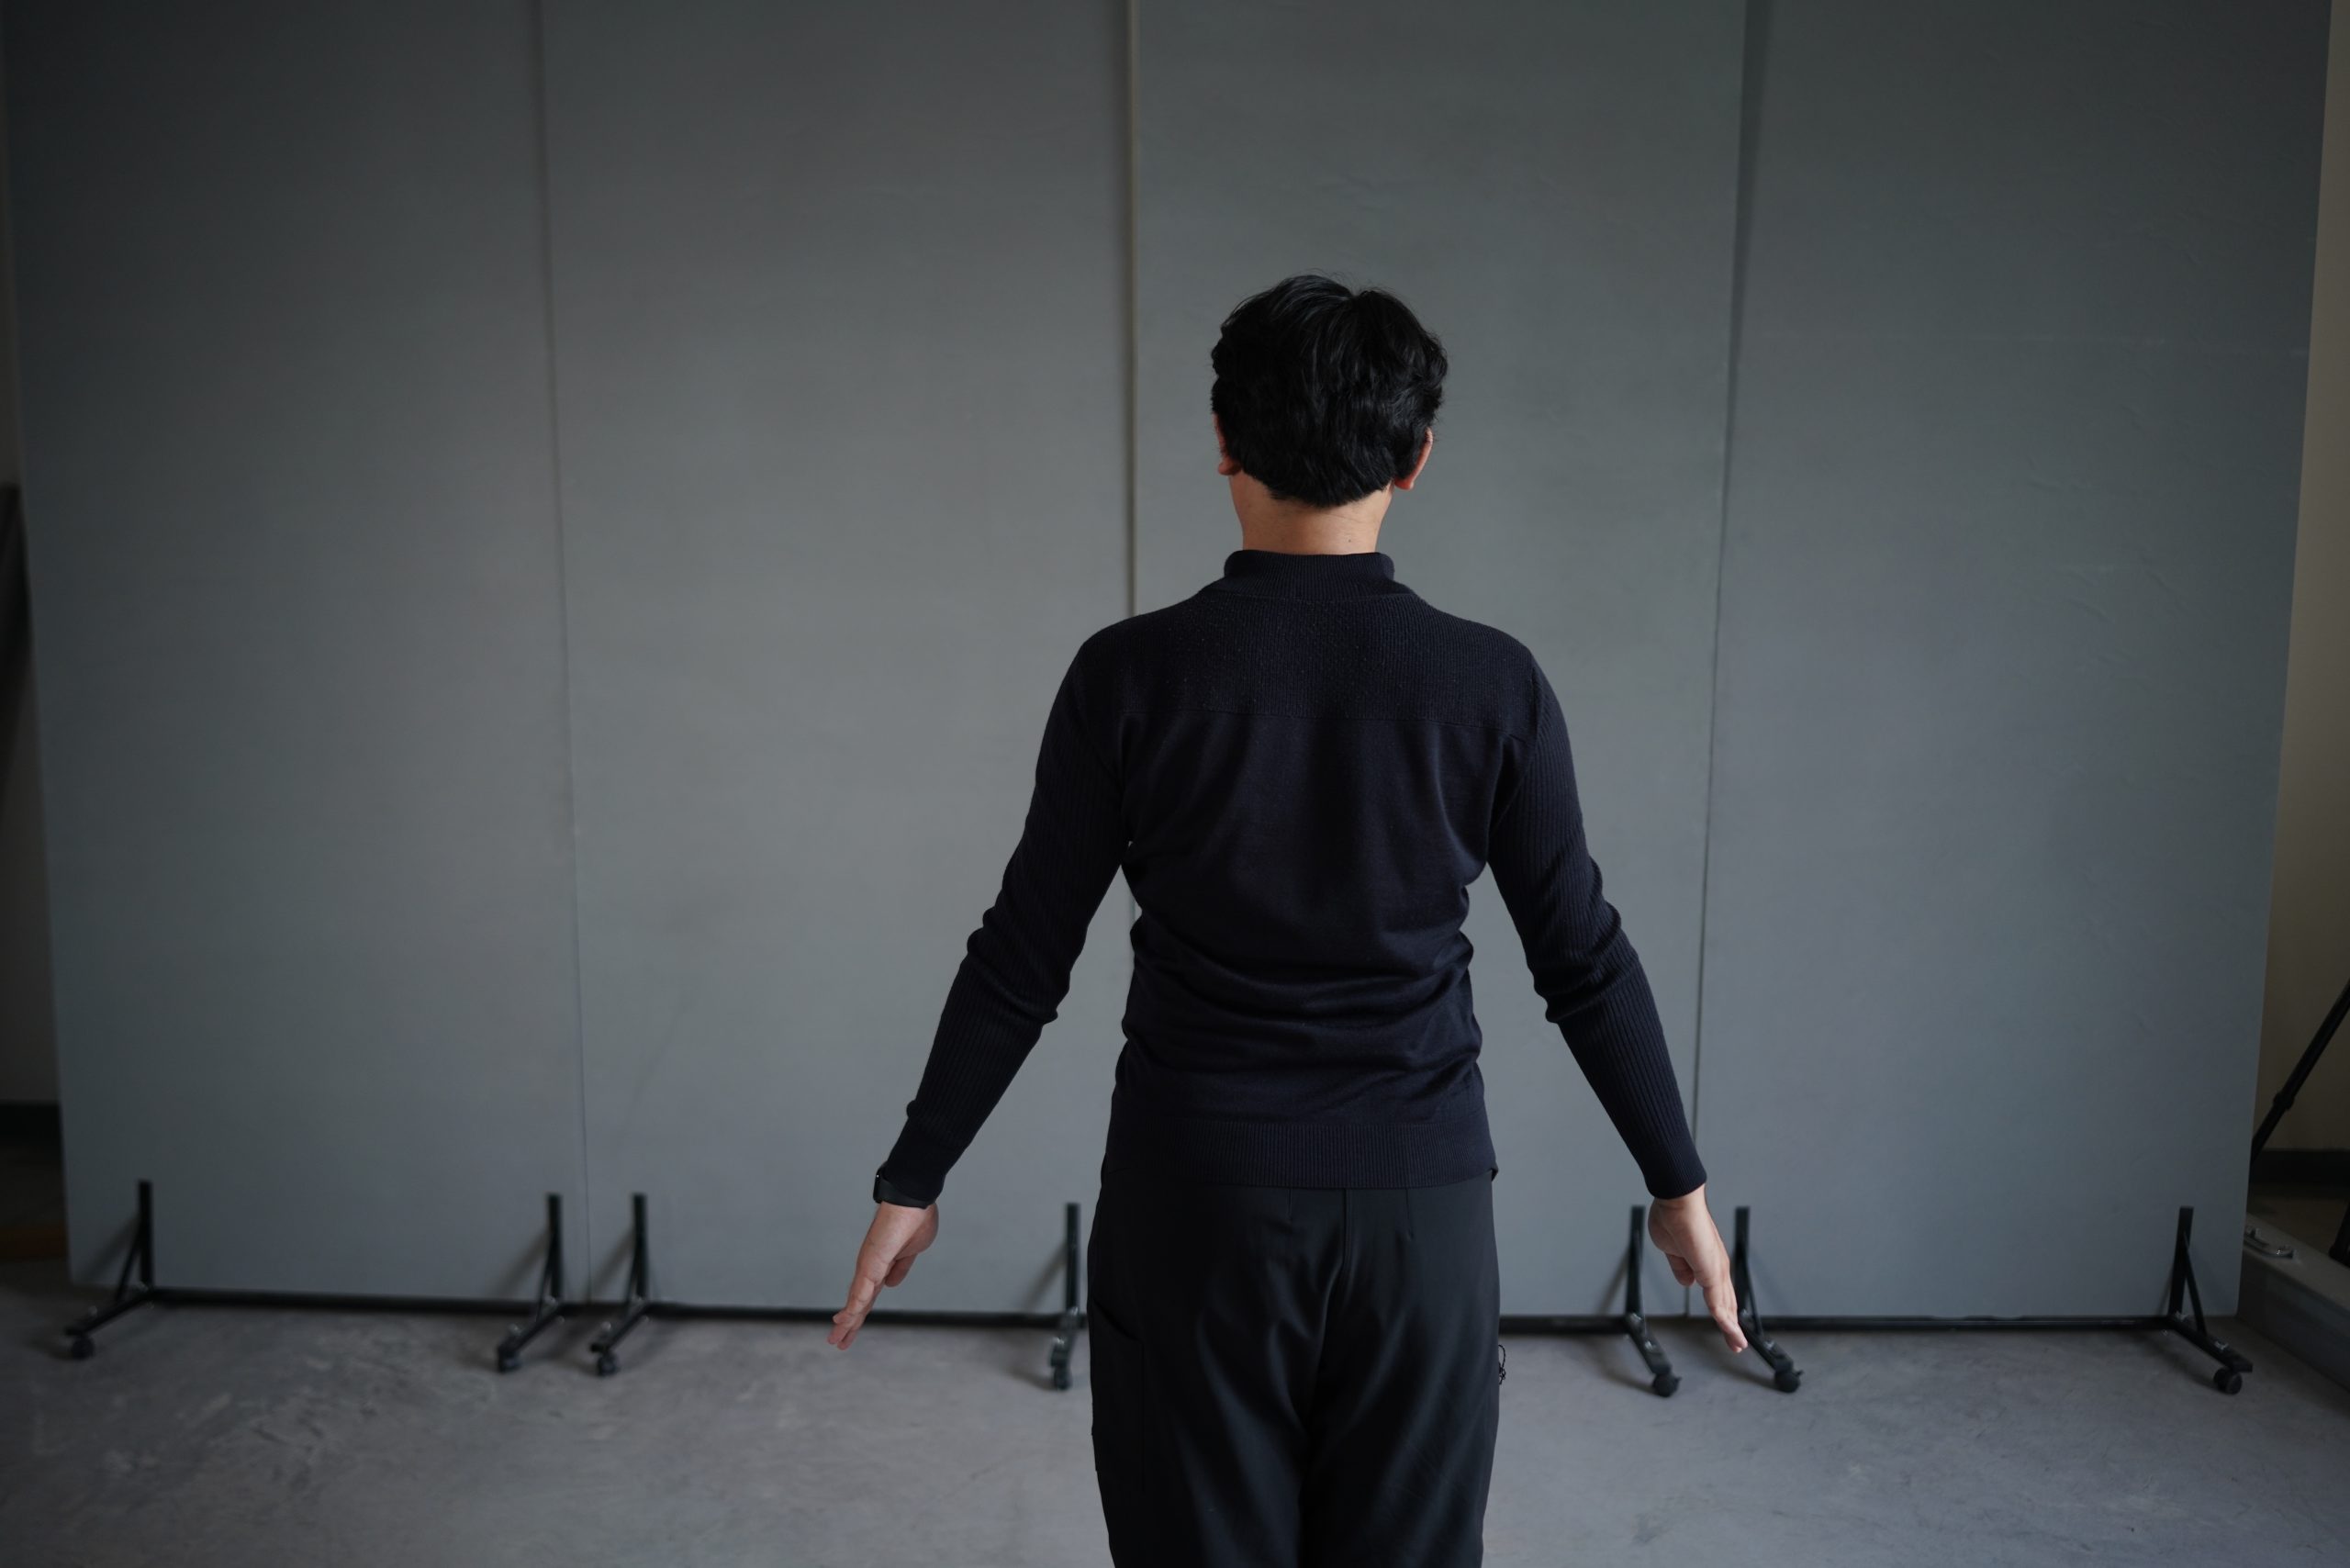 Figure 3: “A-pose” standing posture
Based on the subject’s physical condition and tolerance, different scanning postures can be flexibly chosen to efficiently complete data acquisition while prioritizing their comfort.
Human Torso 3D Scanning Operation Workflow
The essence of 3D scanning is to continuously capture frame data with high overlap, enabling automatic alignment using geometric features. Therefore, the sole objective of the operation is to provide a continuous, stable, and feature-rich image stream for the alignment algorithm. Any interruption, overly rapid movement, or feature deficiency can lead to alignment failure.
Step 1: Scanning Path Planning
If using T-Pose: Adopt a horizontal closed-loop path. With arms raised, the underarms and lateral torso are fully exposed. Start scanning from the front of the torso, transition smoothly from the side directly to the back, and return to the front on the opposite side to finish. This path is the shortest and most direct.
If using A-Pose: Adopt a closed-loop path that transitions over the shoulder joints. Naturally hanging arms will obscure the underarms and part of the lateral waist. Attempting to go from front to back by circling around the arms would cause occlusion. Additionally, arms and limb extremities are more prone to slight movement during scanning, affecting data stability. Routing the scan around the feature-rich outer shoulder joint area ensures alignment continuity.
Step 2: Data Acquisition Guidance
Setup: Open the 3DeVOK Studio scanning software. Click the ‘+’ icon to enter Scan Mode Management. Select the “Torso (No Color)” and activate the button corresponding to this mode.
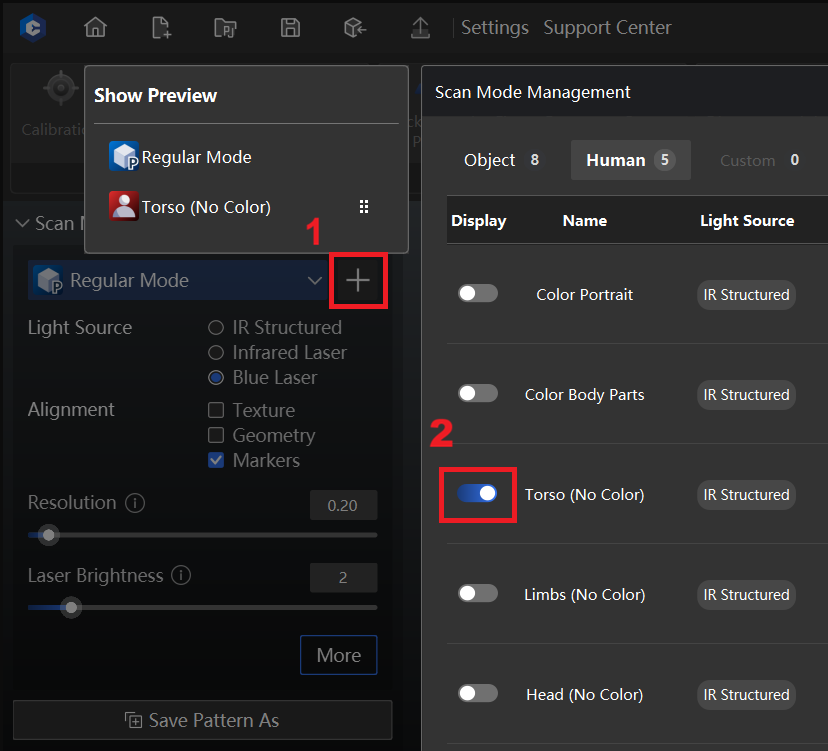 Figure 4: Scan Mode Management
Exit Scan Mode Management. From the drop-down menu, select “Torso (No Color)”.

Figure 5: Torso (No Color) scan mode selection
Starting Position: Stand directly in front of the subject. Aim the scanner at the center of the sternum. Adjust the scanning distance to approximately 400mm.
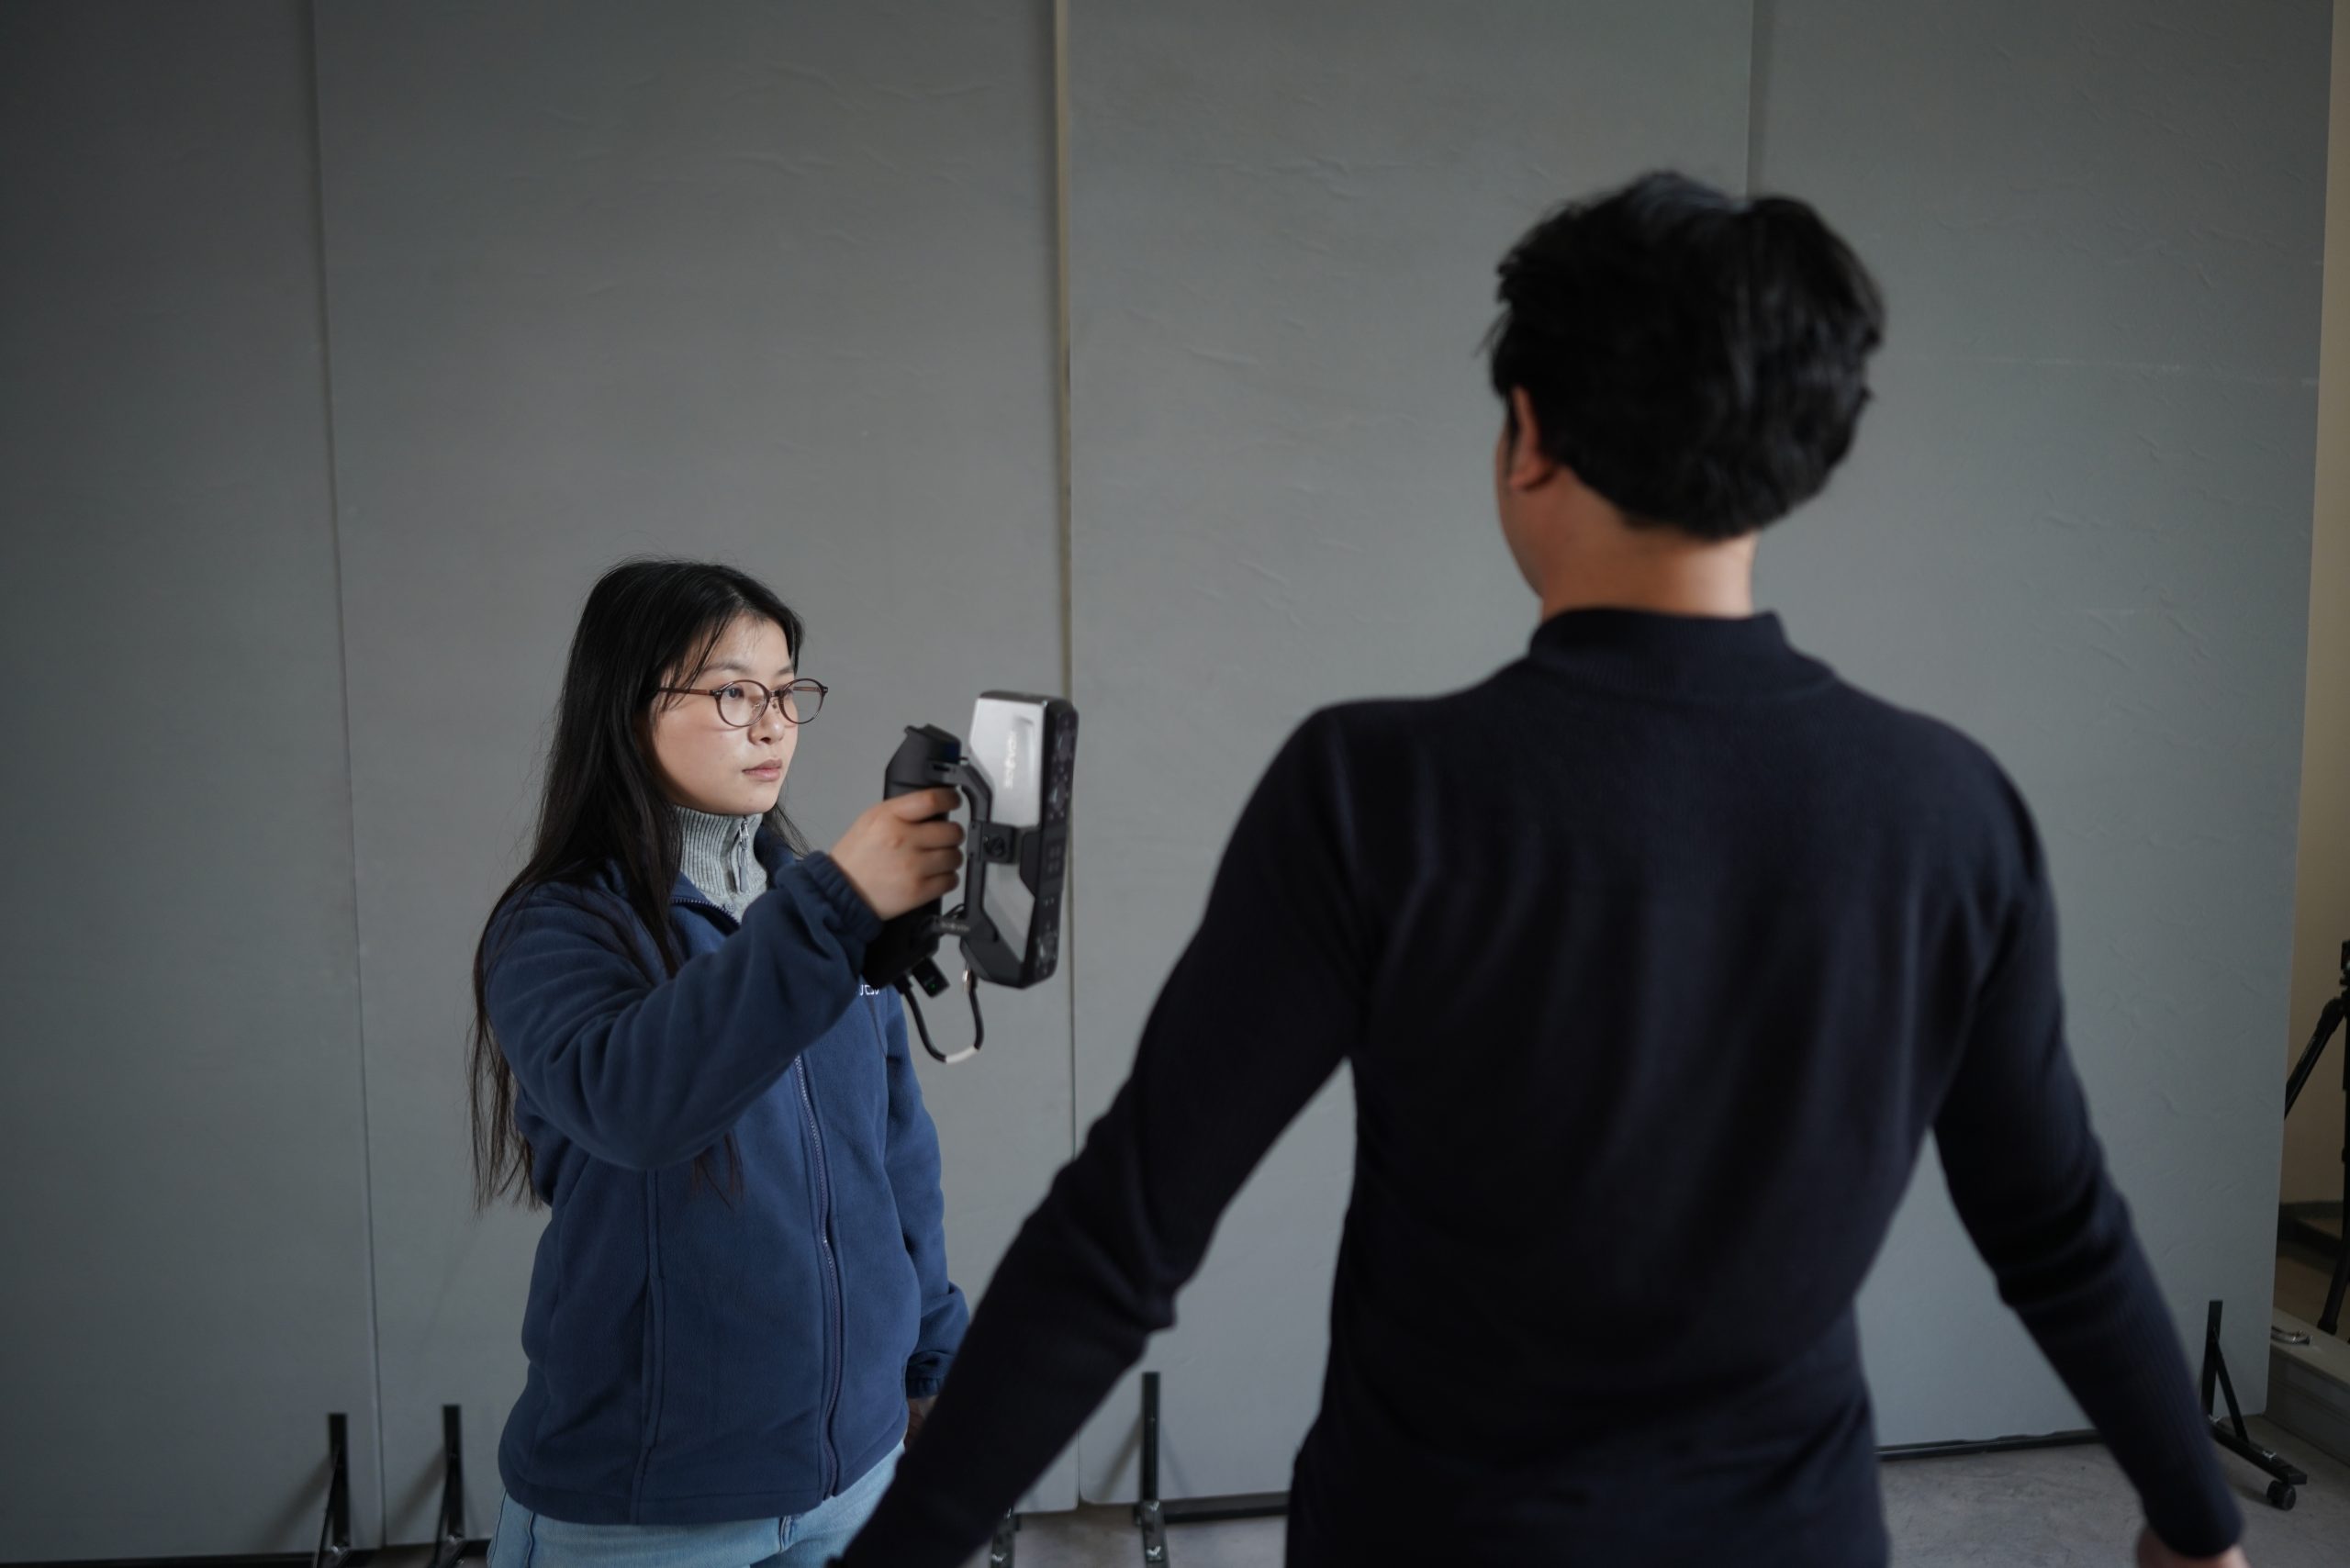 Figure 6: Reference for scanning starting position
Scanning Process: Tap the scanner’s touchscreen to begin scanning. Move smoothly at a constant speed along the predetermined path (see Step 1). The movement speed should allow the real-time preview alignment within the software to progress smoothly without stuttering or warnings. Maintain the distance within the ideal range of 350mm to 450mm for optimal data quality.
Completing the Loop: As you approach the starting point, observe the real-time aligned model in the software interface. Ensure that the starting area and the current scanning area have seamlessly closed the loop.
3D Scan Data Inspection and Post-Processing
Immediate Integrity Check:
After scanning, preview the point cloud in the software to quickly check for missing data. The subject must not move before this step. If the posture has changed, scanning cannot be resumed on the existing data. Once confirmed, click to complete the scan and proceed with data processing.
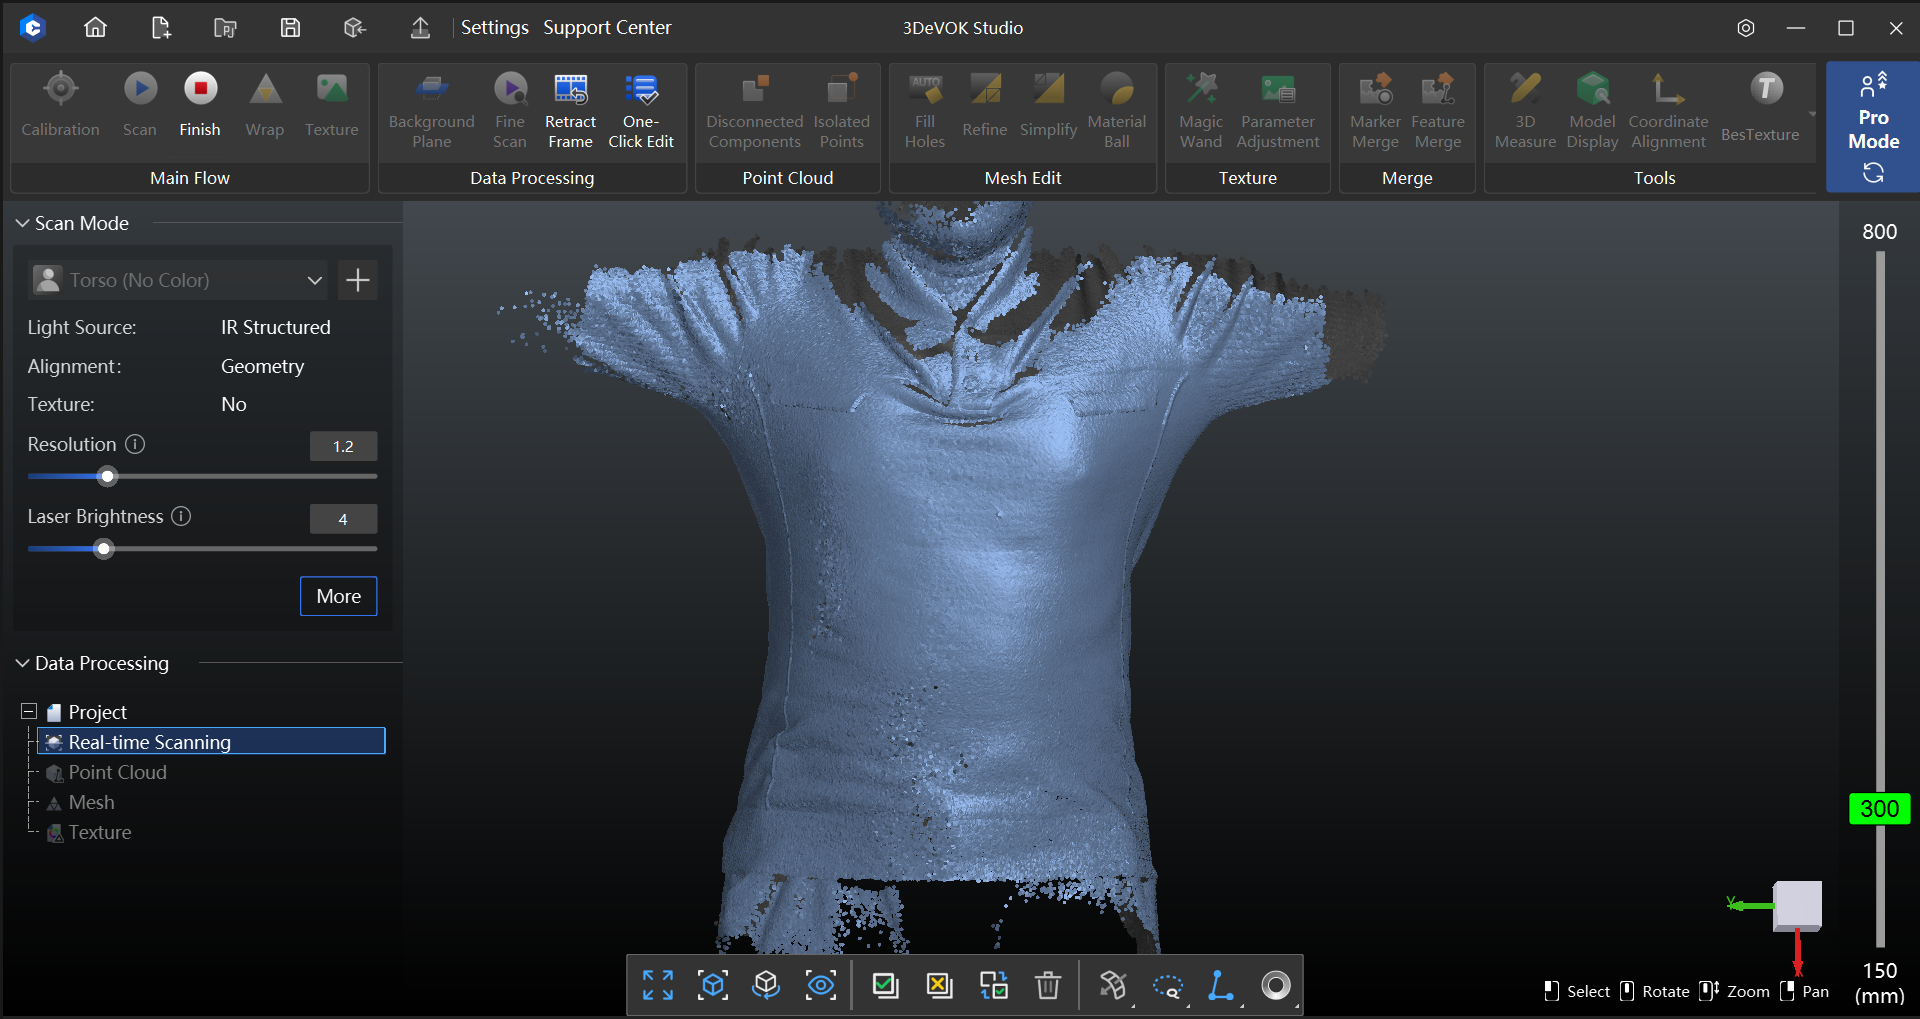 Figure 7: Torso scan data (point cloud)
Point Cloud Optimization:
Use the “Optimize Floating Misalignment” function to correct local shifts caused by minor movements like breathing.
Use the “Reduce Cumulative Error” function to correct systematic alignment drift. Selection: “Rich Geometric Features”.

Figure 8: Point cloud processing options
Mesh Generation and Export:
Select the “Fill Small” option during meshing to fill minor holes. After the mesh data is generated, manual hole-filling can be performed until the model is complete.
Export the final 3D model in STL format. This model is now ready for downstream applications such as data analysis and 3D printing.
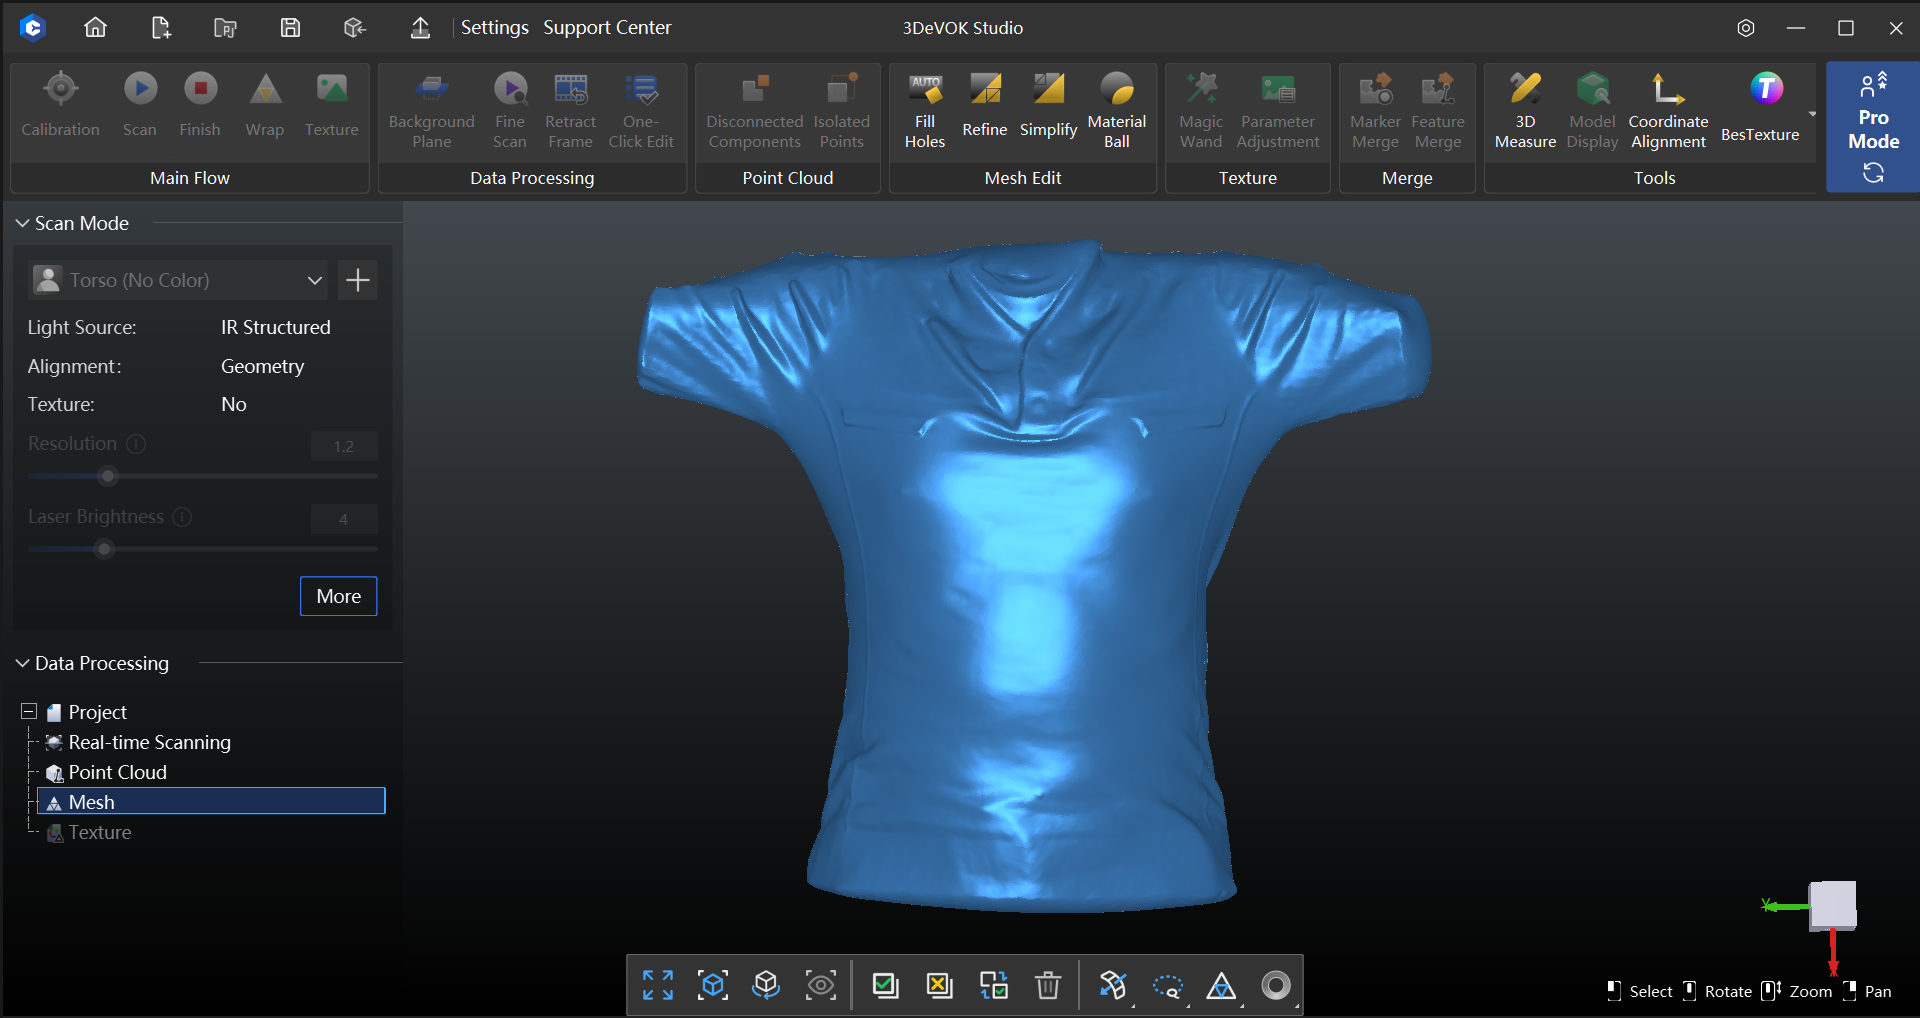 Figure 9: Torso mesh data
Conclusion
This technical solution outlines the complete workflow for torso scanning. The core of following this process lies in meticulous preparation and efficient scanning execution. By controlling the environment, standardizing clothing, stabilizing posture, and selecting the corresponding scanning path based on the different poses (T-Pose/A-Pose), complete and accurate raw data can be acquired in a single pass. Crucially, the scan must be understood as a continuous, closed-loop process, as any interruption can compromise the final model quality.
Through this standardized technical process, high-quality STL models can be reliably obtained, providing a dependable data foundation for posture analysis, orthotic design, rehabilitation medicine, and ergonomic applications.
Related Articles


View Our Product
