How to Import Color 3D Scanned Files into Blender, ZBrush, and Cinema 4D

04/25/24

Color 3D Scanned Data

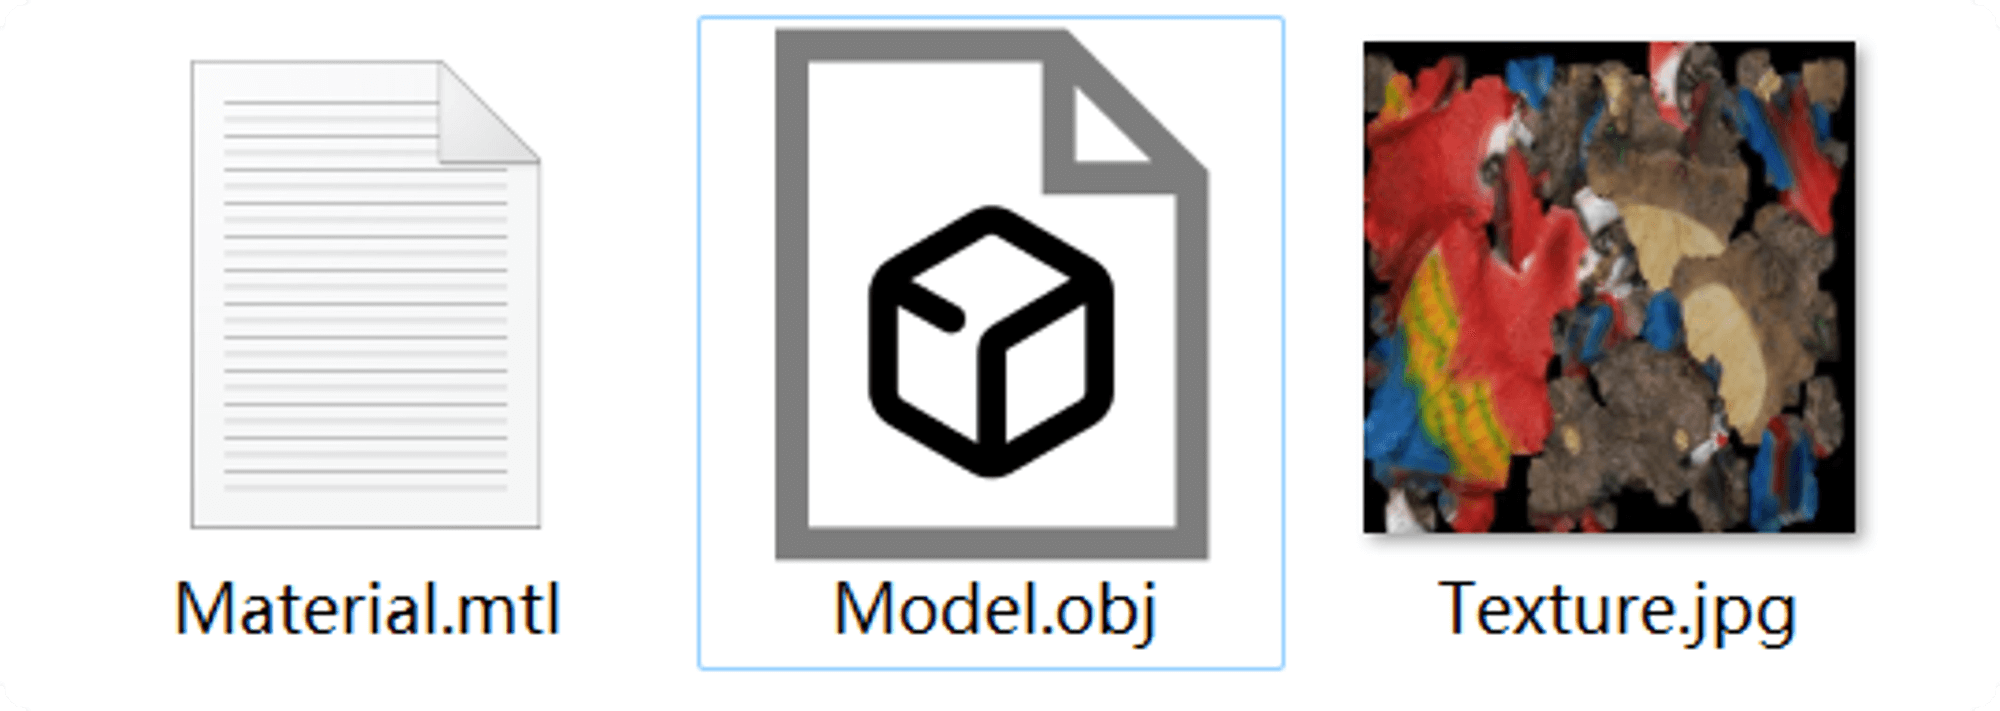
The iReal 3D scanning software exports color data in OBJ format, which typically consists of three files: an .obj file containing the three-dimensional structure data, an .mtl file detailing the material properties, and a .jpg file for texture mapping. Absence of the .mtl and .jpg files results in a colorless 3D representation when opened.

It’s crucial to note that the file names of the .mtl and .jpg files within the three files must not be altered arbitrarily; changing them will result in colorless three-dimensional data upon opening. However, we can manually adjust the .mtl and .jpg file names post-renaming while ensuring the file contents remain specified.

Color 3D Scanned Data File

Specific steps are as follows:

  • Begin by understanding the relationship between the three files. The .obj file contains the path and name of the .mtl file, while the .mtl file includes the path and name of the .jpg file. Since these files are typically located in the same folder, they use relative paths with minimal adjustments required. Focus on modifying the corresponding names, and remember that both the .obj and .mtl files can be opened using Notepad.
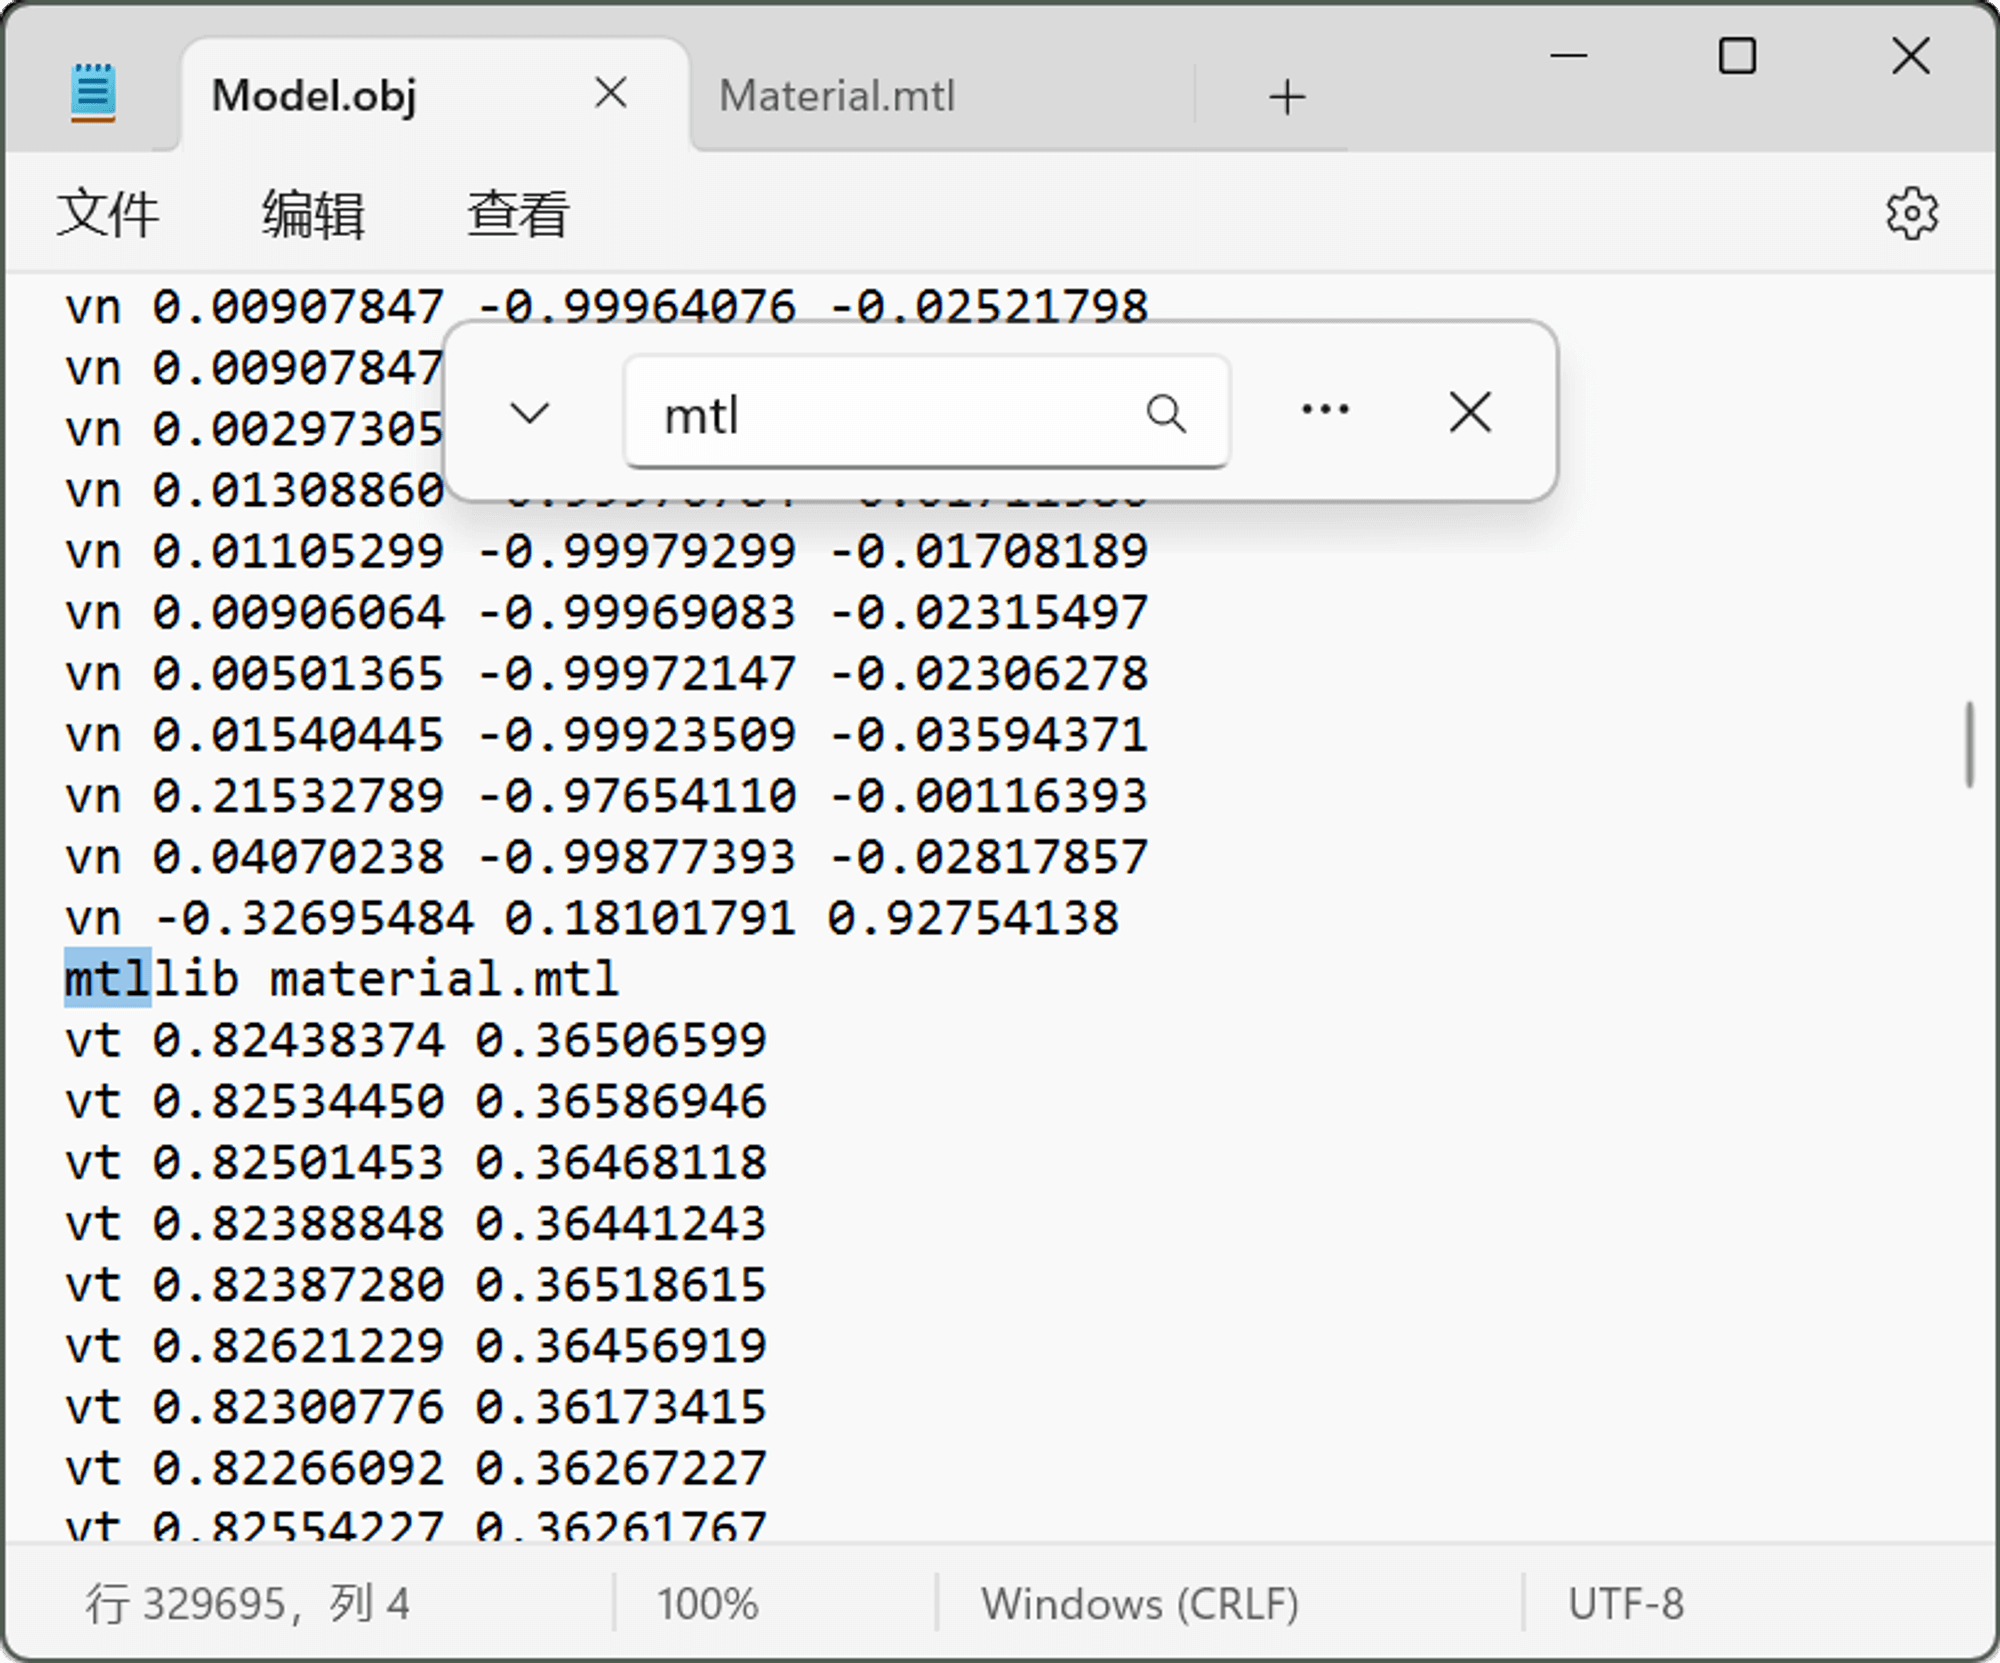
  • Open the .obj file using Notepad. Given its extensive content, locating specific sections can be challenging. Utilize the “Ctrl+F” shortcut to search for “mtl”. Pay attention to the space followed by “material”, as this is the part requiring modification. Once done, save the changes using “Ctrl+S”.
Specific steps
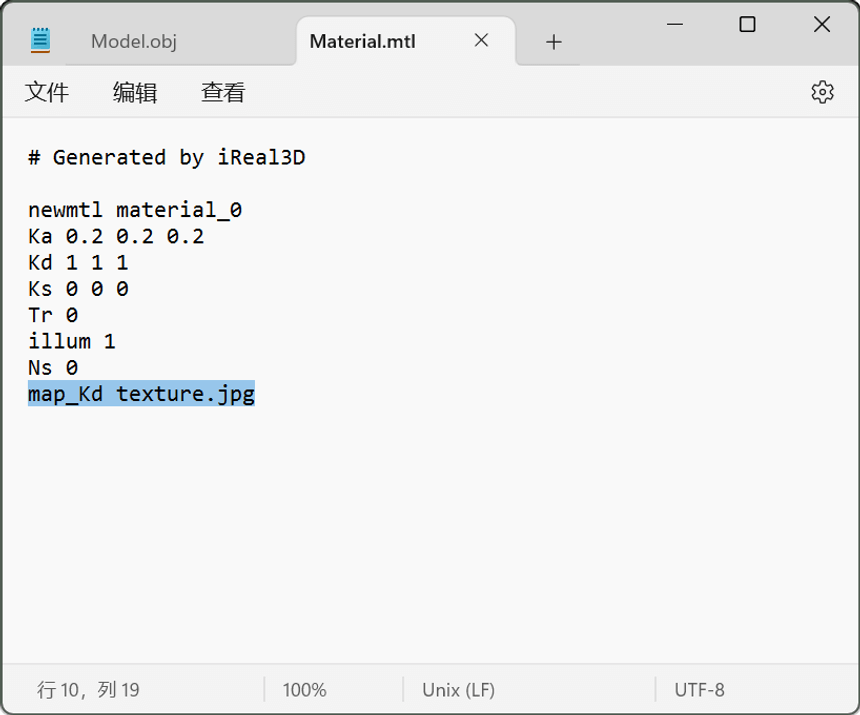
  • Next, open the .mtl file using Notepad. This file is comparatively straightforward. The .mtl files in the example signify specific meanings (refer to the information below). Verify if the map name associated with map_Kd is correct. If not, manually adjust and save the file.

# Generated by iReal 3D
newmtl material0         # Material Name, Containing a Sequence of Material Definitions
Ka 0.2 0.2 0.2              # Ambient Lighting Color
Kd 1 1 1                      # Diffuse Lighting Color
Ks 0 0 0                       # Specular Lighting Color
Tr 0                             # Transparency
illum 1                         # Illumination Model (The value 0 represents the Blinn-Phong model.)
Ns 0                            # Specular Highlights
map_Kd texture.jpg    # A Color Texture File

.mtl file

Import 3D Models

1. Importing Models into Blender

  1. Activate Blender. This demonstration utilizes Blender 4.0, the latest version; however, the process remains similar across different Blender versions.
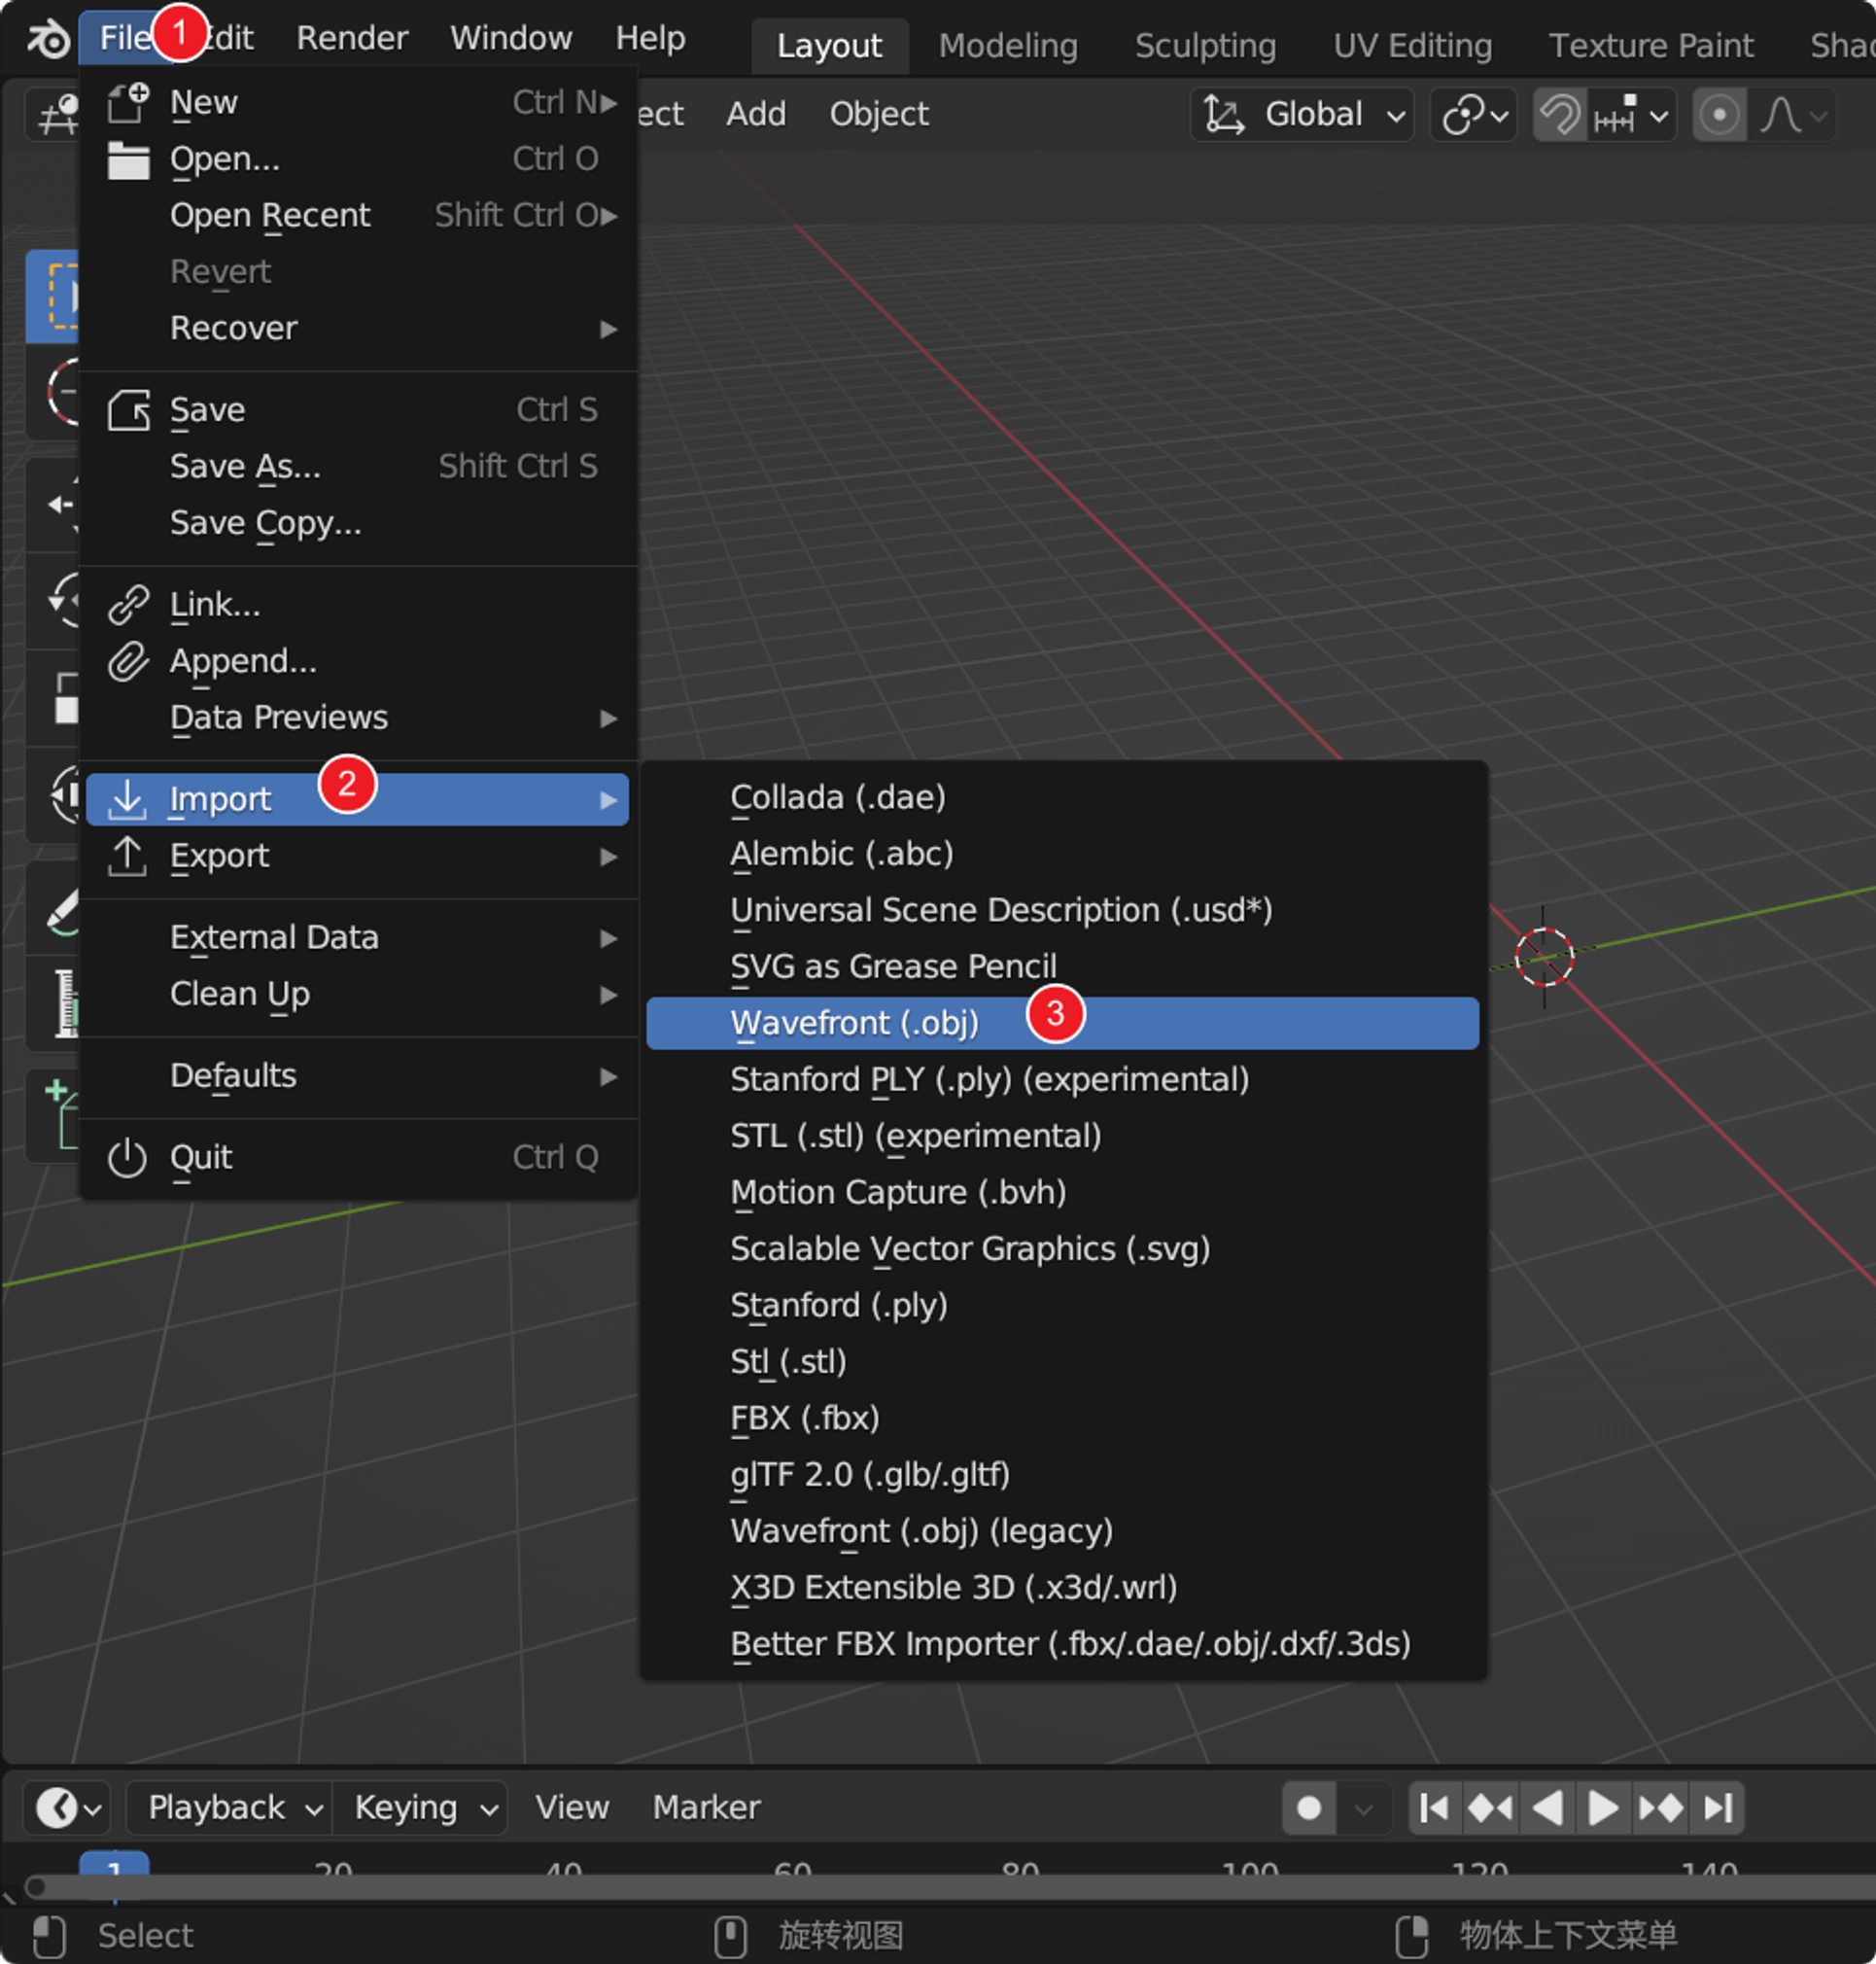
  2. Note that dragging files for import is not supported in this software. Instead, navigate to File → Import → Wavefront (.obj) to import your files.

Importing Models into Blender-b
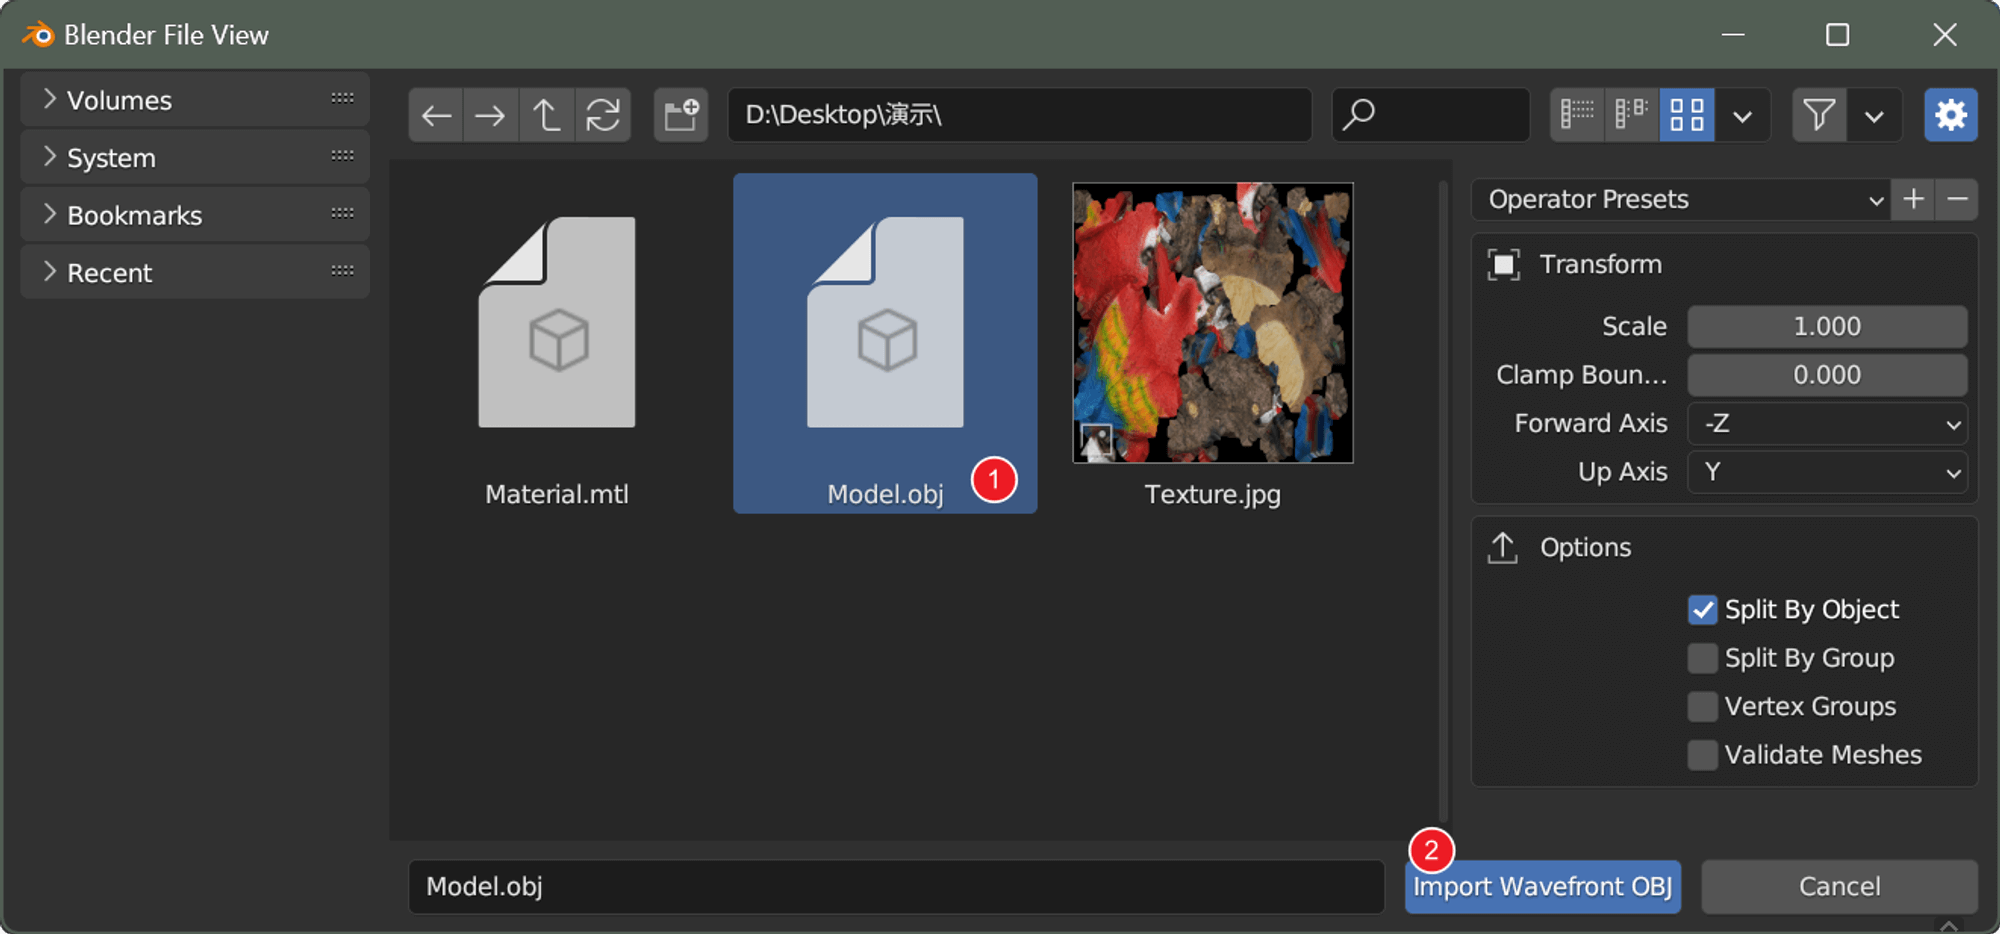
  • c. Choose the OBJ file you wish to export.
Importing Models into Blender-c
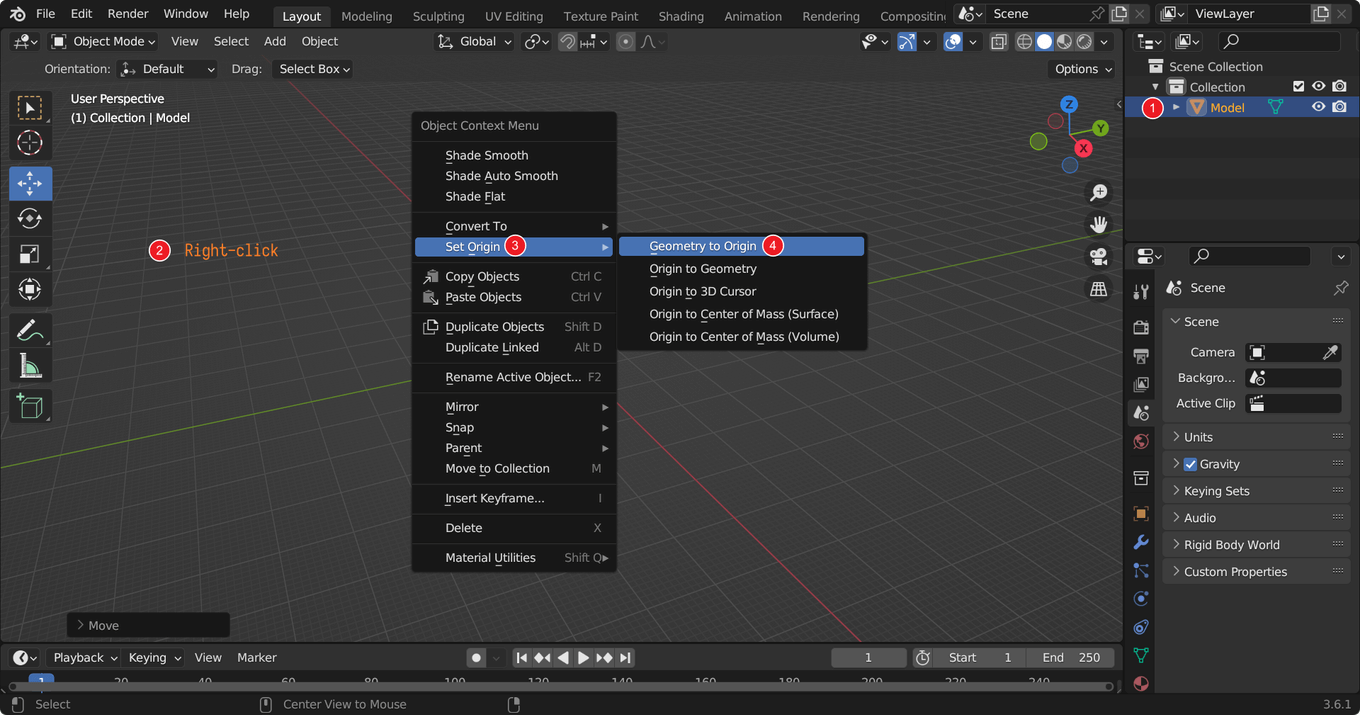
  • d. After opening it, you might not see anything due to a coordinate system offset. To center the model in the view, click on the model in the outline view on the right. Then, right-click in the 3D view and choose Set Origin → Geometry to Origin. This action swiftly relocates the model to the center of the view.
Importing Models into Blender-d
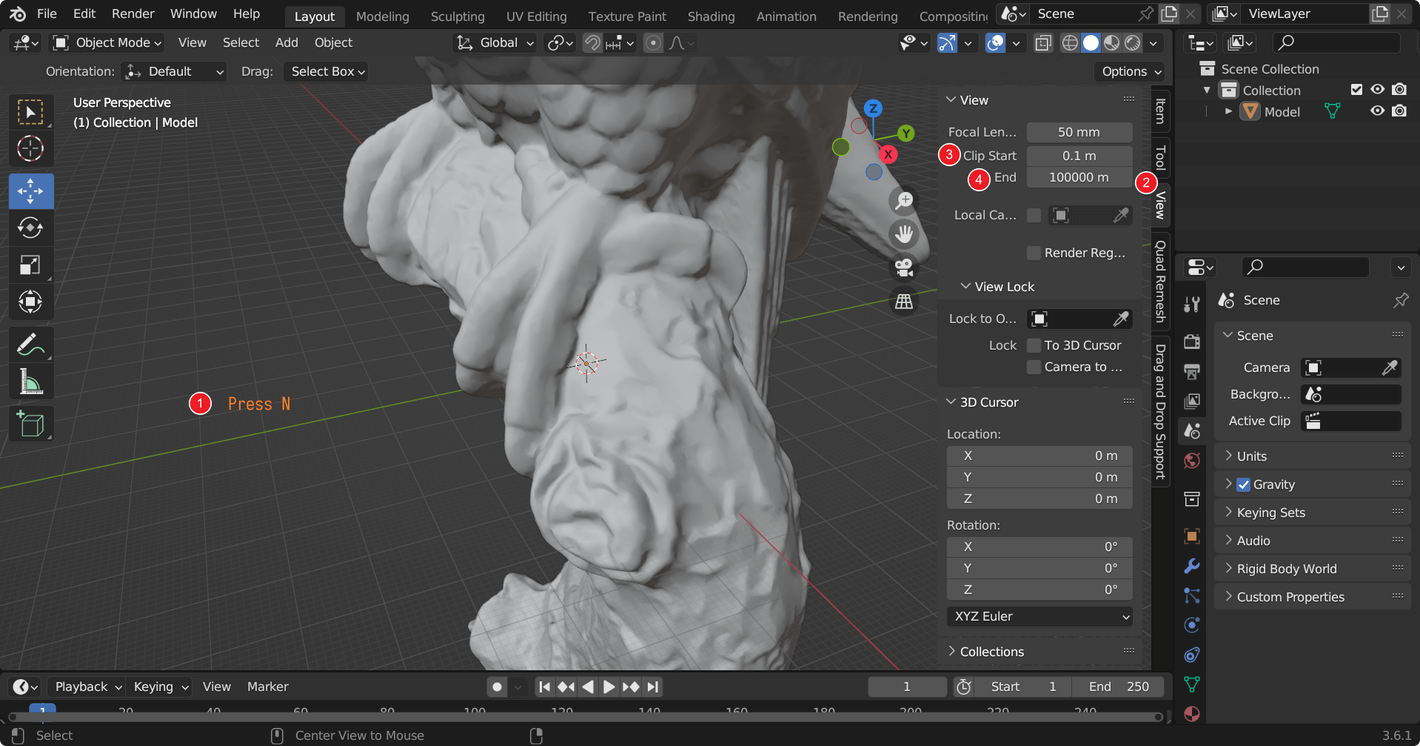
  • e. To ensure proper display of the scanned model, follow these steps: press N to open the sidebar, choose View, and set the Clip Start to 0.1 m and Clip End to 100000 m.
Importing Models into Blender-e
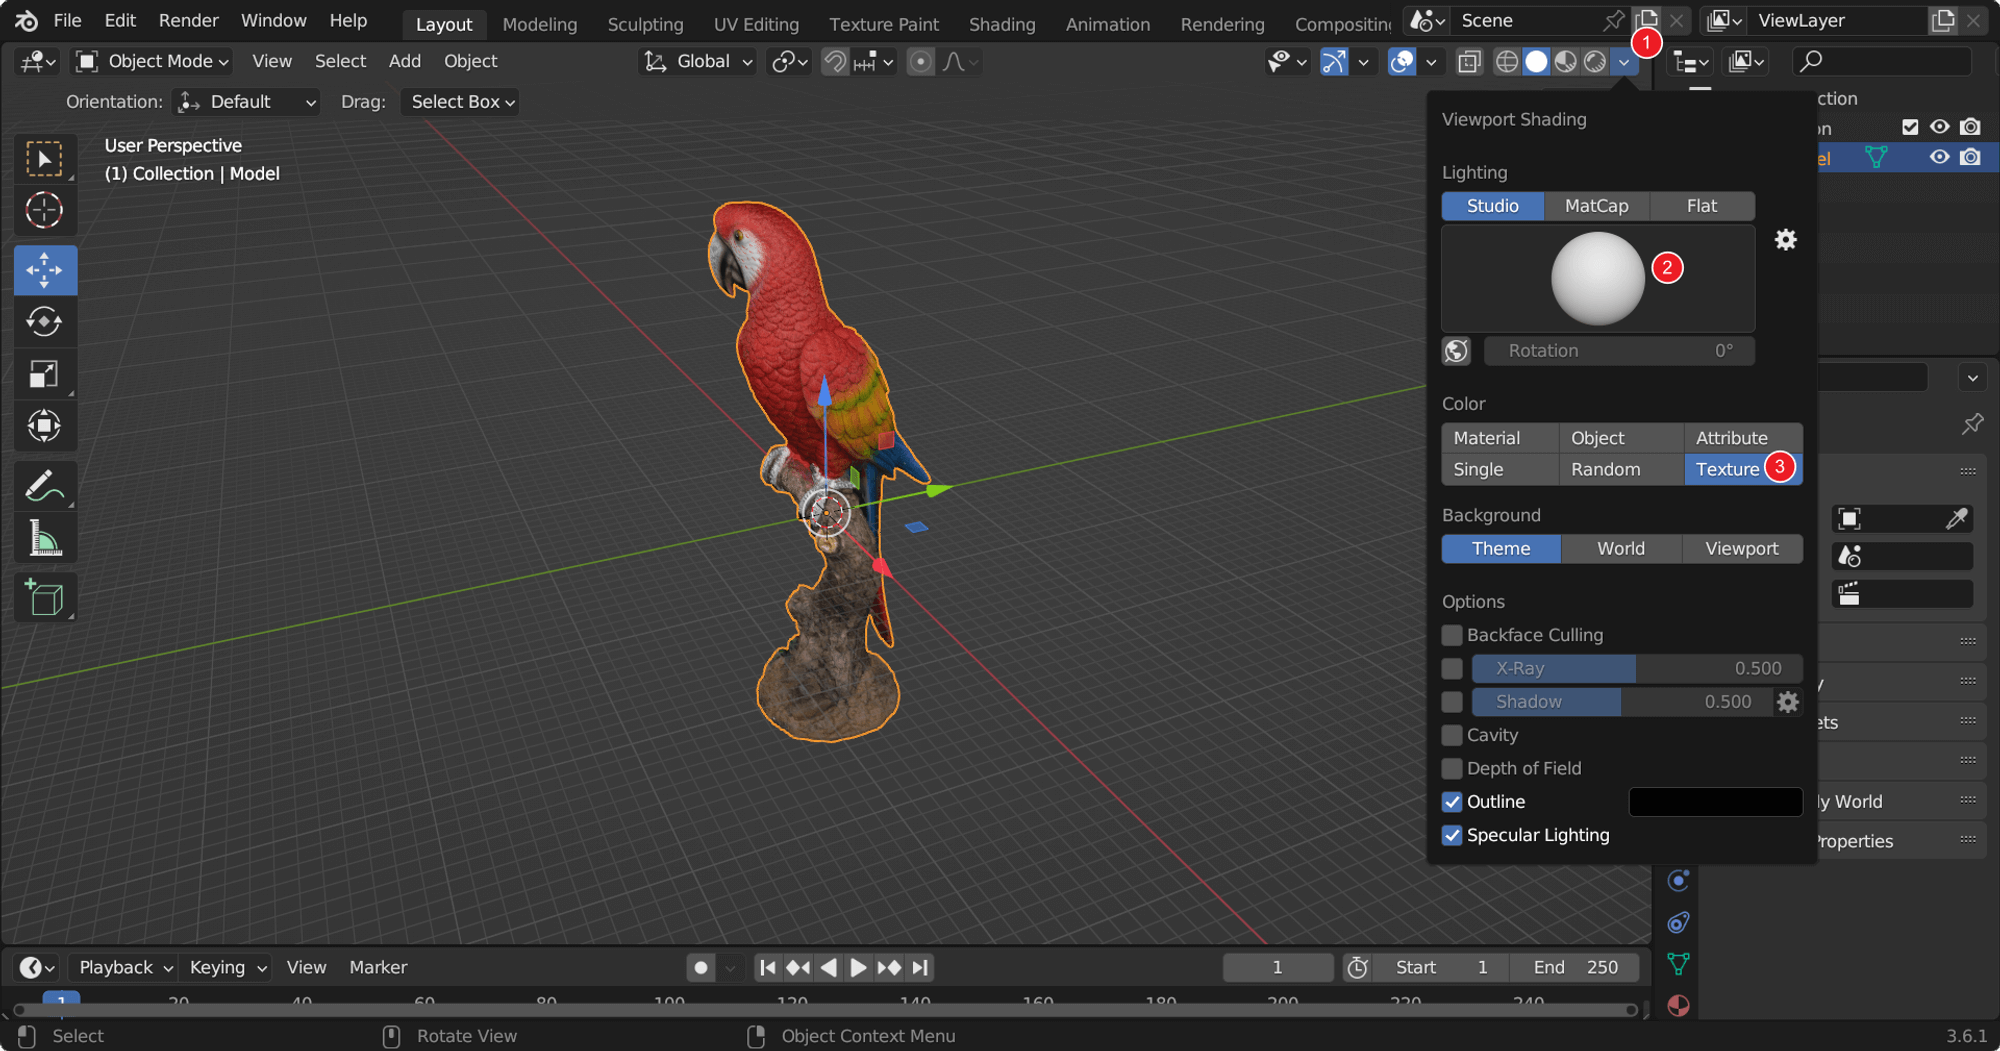
  • f. To view the color, start by clicking the small drop-down arrow, then choose an appropriate Lighting option, followed by clicking Texture to display the color. These steps outline how to import color 3D data in Blender. Afterward, you can check out it further by pressing the middle button.
Importing Models into Blender-f

2. Importing Models into Cinema 4D

  1. Launch Cinema 4D 2024 and Windows Explorer, then simply drag the OBJ file into the 3D view interface within the software.
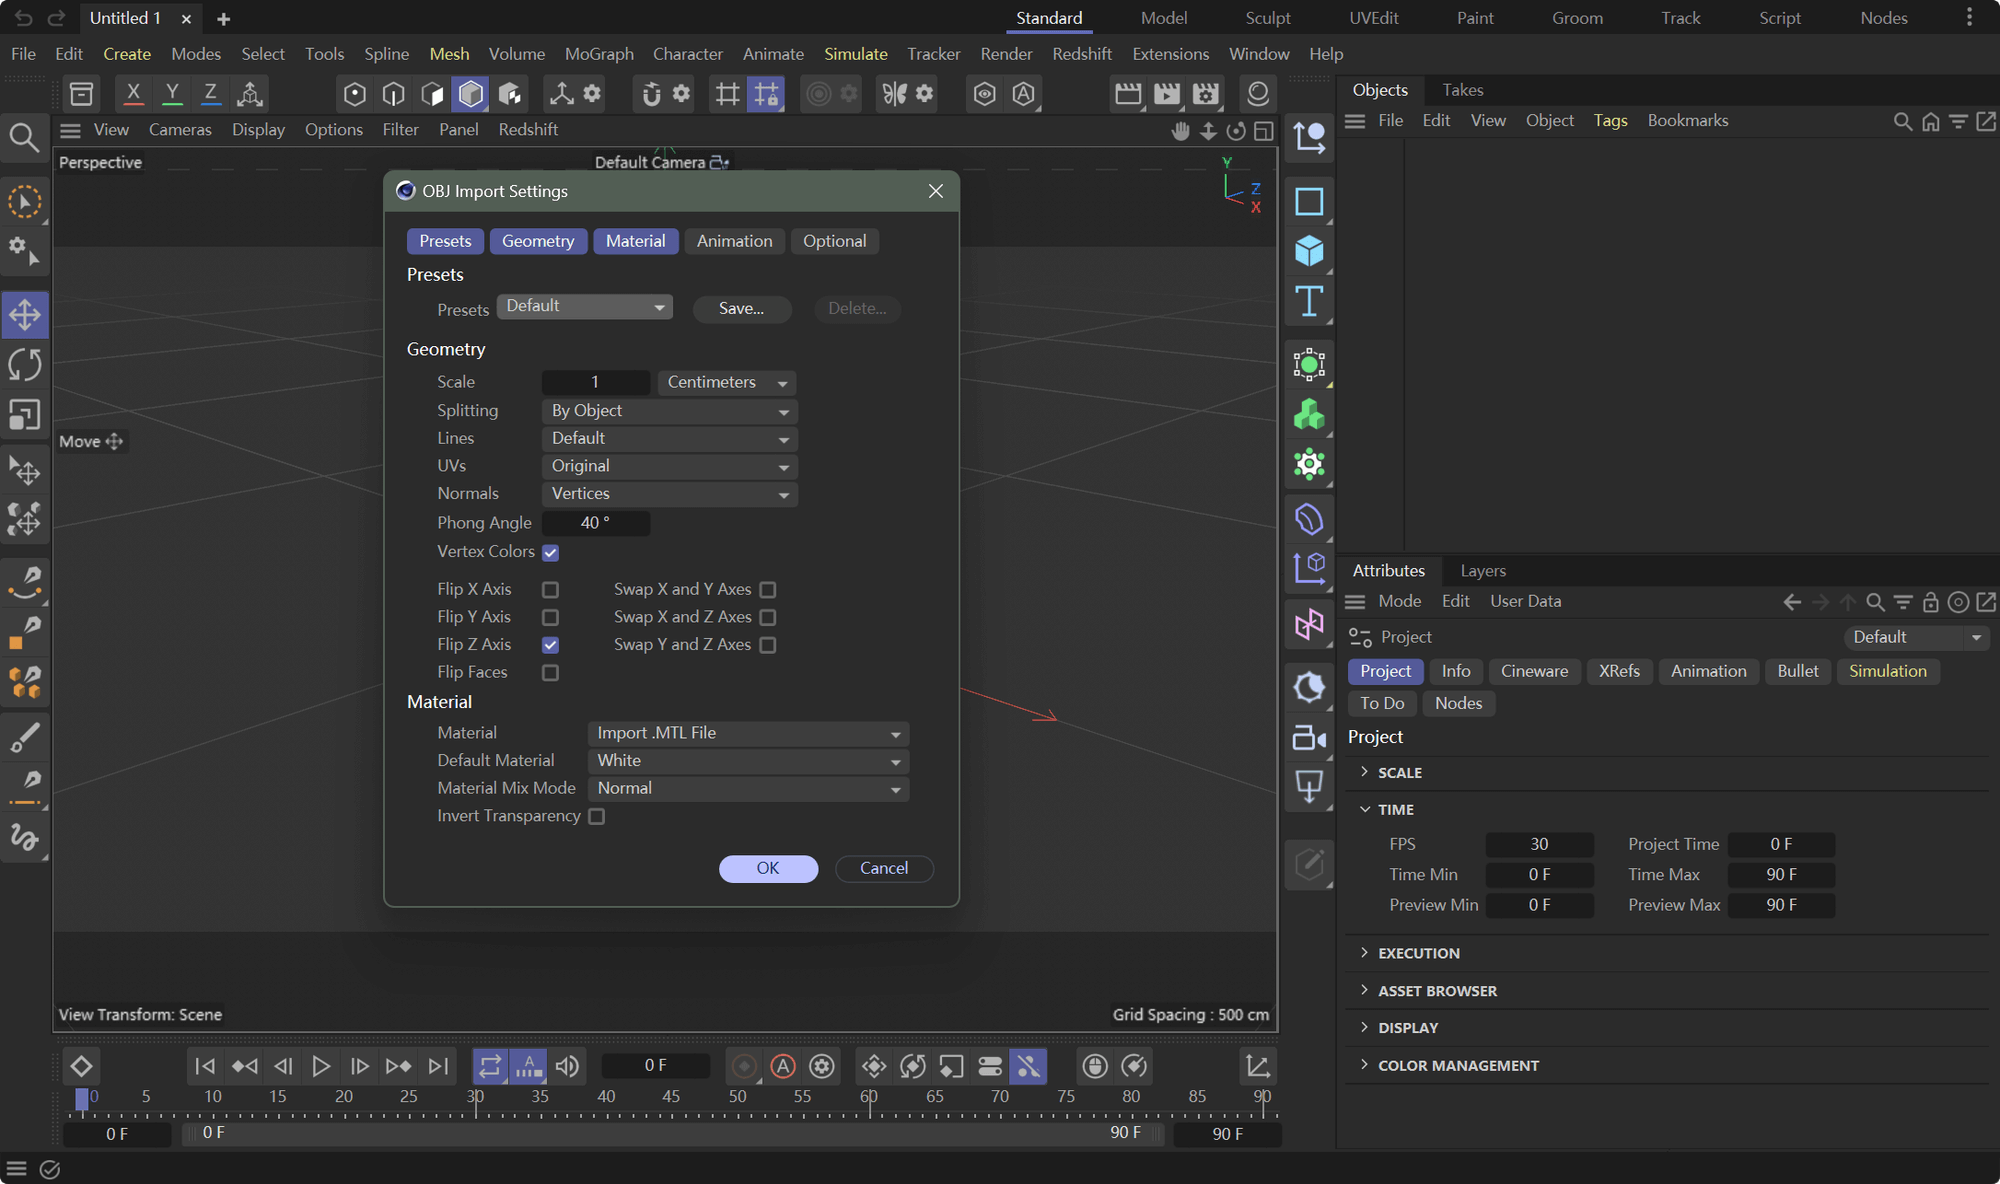
  2. You can customize the OBJ Import Settings as per your needs or preferences, or simply click OK to proceed without changes.

Importing Models into Cinema 4D-b
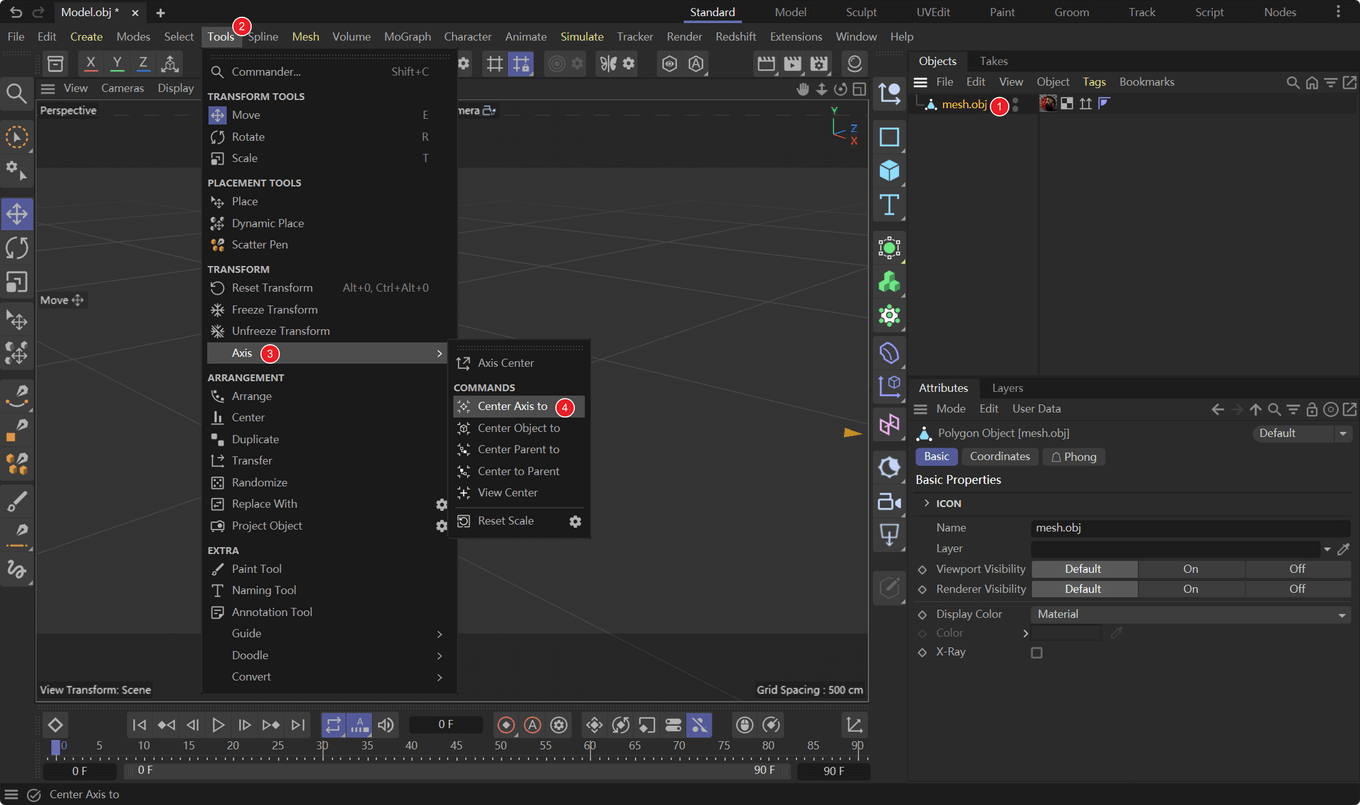
  • c. If the imported model isn’t visible, follow these steps: select the imported OBJ file in the Object Manager at the upper right corner, then go to Tools → Axis → Center Axis to Object.
Importing Models into Cinema 4D-c
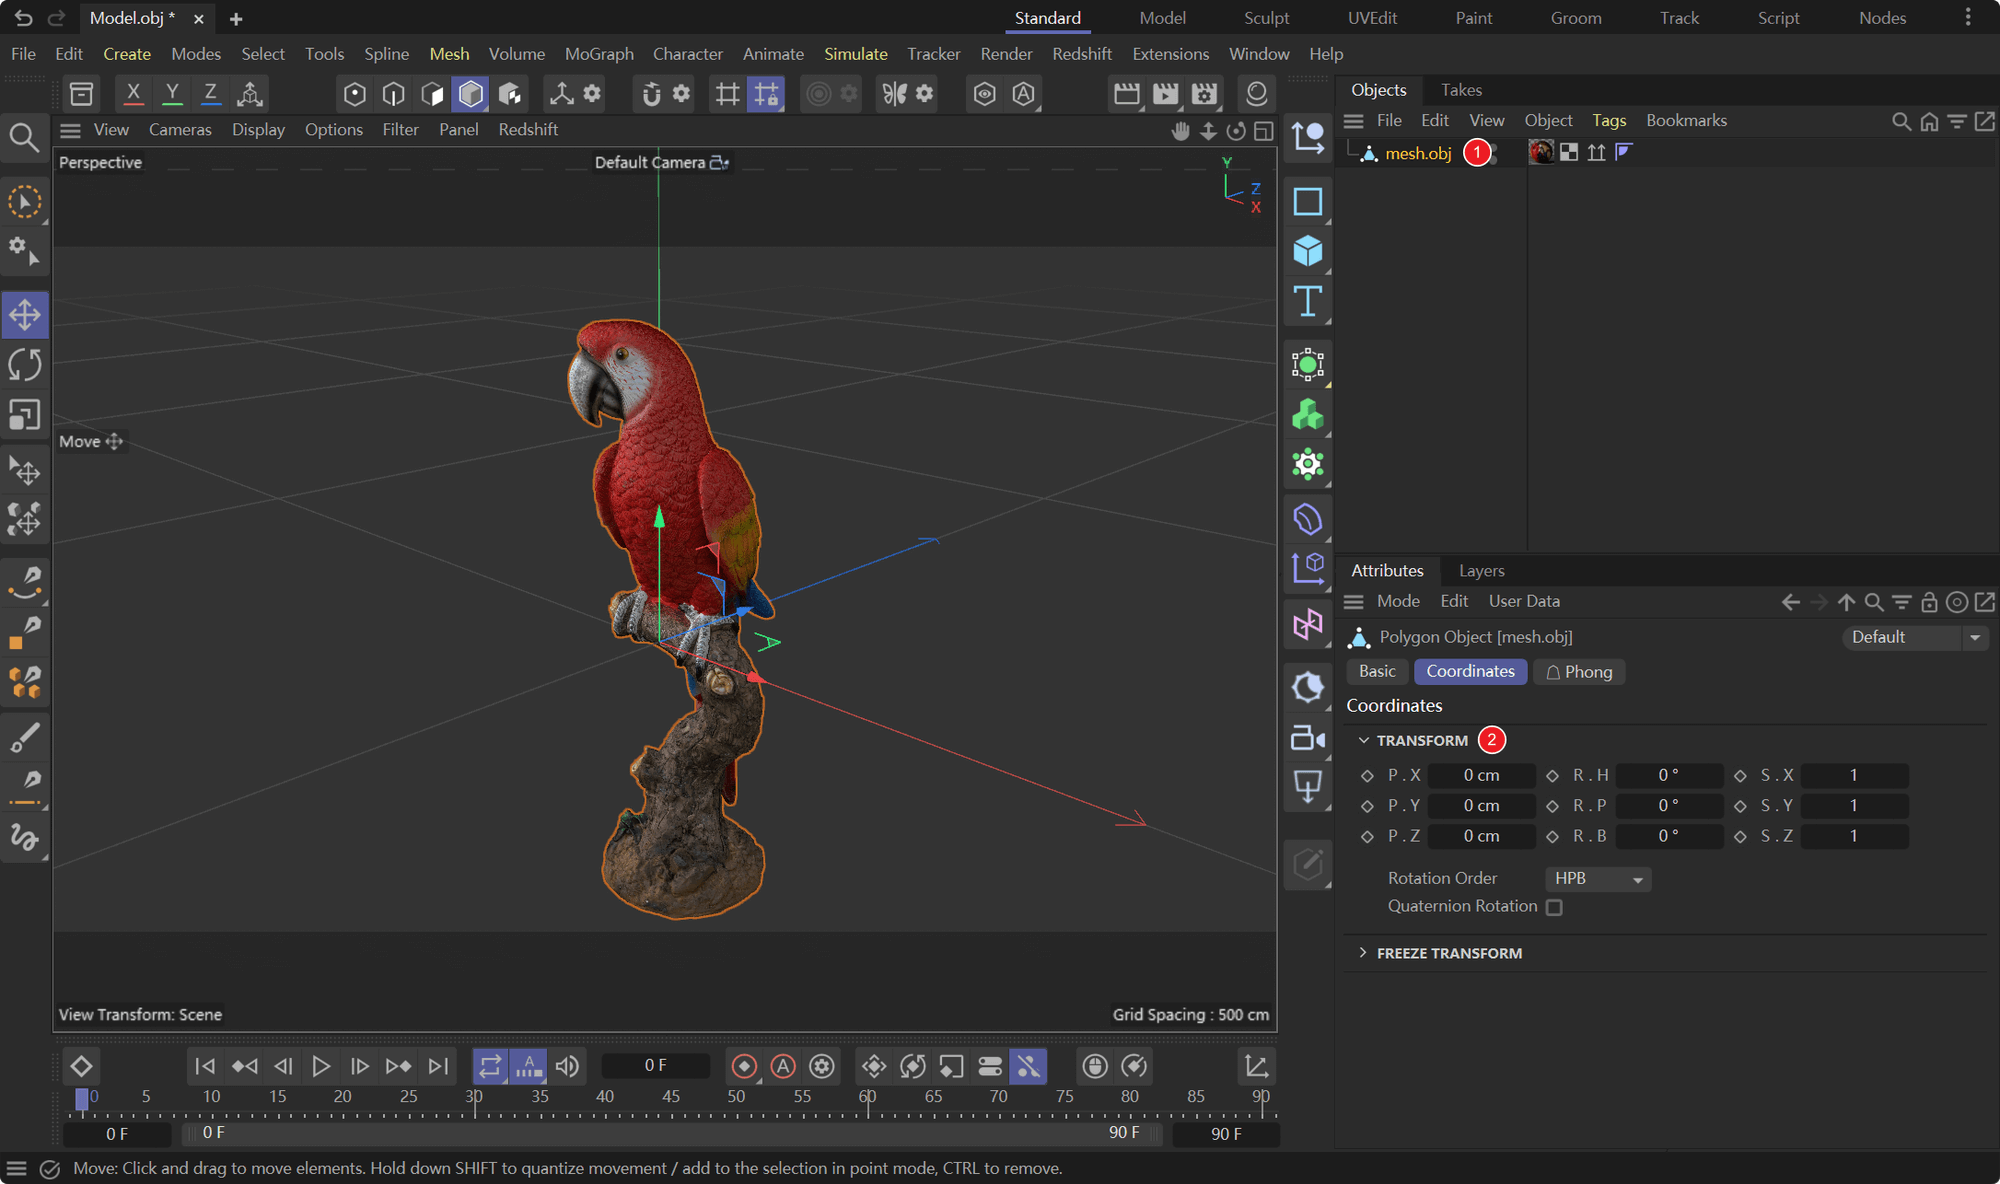
  • d. Set the values of P.X, P.Y, and P.Z to 0 in the Attributes panel. This completes the import process up to this point.
Importing Models into Cinema 4D-d
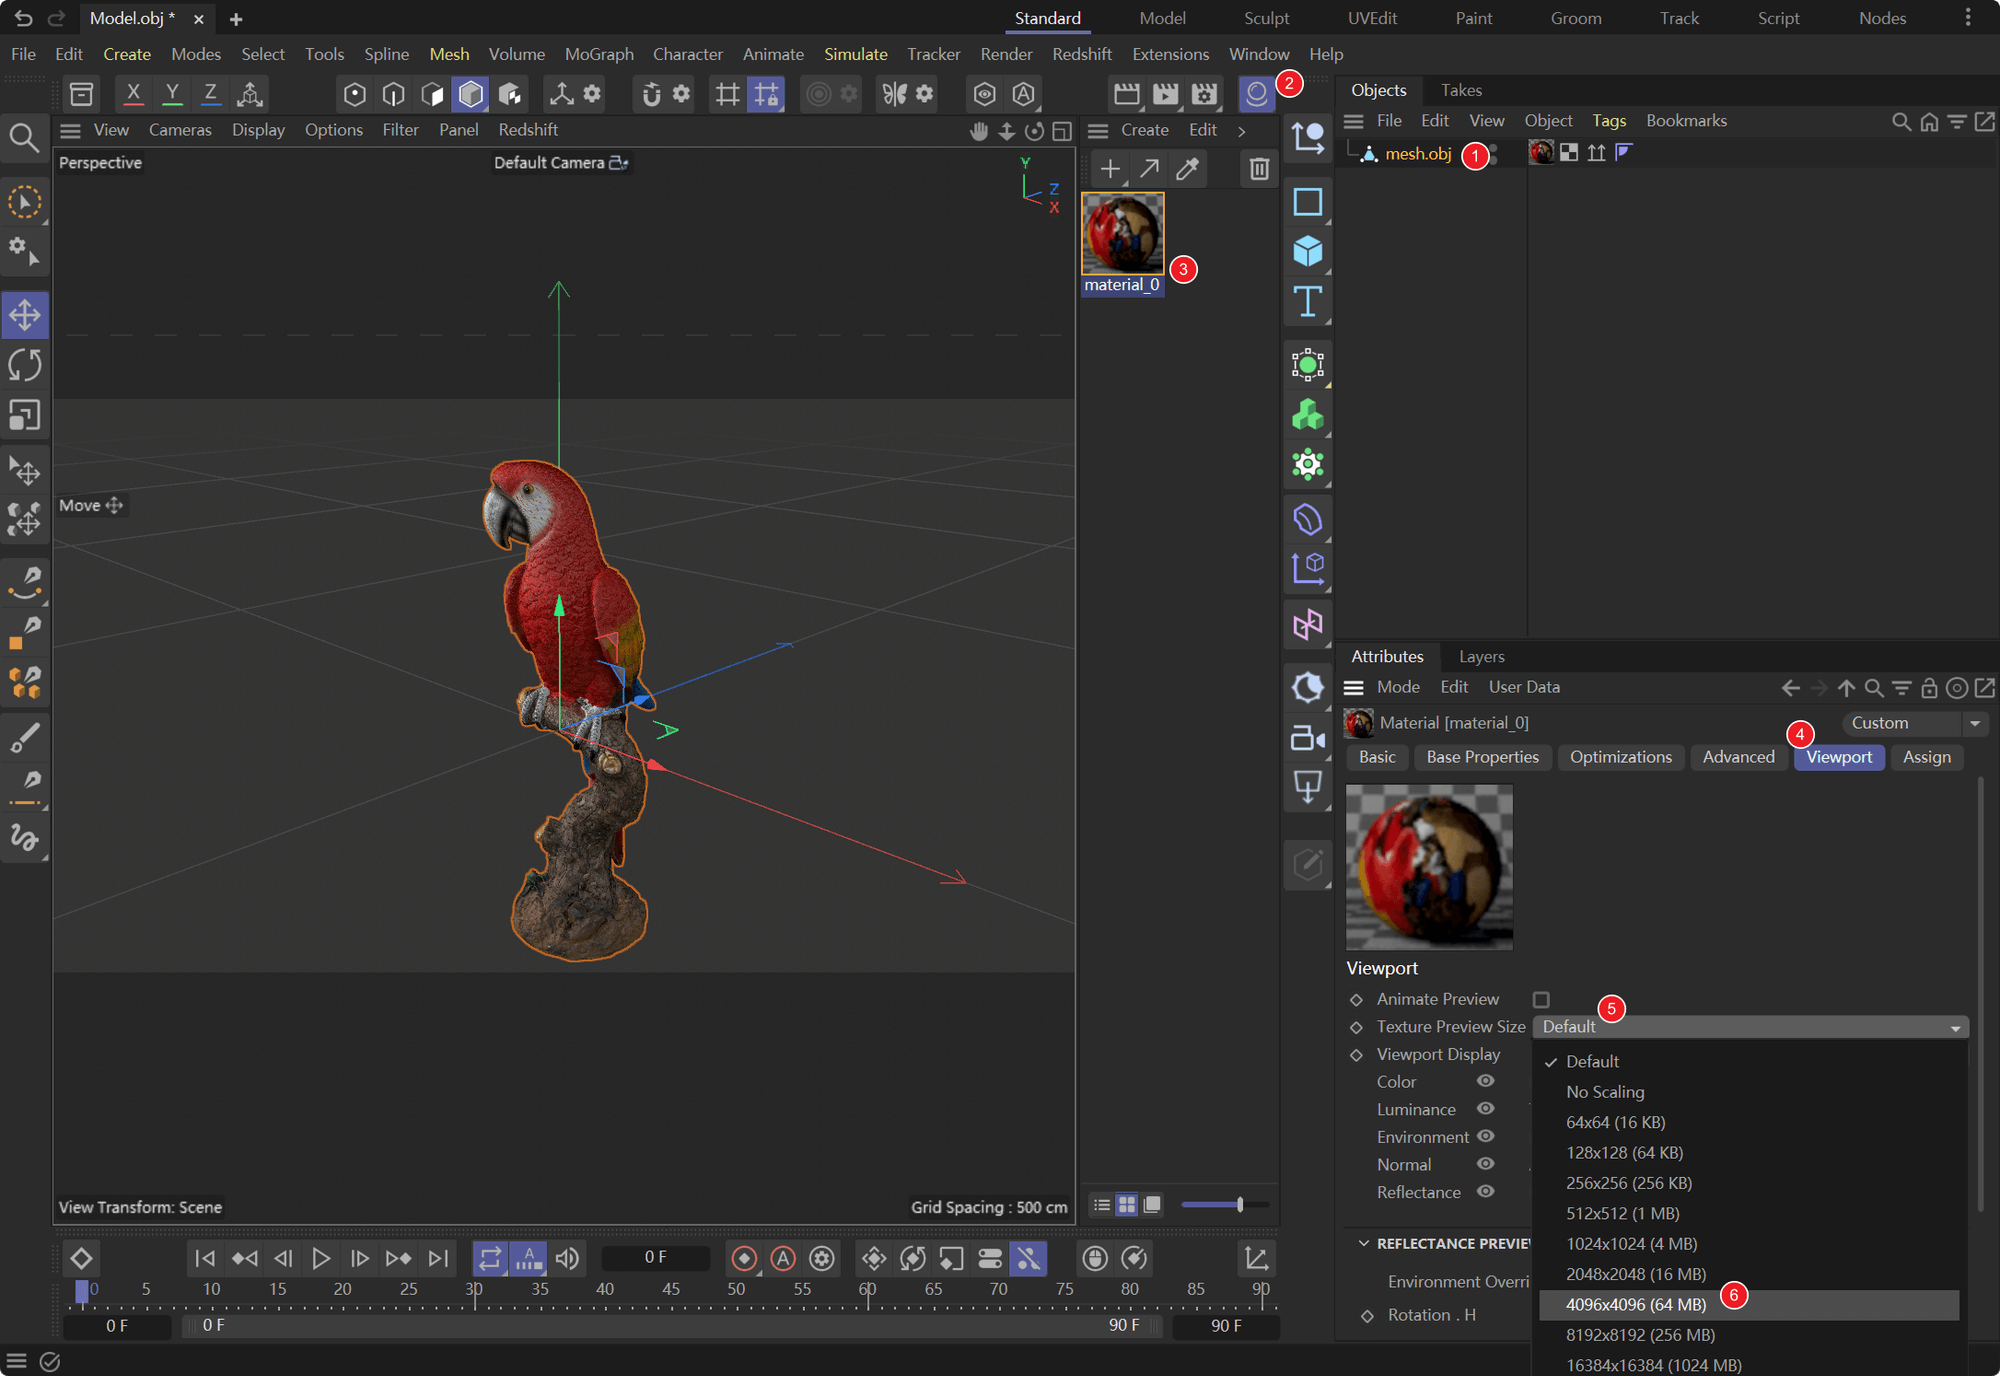
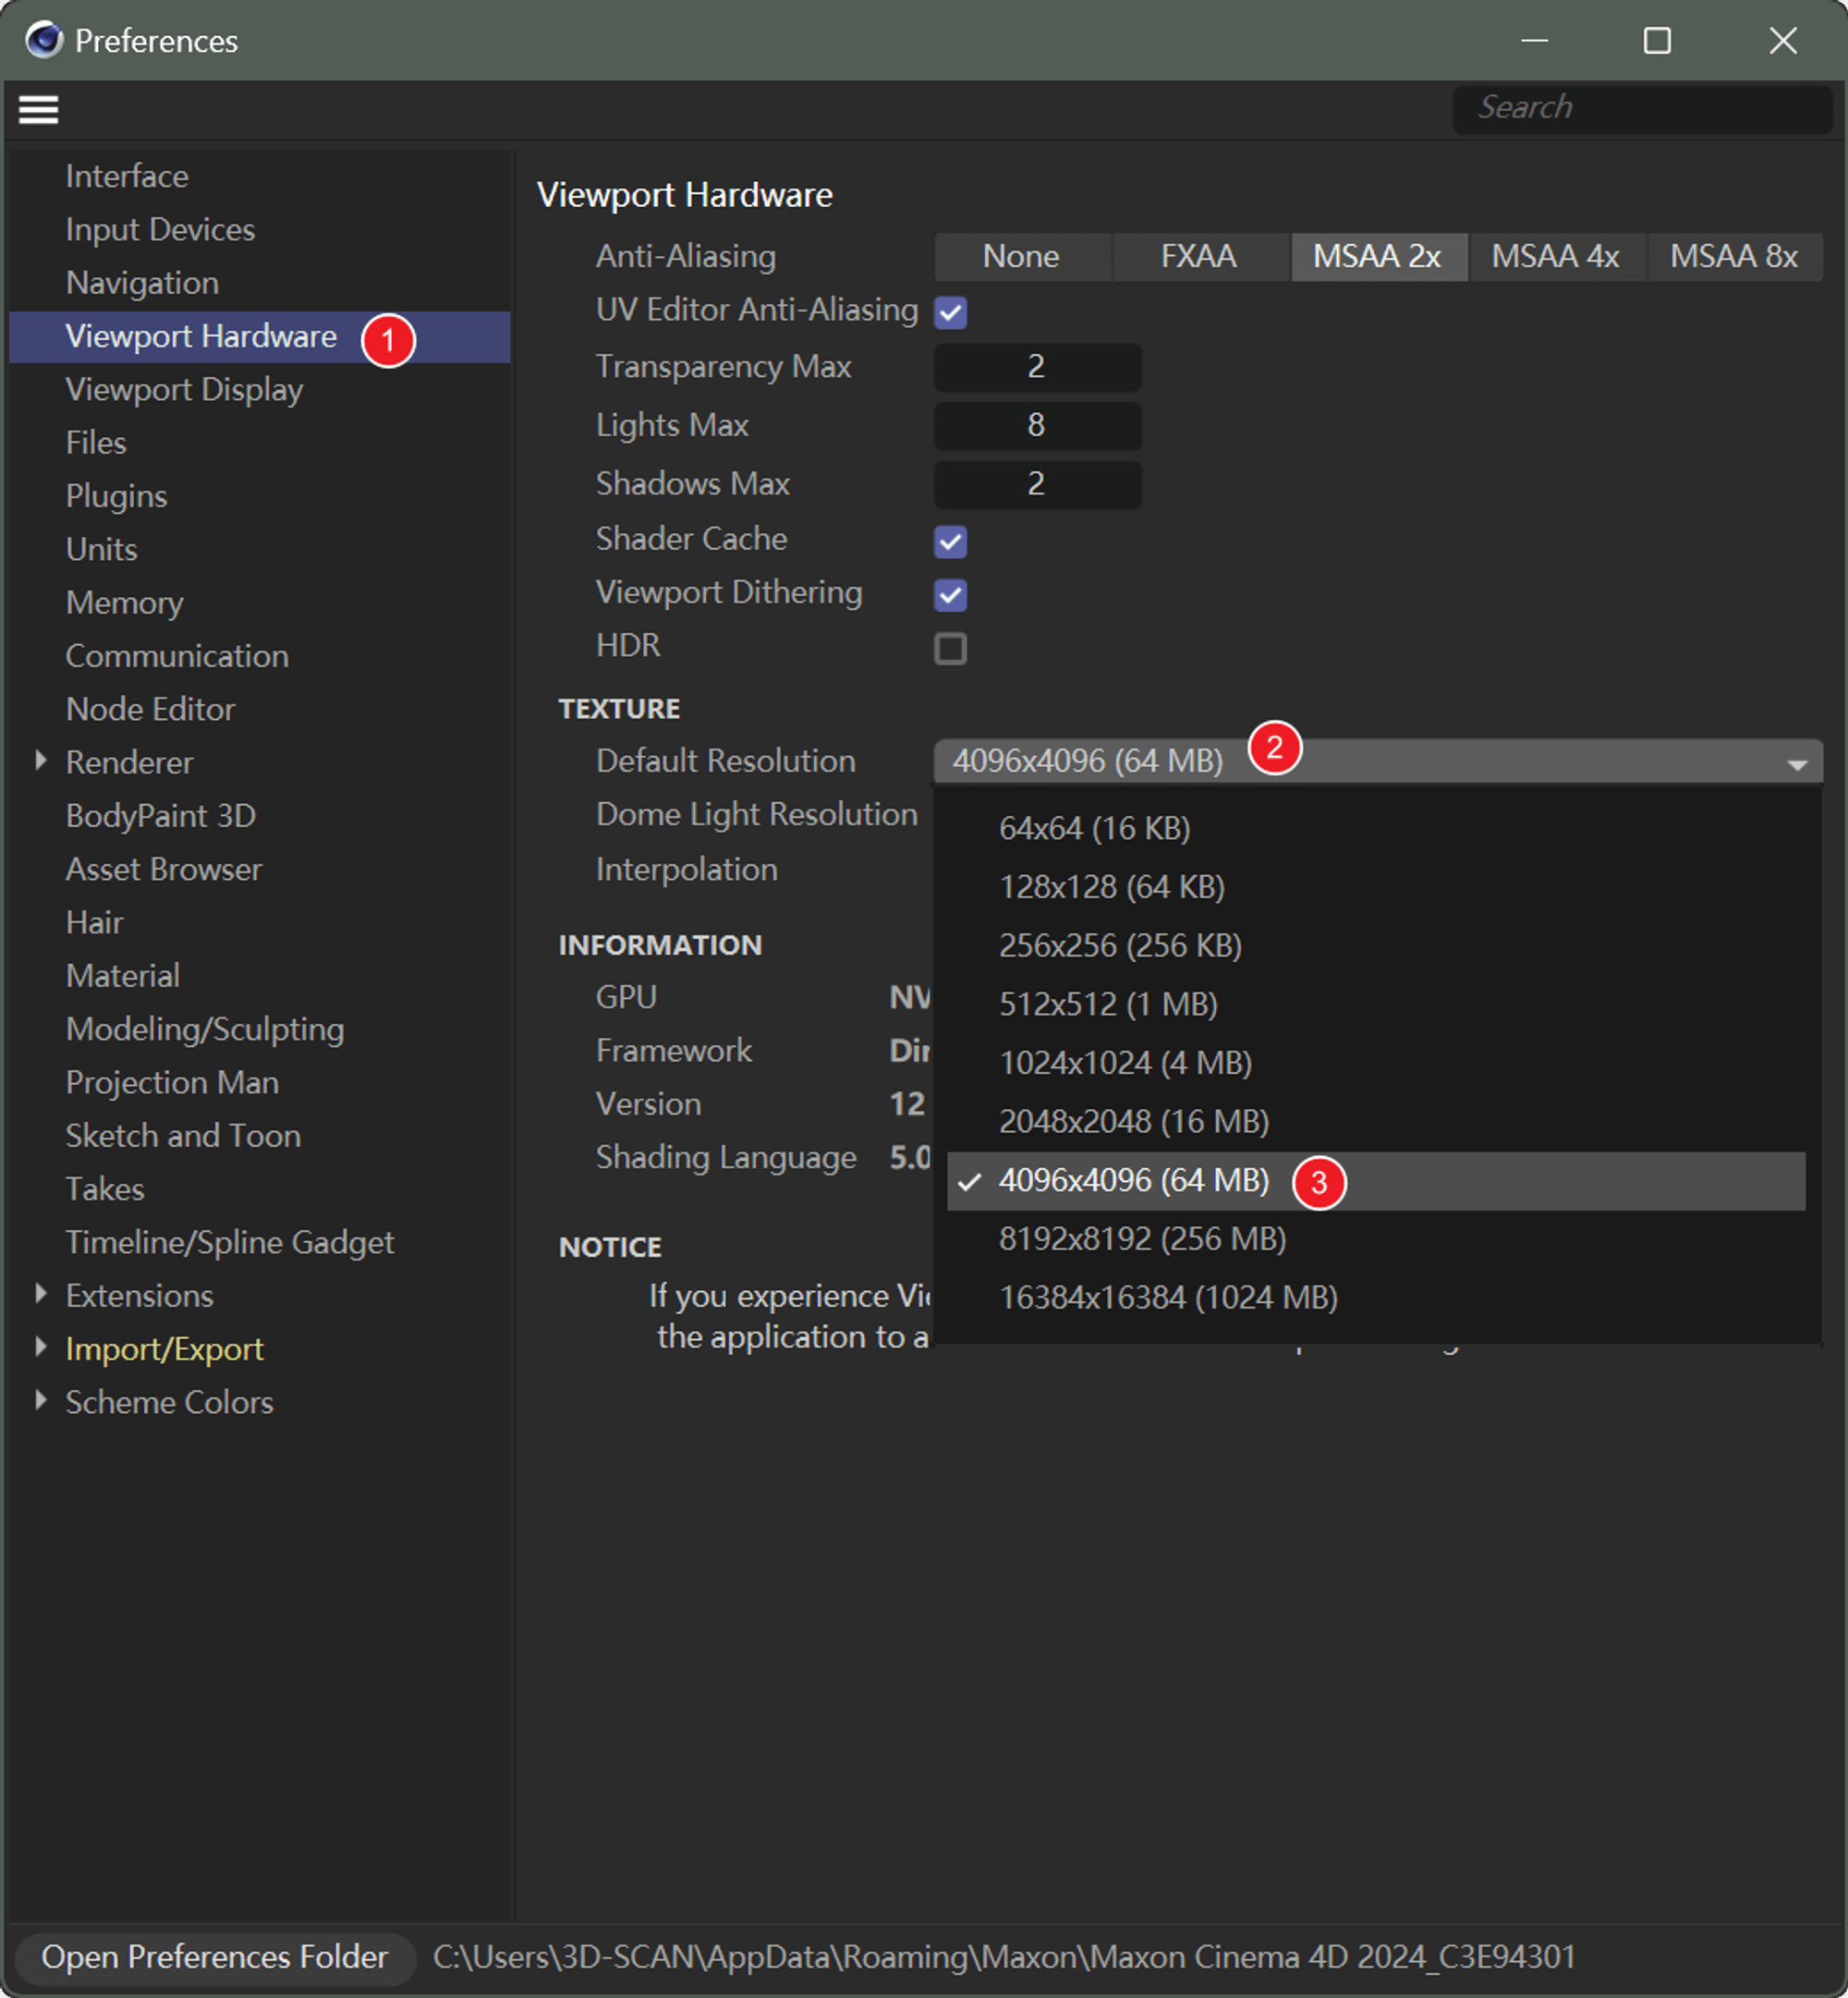
  • e. If you find the texture isn’t clear enough, there are two methods to enhance the quality. First, navigate to the Material Manager and then go to Viewport → Texture Preview Size → 4096×4096 (64MB).
Importing Models into Cinema 4D-e
  • f. You can also directly adjust the Texture Preview Size by pressing Ctrl + E to access Viewport Hardware in Preferences and modify the size to your liking.
Importing Models into Cinema 4D-f

3. Importing Models into ZBrush

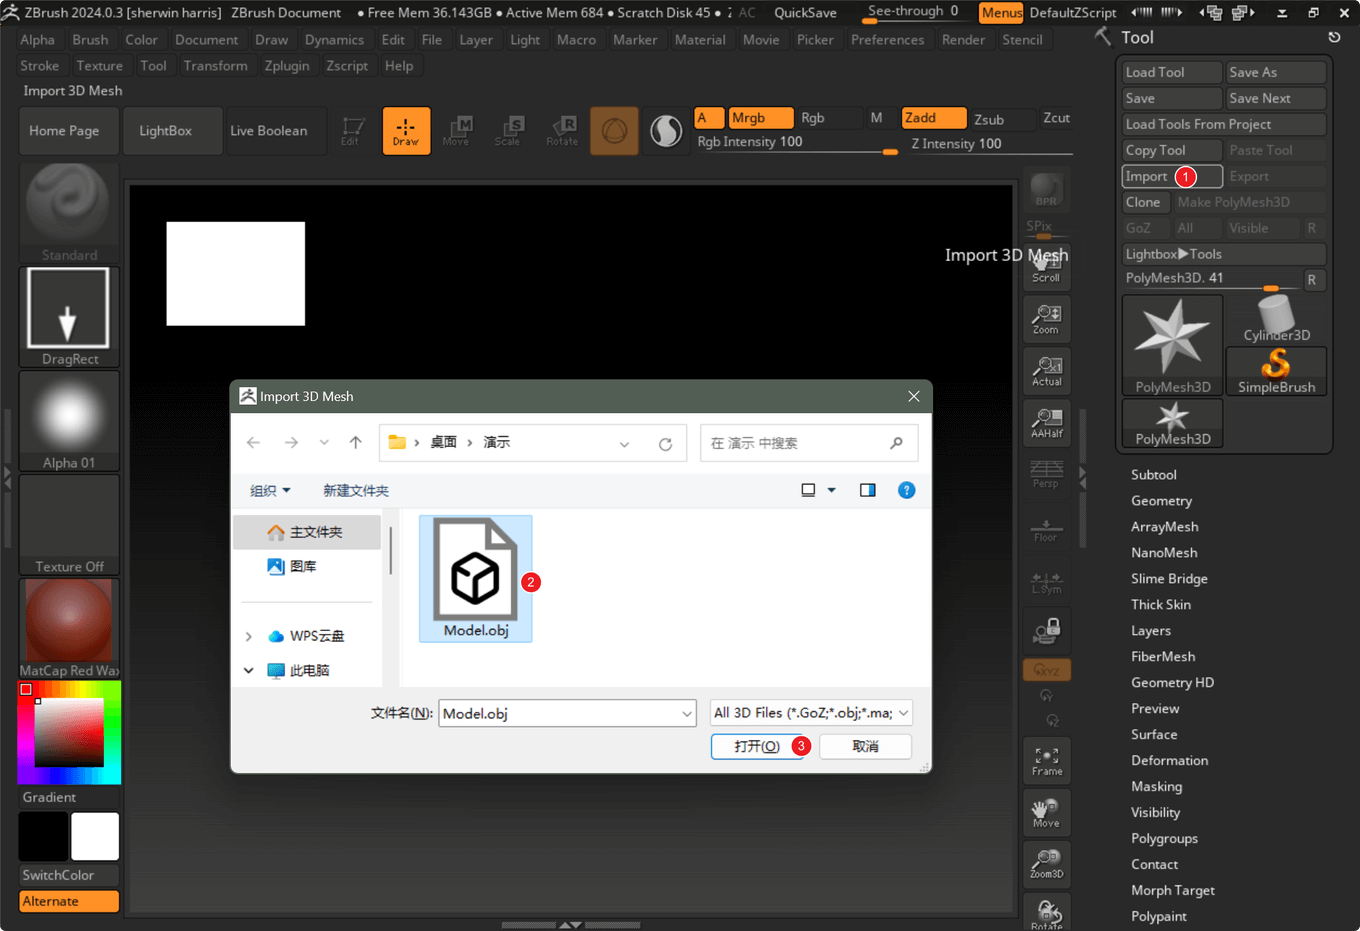
  1. In ZBrush 2024, locate the Import button on the right side of the interface and choose the OBJ file from the pop-up window.
Importing Models into ZBrush-a
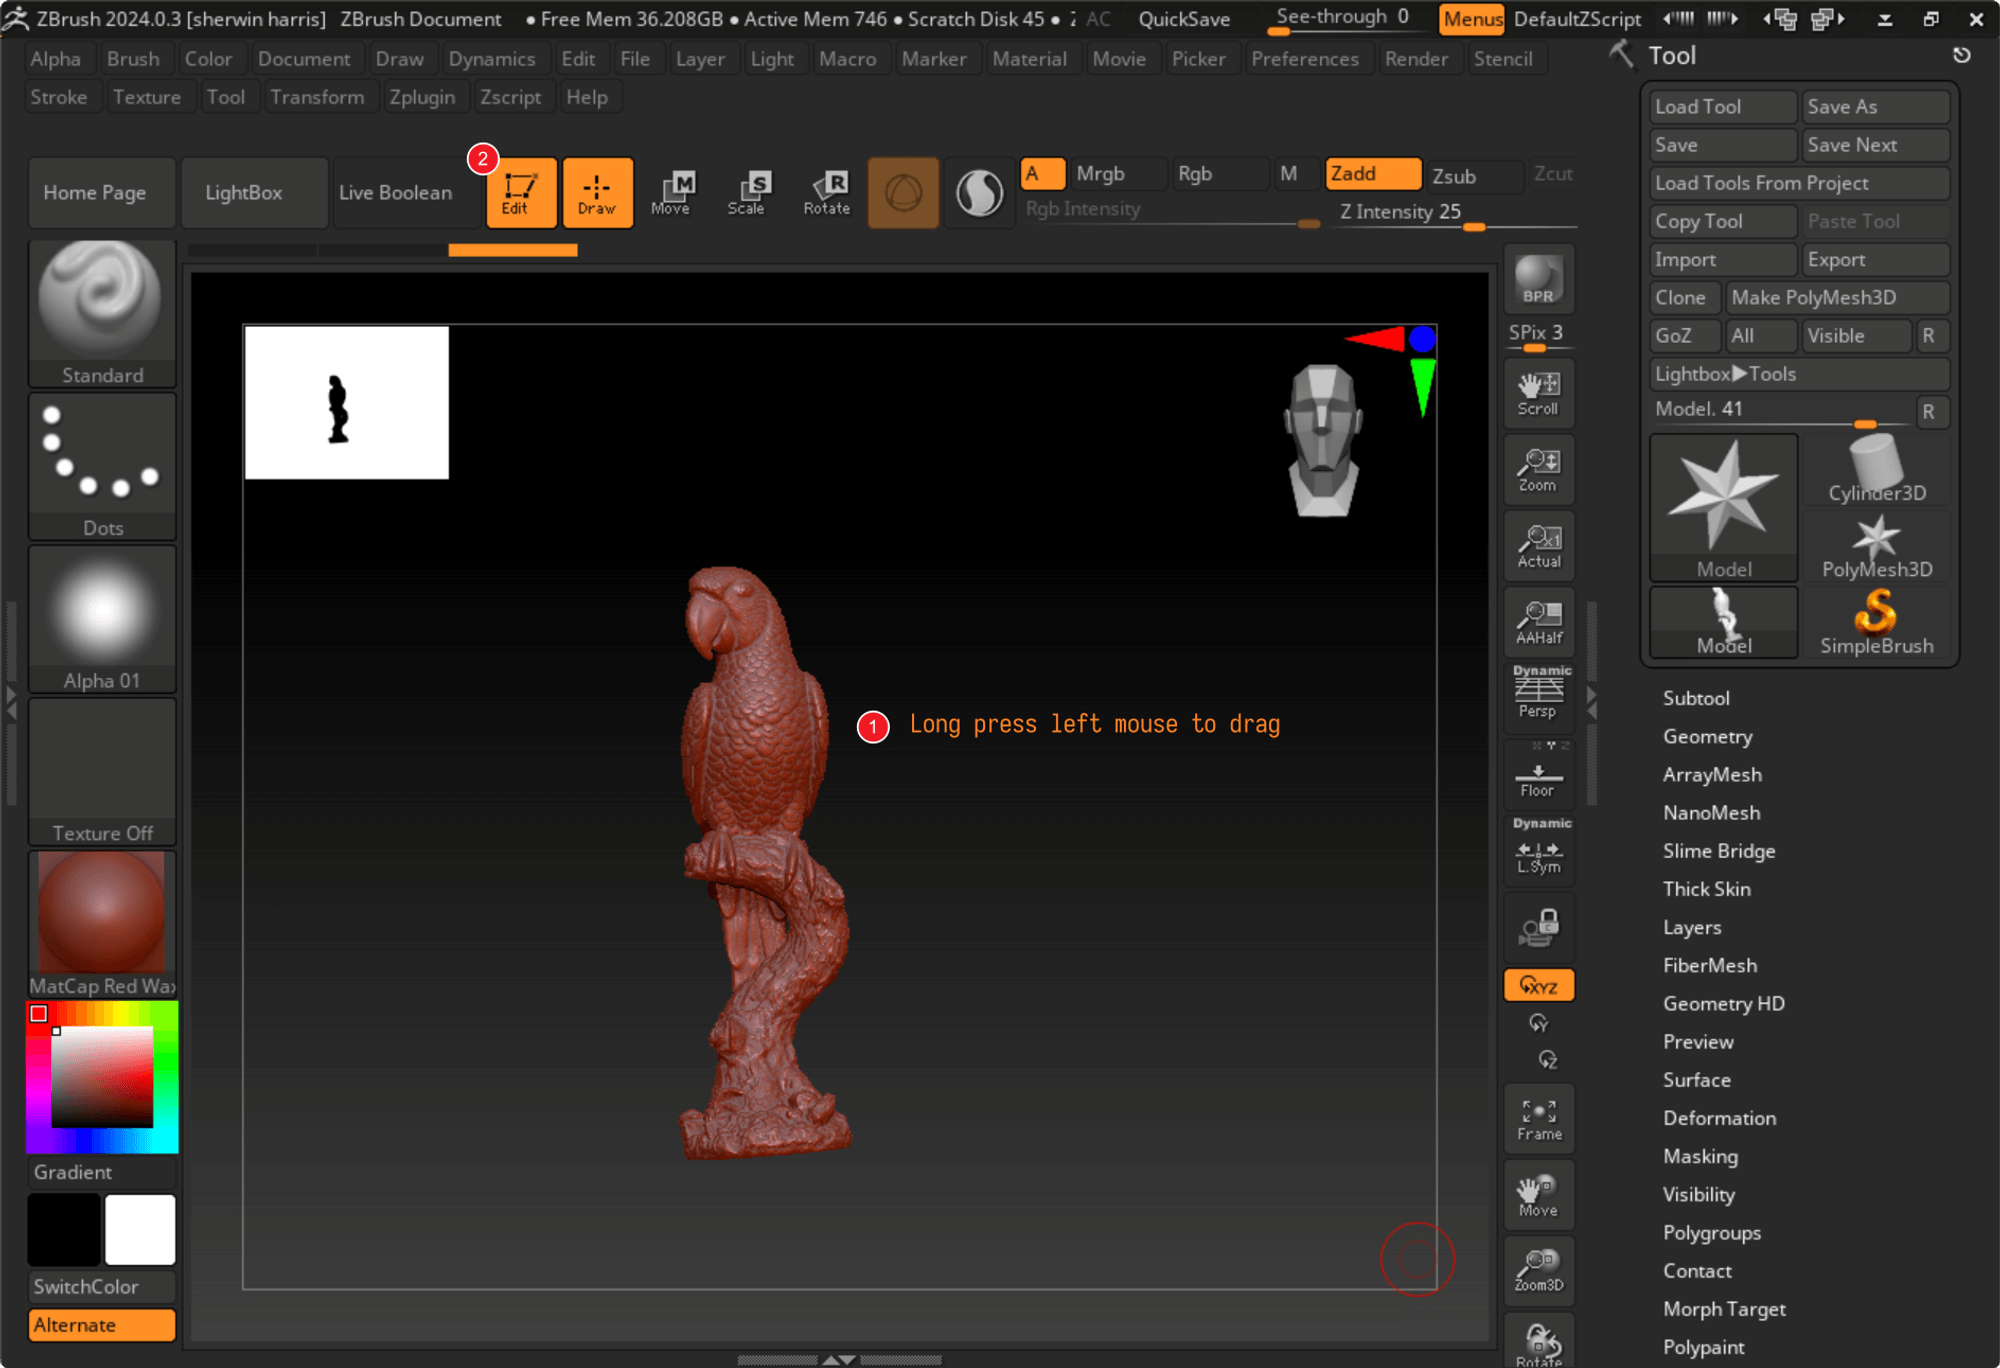
  • b. Left-click and drag the 3D model within the view window. Afterward, click Edit, and you can rotate the model using the right mouse button.
Importing Models into ZBrush-b
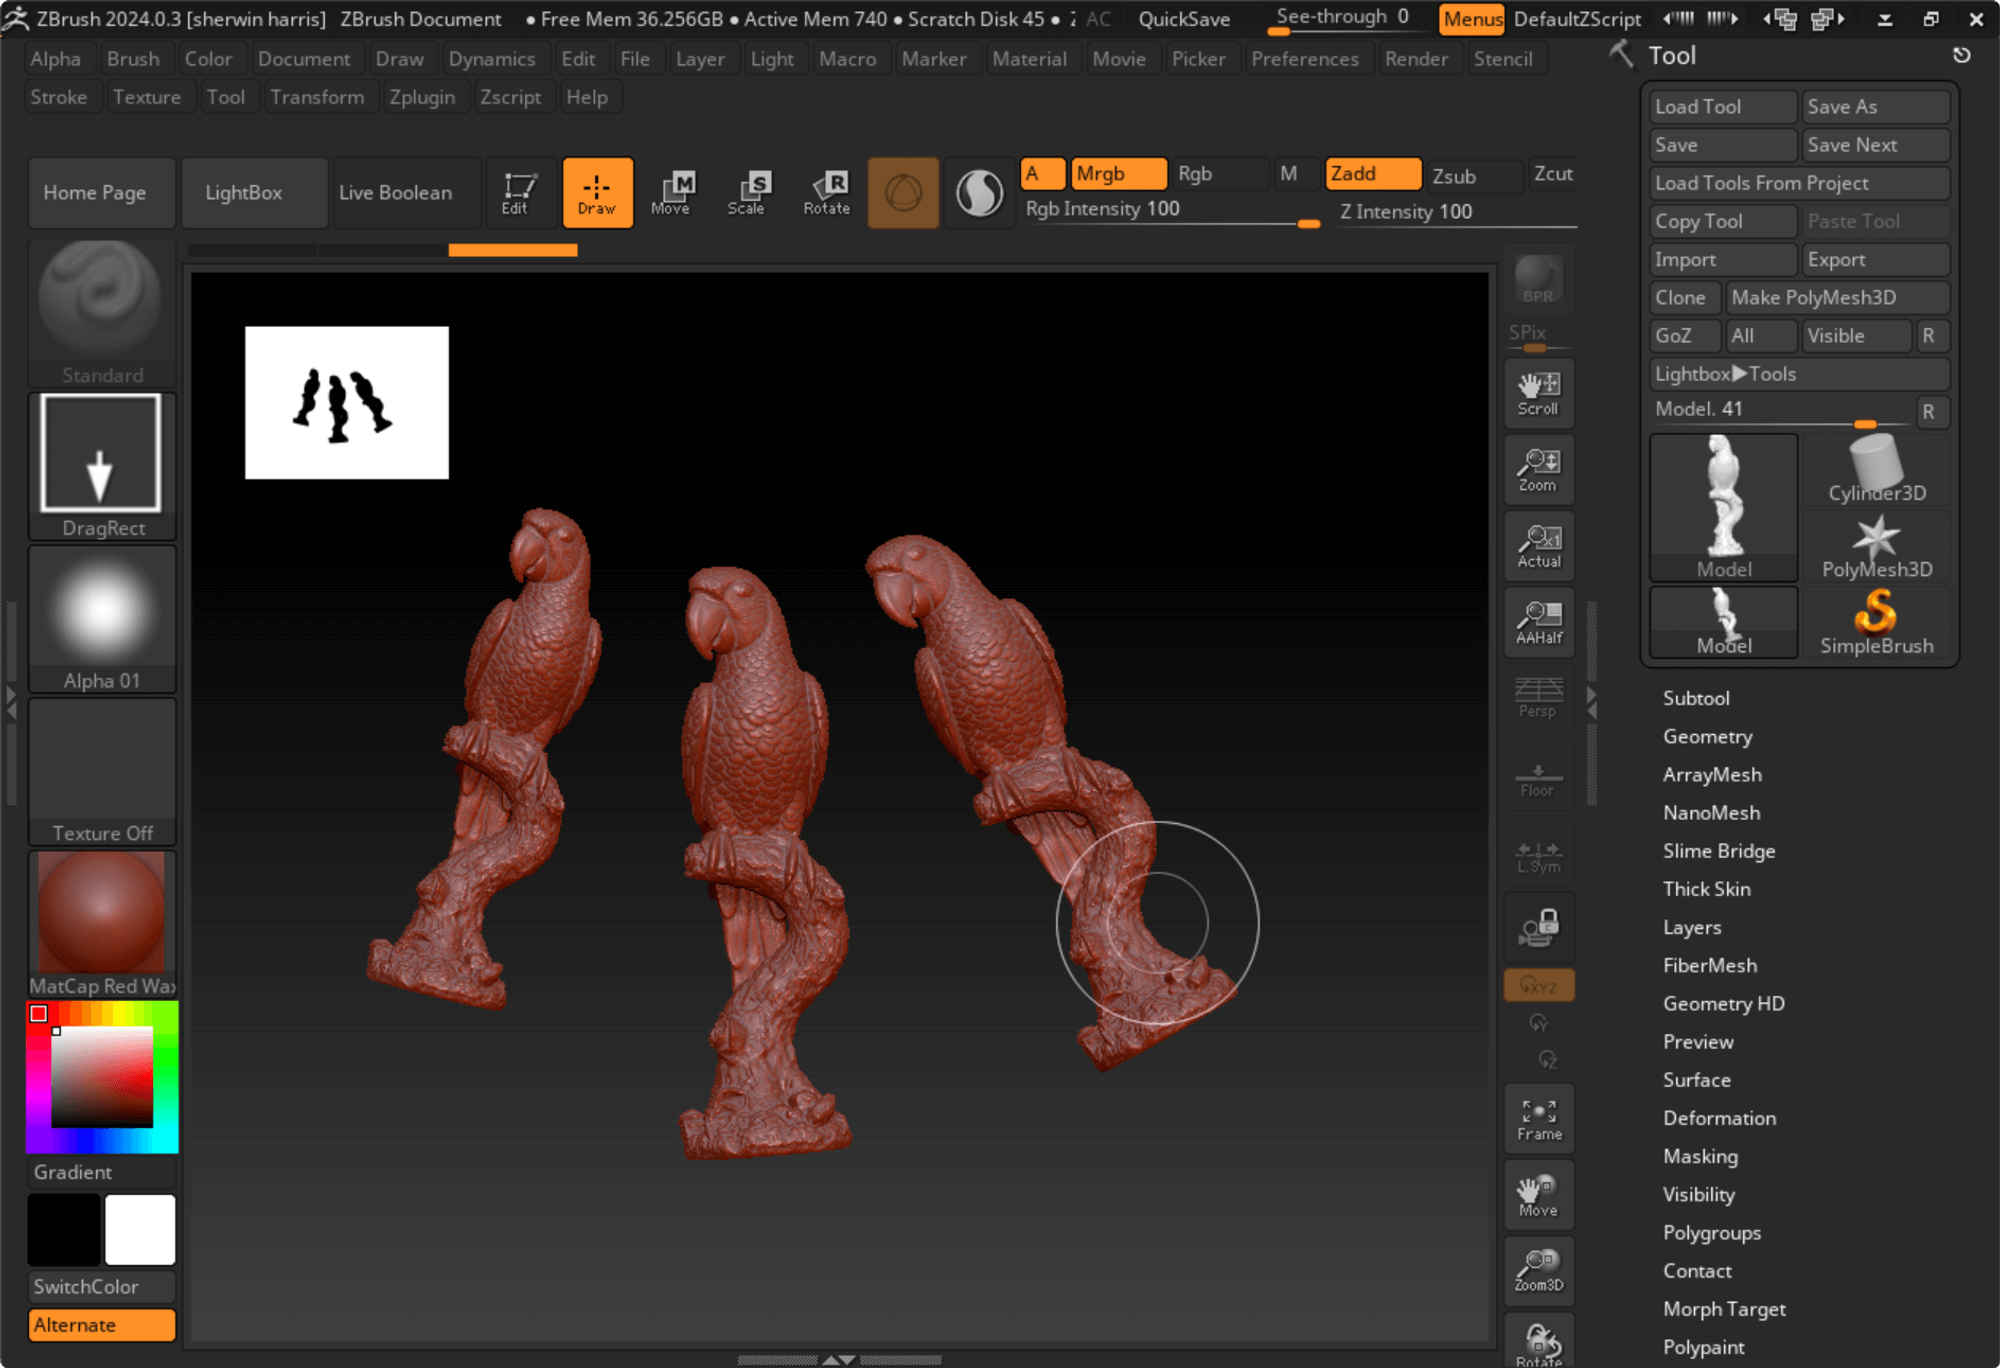
  • c. If you accidentally drag out multiple models, press Ctrl + N to clear the interface first, and then proceed with the last step.
Importing Models into ZBrush-c
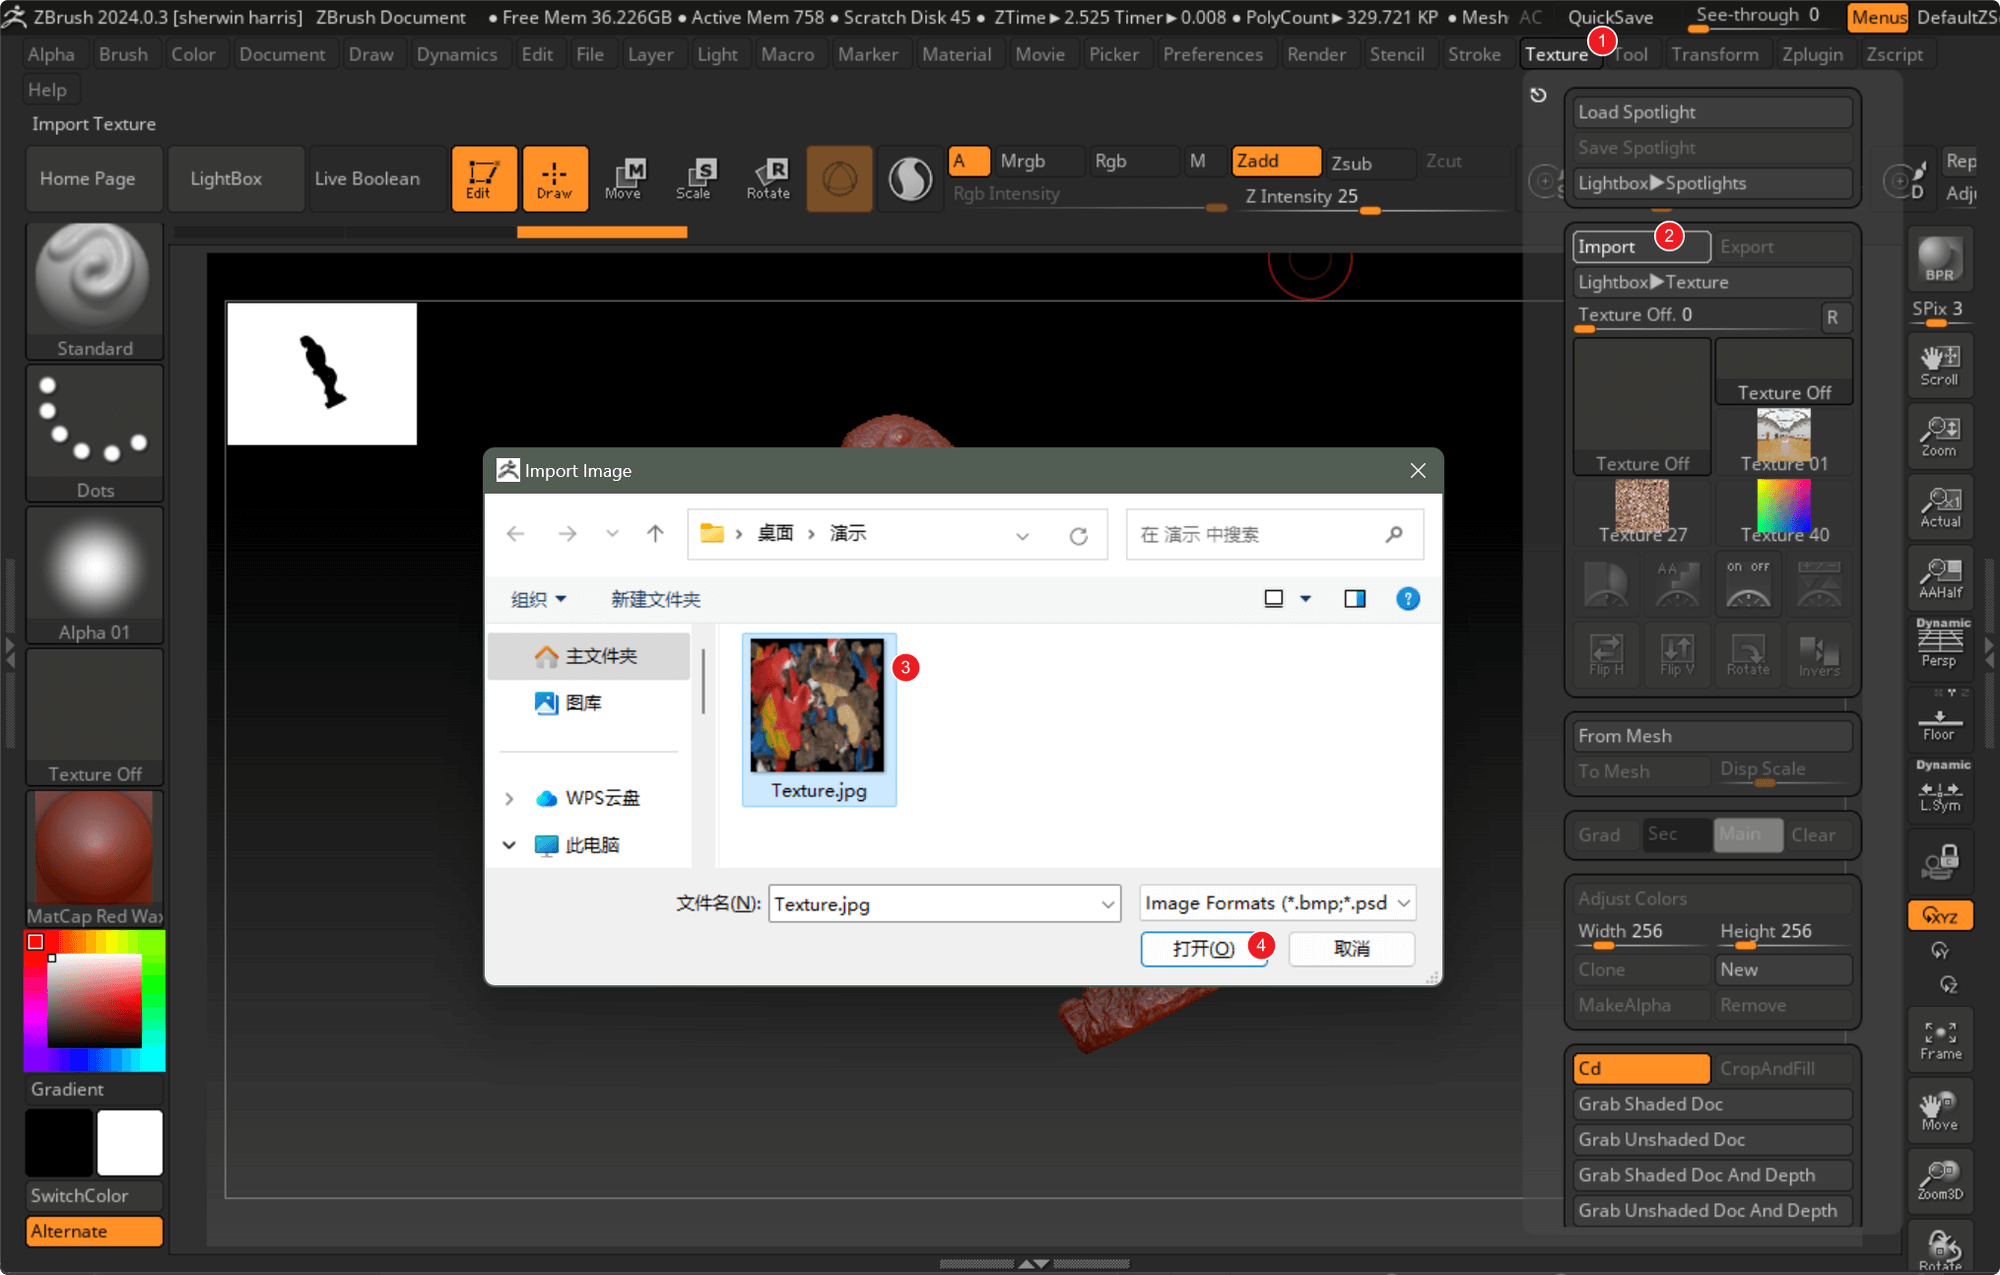
  • d. To import textures, navigate to Texture → Import, choose the .jpg texture file, and then click Open.
Importing Models into ZBrush-d
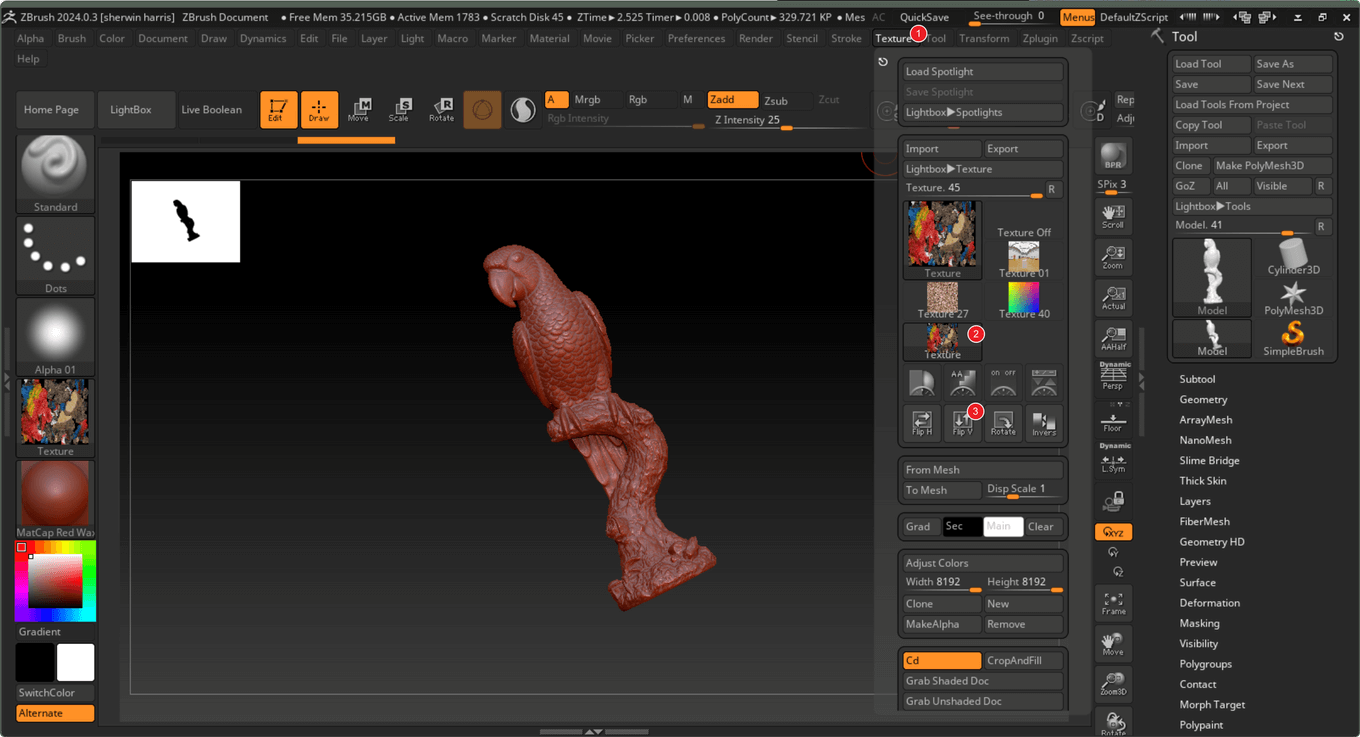
  • e. Click on Texture again, select the imported texture, and then click Flip.
Importing Models into ZBrush-e
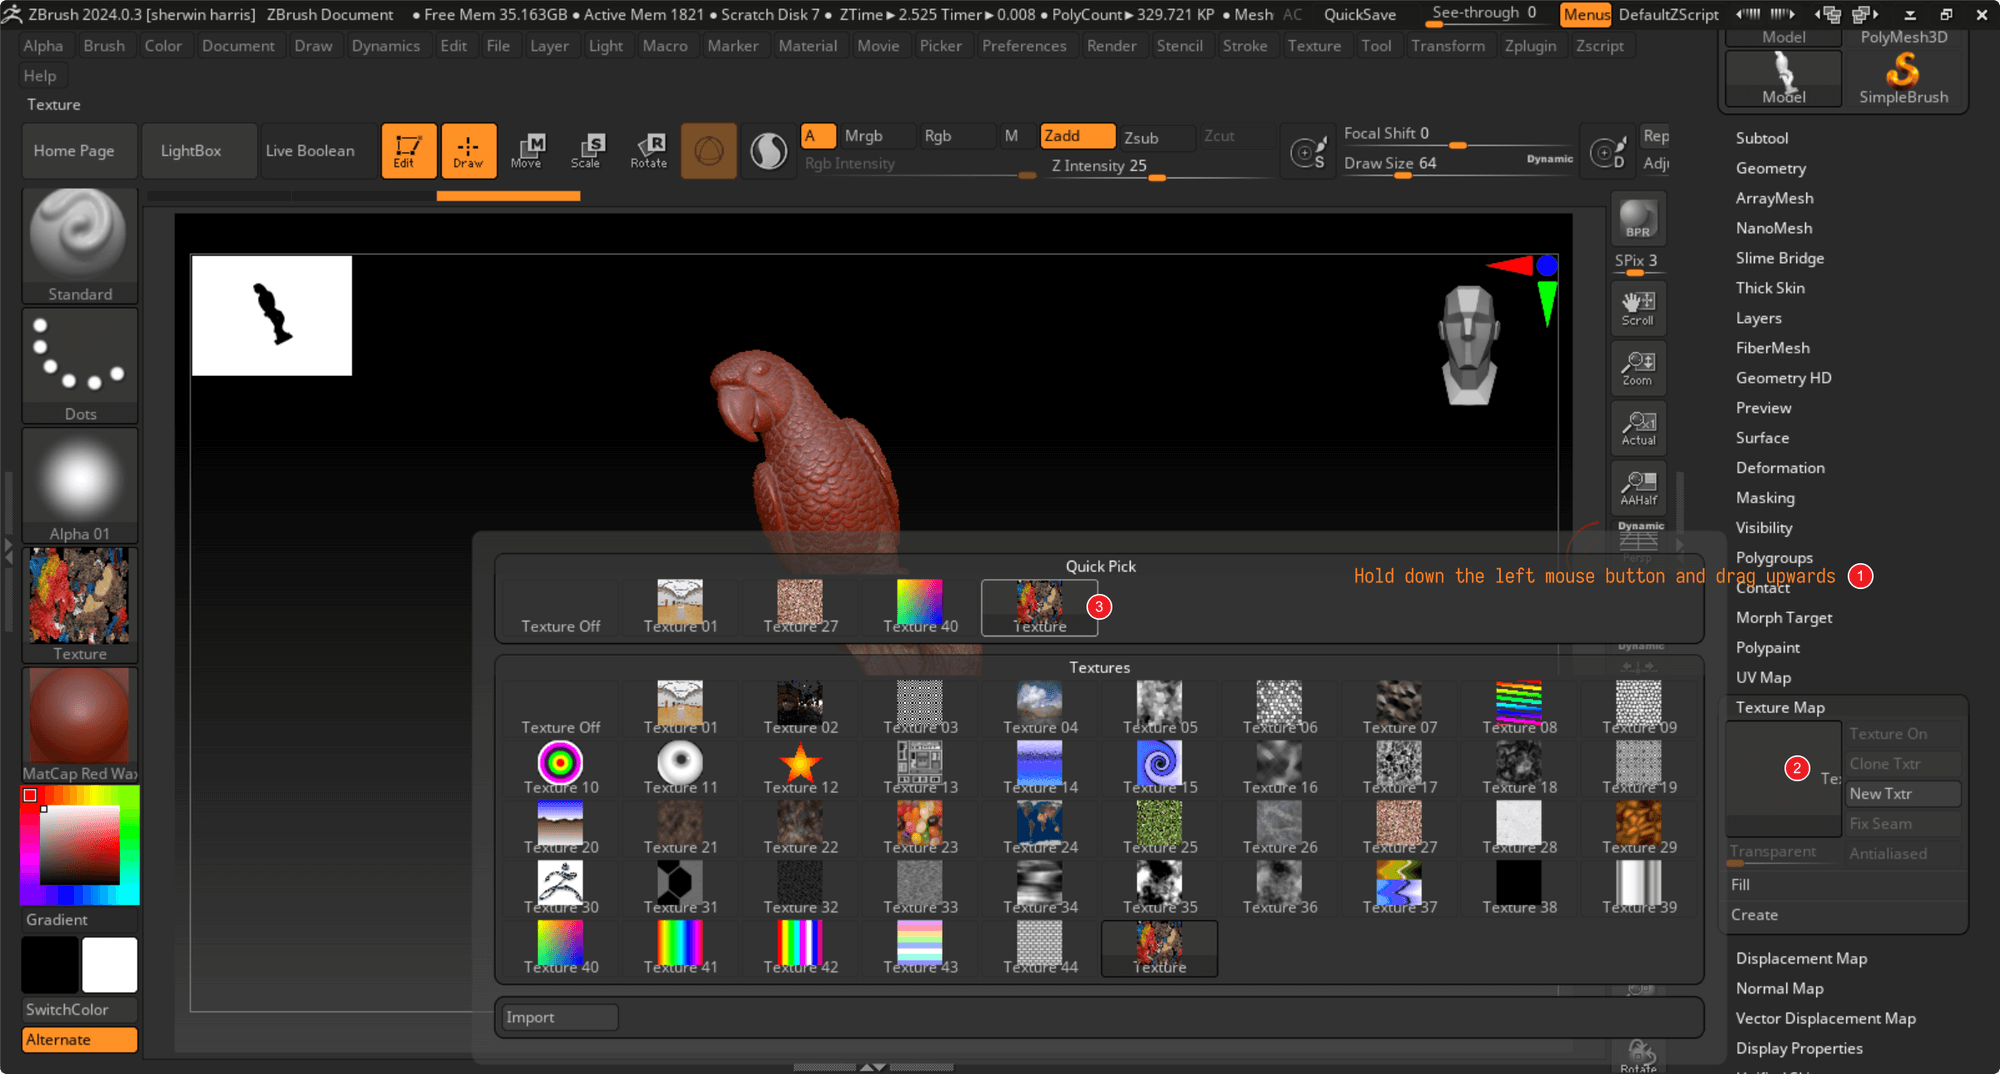
  • f. Next, move the mouse to the blank space on the right until it transforms into an arrow symbol (‘‘), then hold down the left button and drag upwards. Click on Texture Map → Preview Flipped image. Now, the model has color, but it may appear unusual.
Importing Models into ZBrush-f
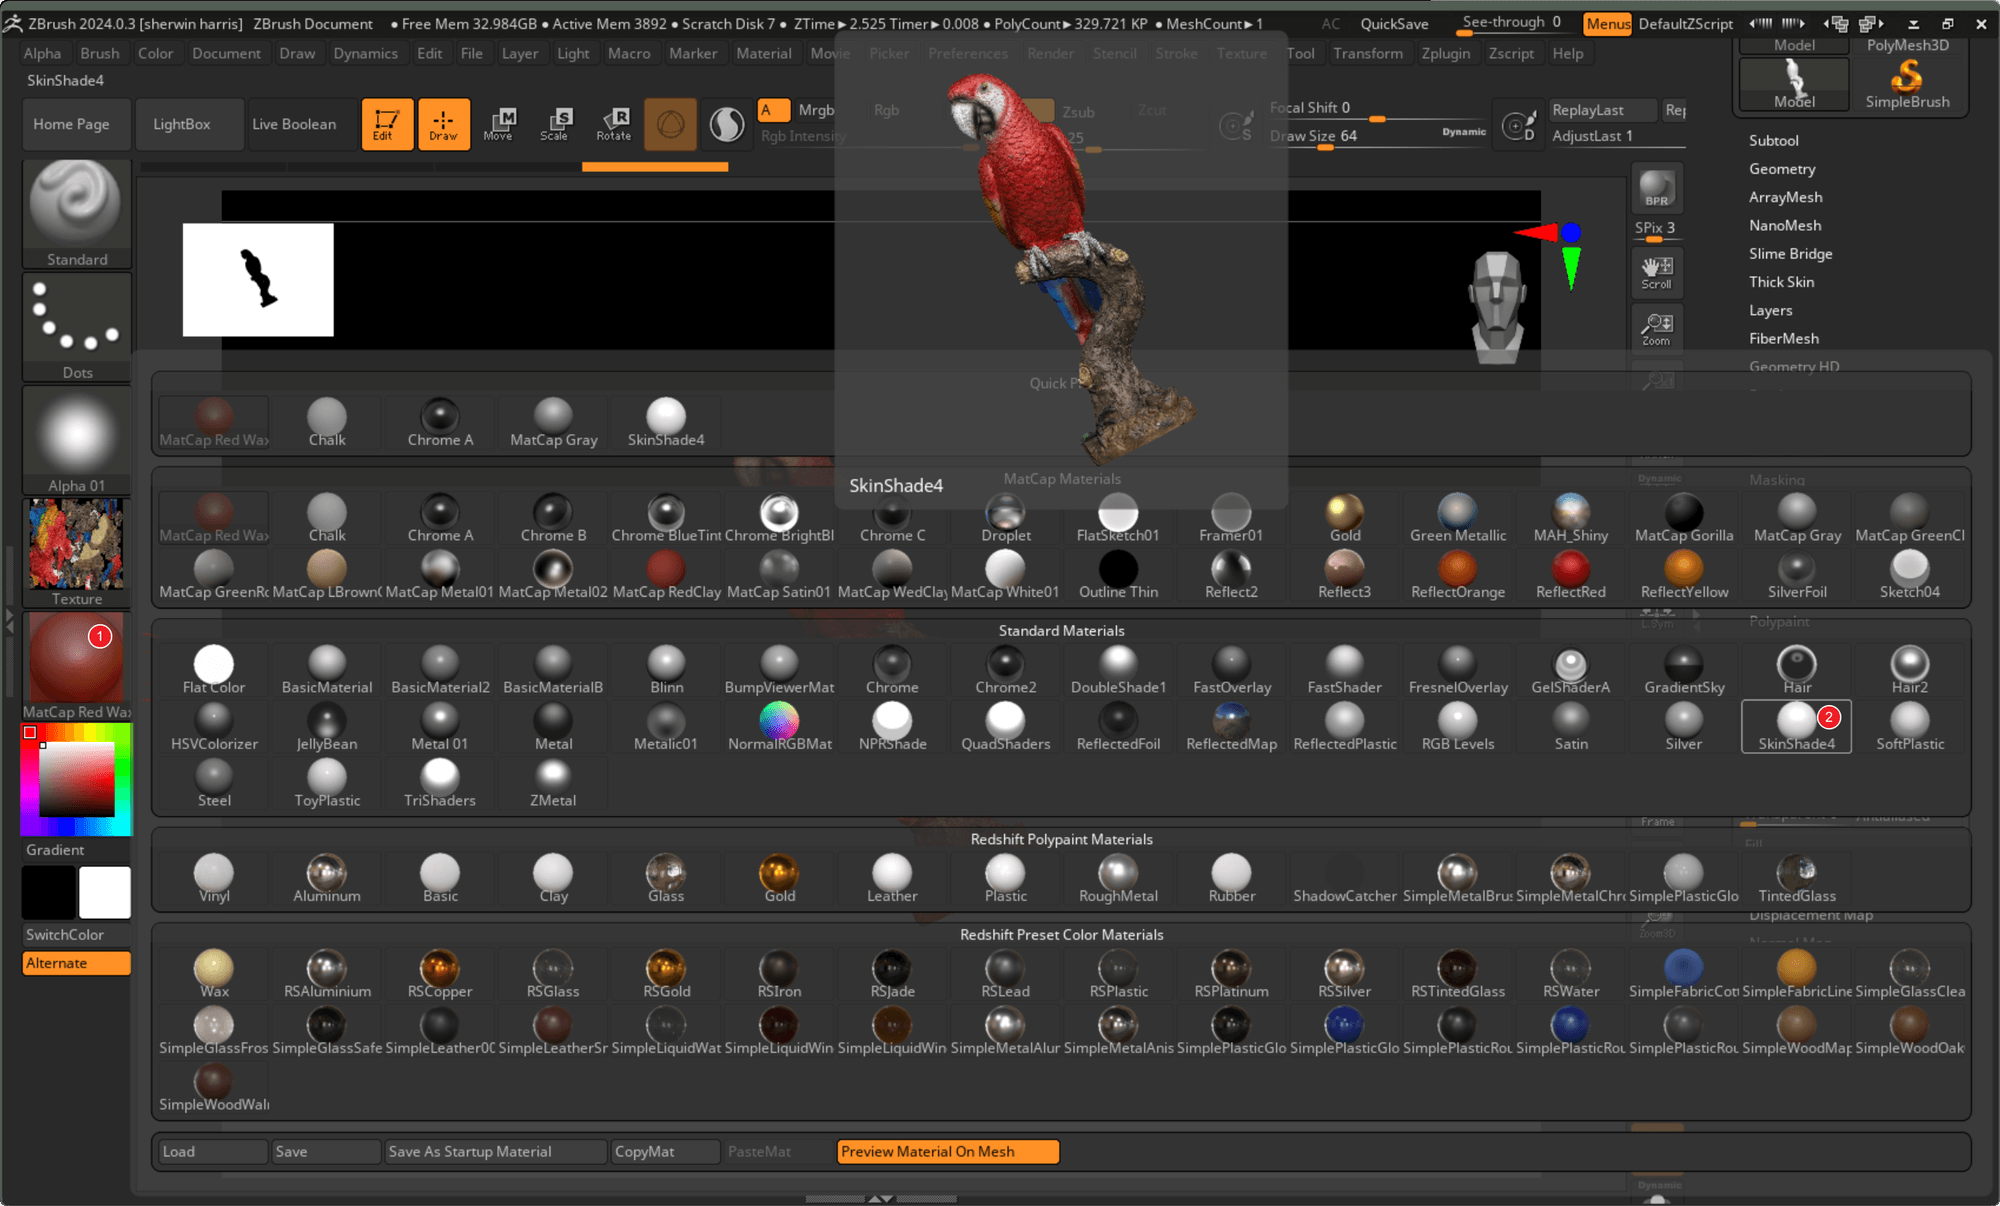
  • g. In the final step, select an appropriate MatCap to restore the texture color to its normal appearance.
Importing Models into ZBrush-g