How to Create Seamless Textures in Blender?
11/01/24
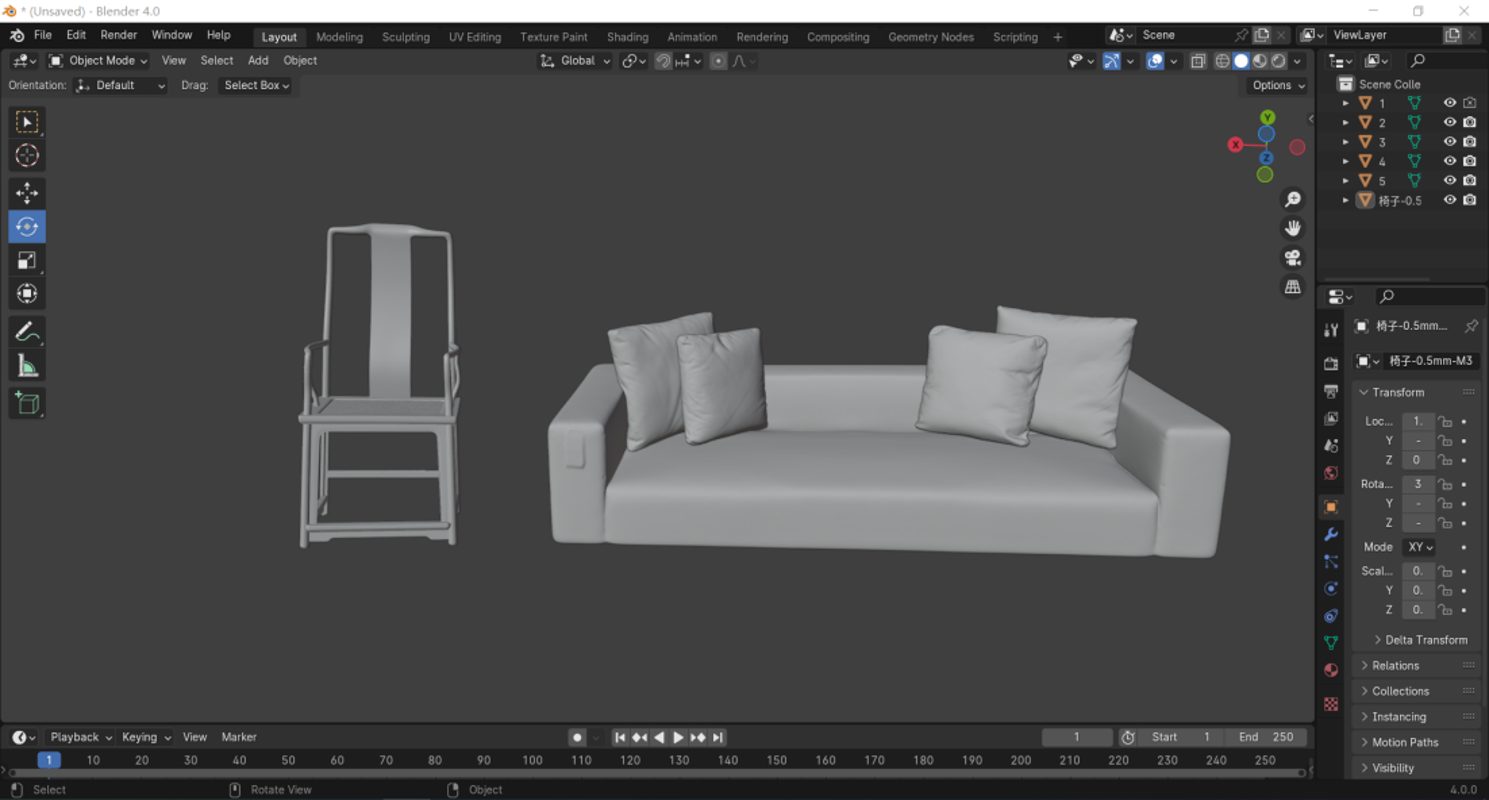
In the 3D scanning industry, seamless texturing plays an important role in areas such as displaying furniture and art work, reconstructing high-quality textured models, creating material libraries for scanned objects, and digital preservation and restoration of artifacts.
Blender, as a powerful open-source 3D creation software, offers a comprehensive set of tools that allow textures to be applied seamlessly and naturally to the surfaces of 3D scanned models, enhancing the visual realism. Below are some efficient steps and professional tips for processing seamless textures in Blender:
Ⅰ. Data Preparation
Use the 3DeVOK scanner to obtain the STL model. The scanned data should undergo a basic post-processing, such as data cleaning, simplification, and hole filling, to facilitate the subsequent application of seamless textures.
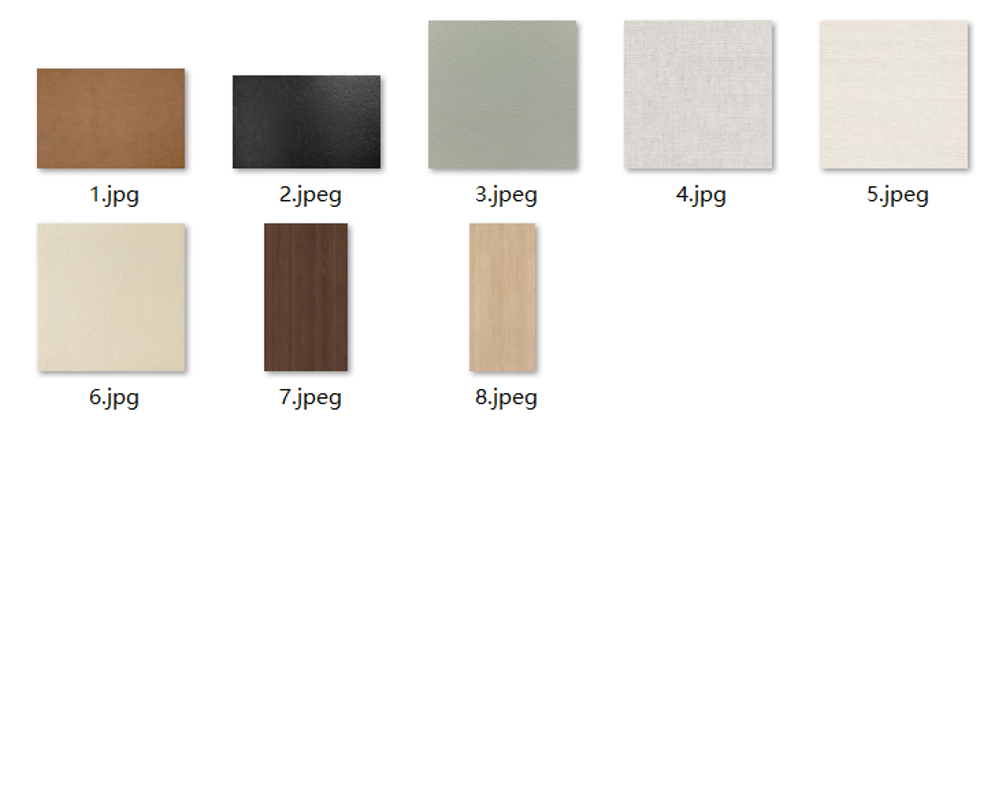
The seamless texture images must have precise alignment at the top, bottom, left, and right edges to ensure color and texture continuity. You can use external image editing software (such as Photoshop or GIMP) to create seamless textures or utilize online seamless texture resources.
II. Import into Blender
a. Open Blender: In this example, the latest version, Blender 4.0 is used for demonstration. The operations are not significantly different from other versions.
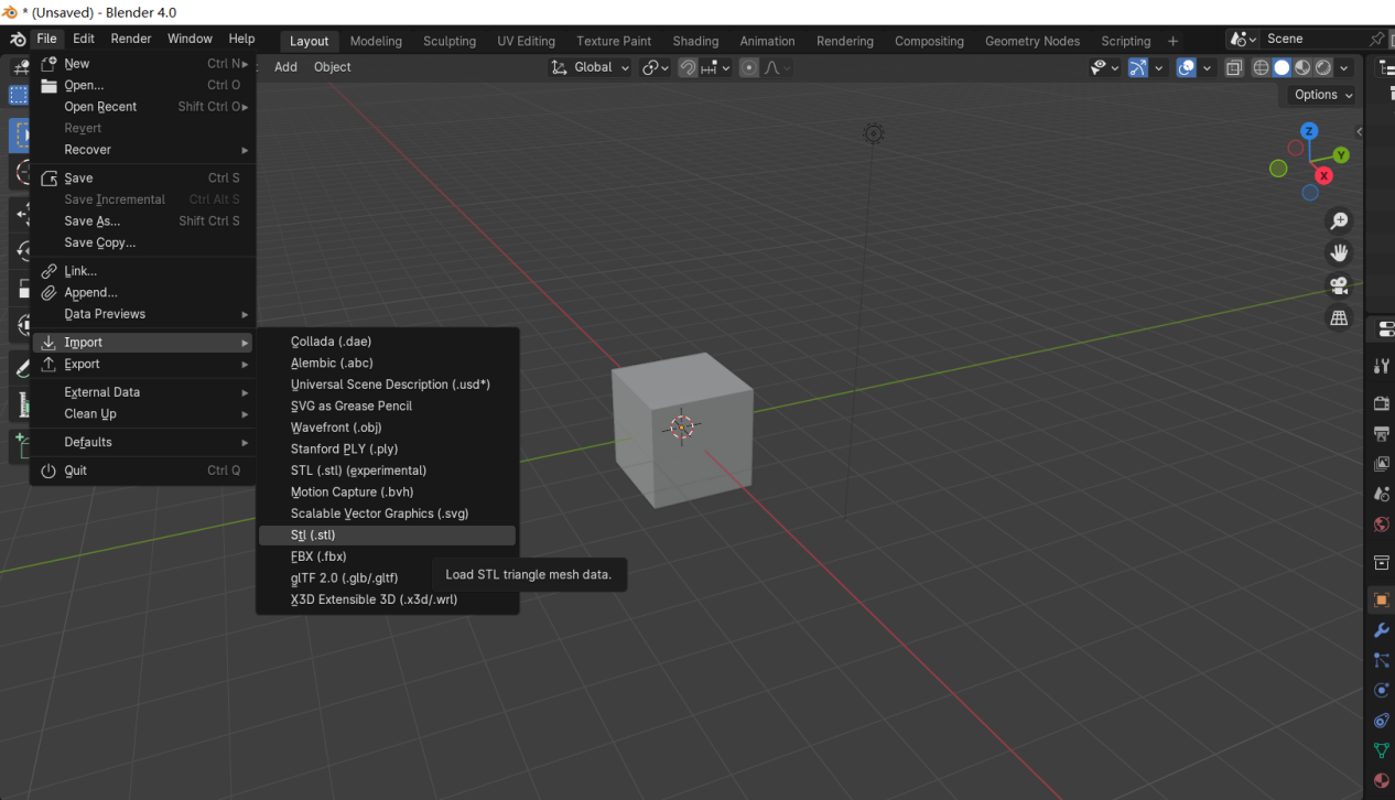
b. Prepare for Import: Since Blender does not support drag-and-drop file import, you need to use the menu: File →Import → STL.
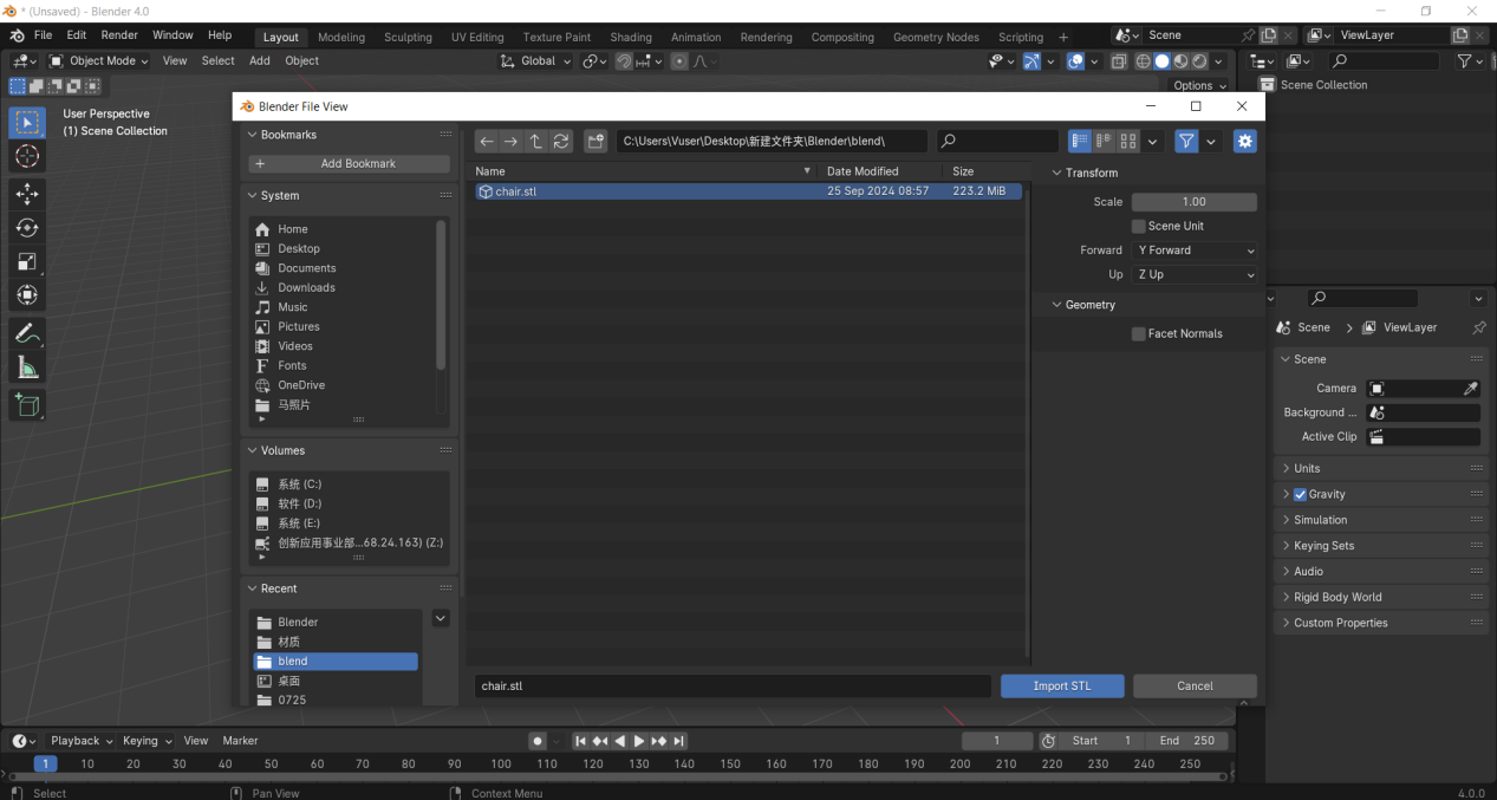
c. Select and Import the File: In the import interface, locate and select the required .stl file to import it.
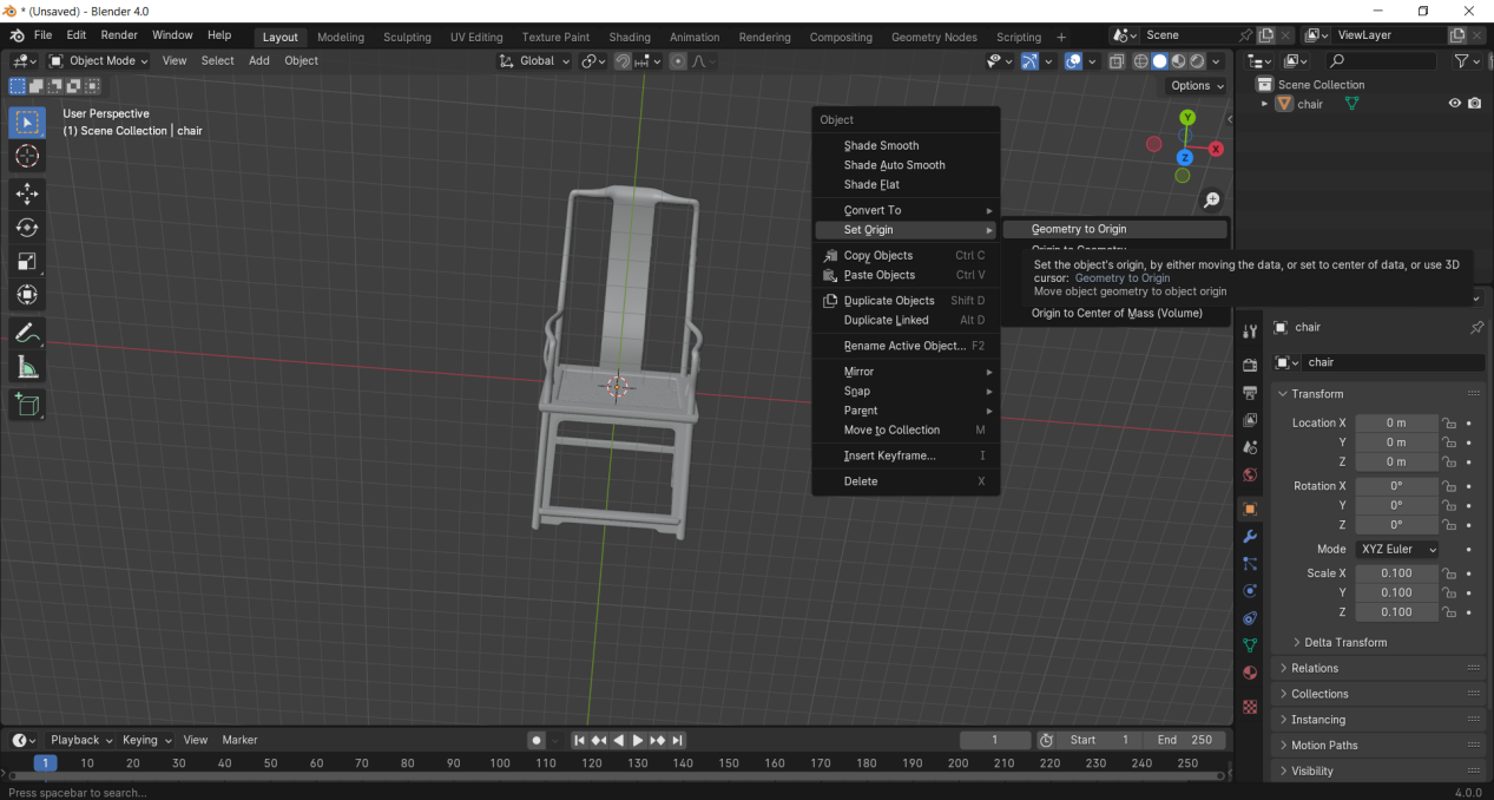
d. Adjust Model Position: If the model is not visible due to coordinate system offset, select the model in the right outline view, then right-click in the 3D view and choose Set Origin → Geometry to Origin. This will quickly center the model in the viewport.
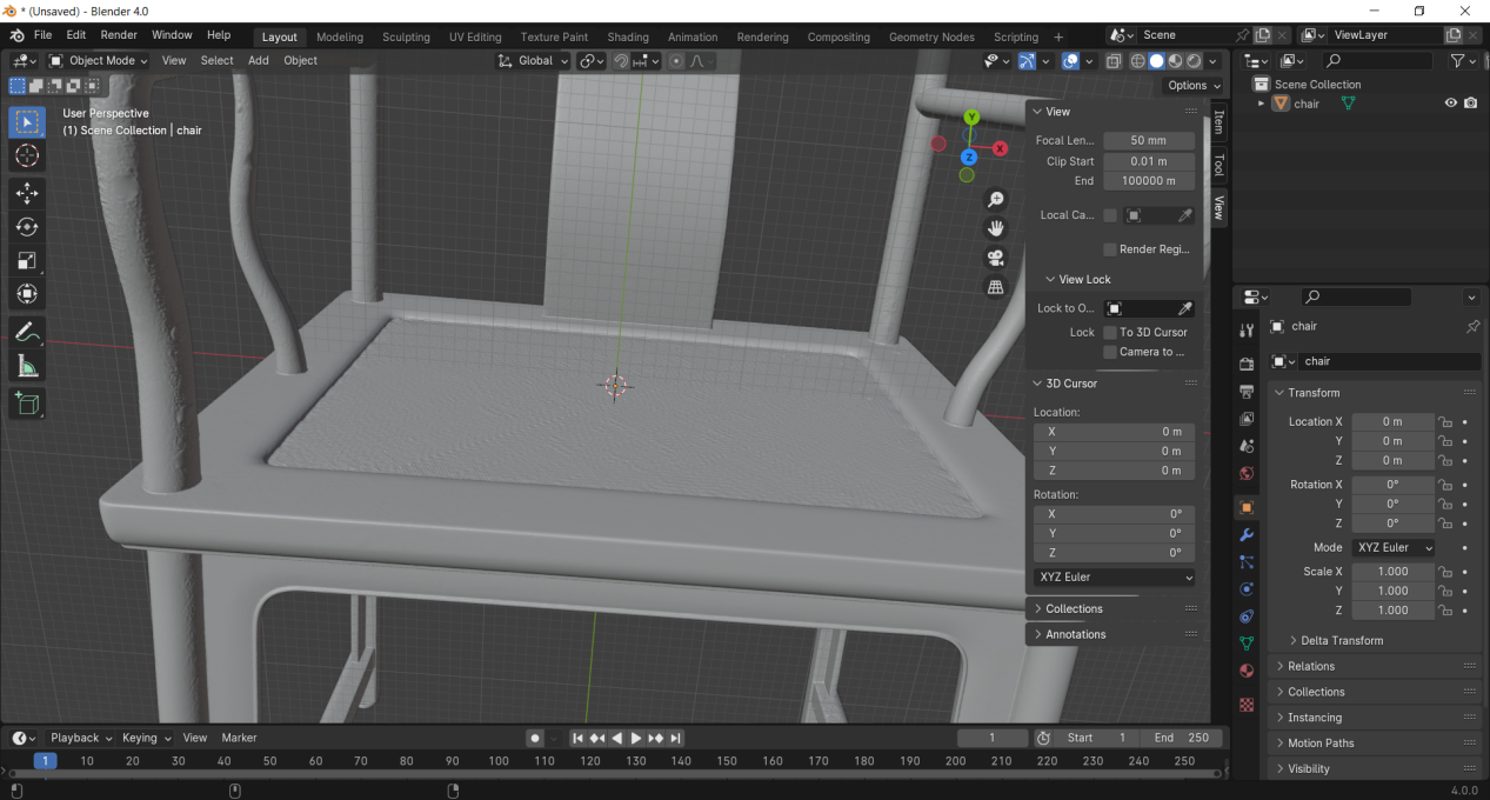
e. Adjust View Display Range: Since the scanned model may be large, if it’s not fully displayed, press the N key to open the sidebar. In the view settings, set the clip start to 0.1 and the clip end to 100000 to display the entire model.
III. Automatic UV Unwrapping
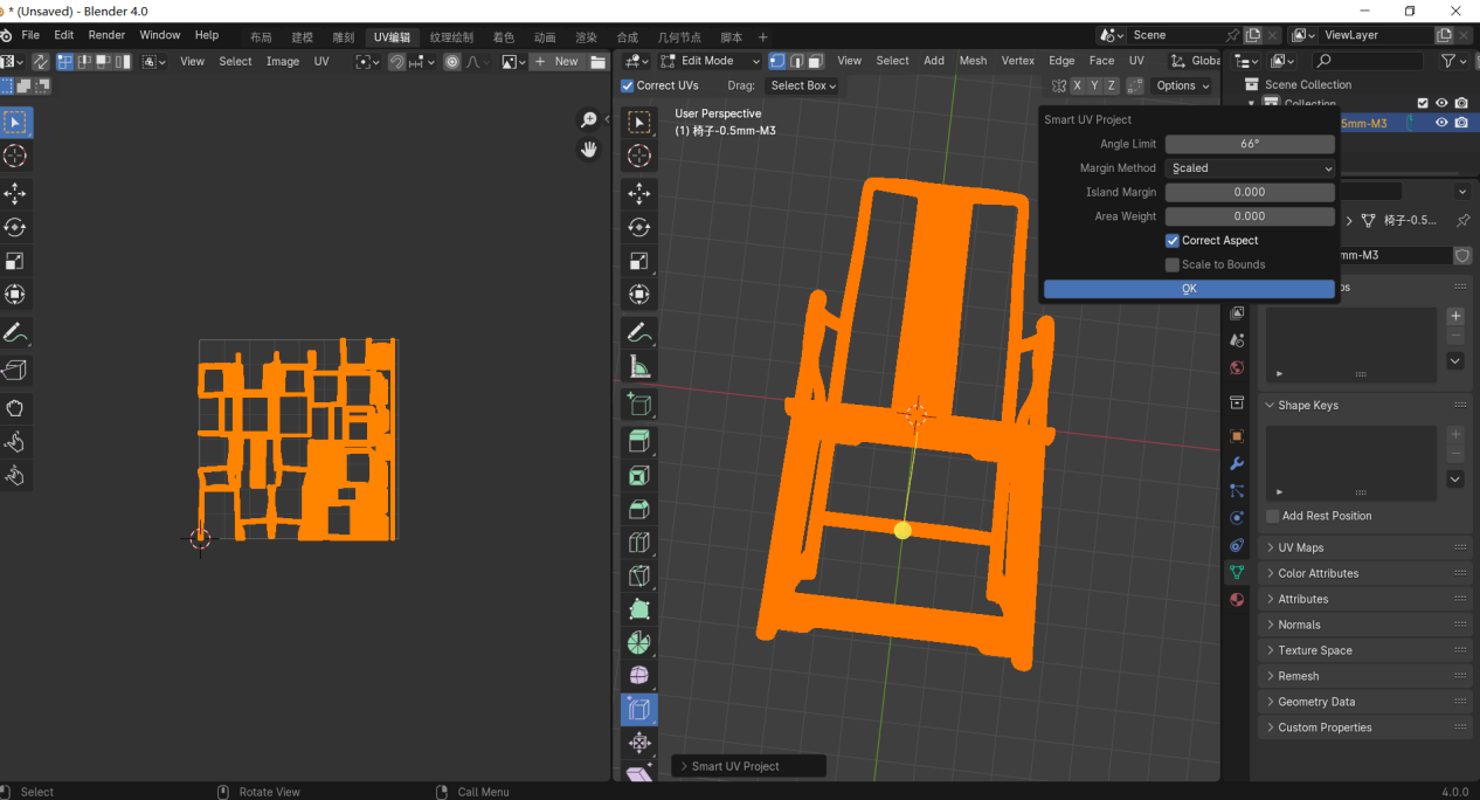
Enter UV Editing mode – Press the A key to select the entire model. The selected part will turn orange. Choose Smart UV Project and adjust the angle limit as needed. The smaller the angle, the more UV cuts will be made, which is suitable for complex models.
IV. Import Textures
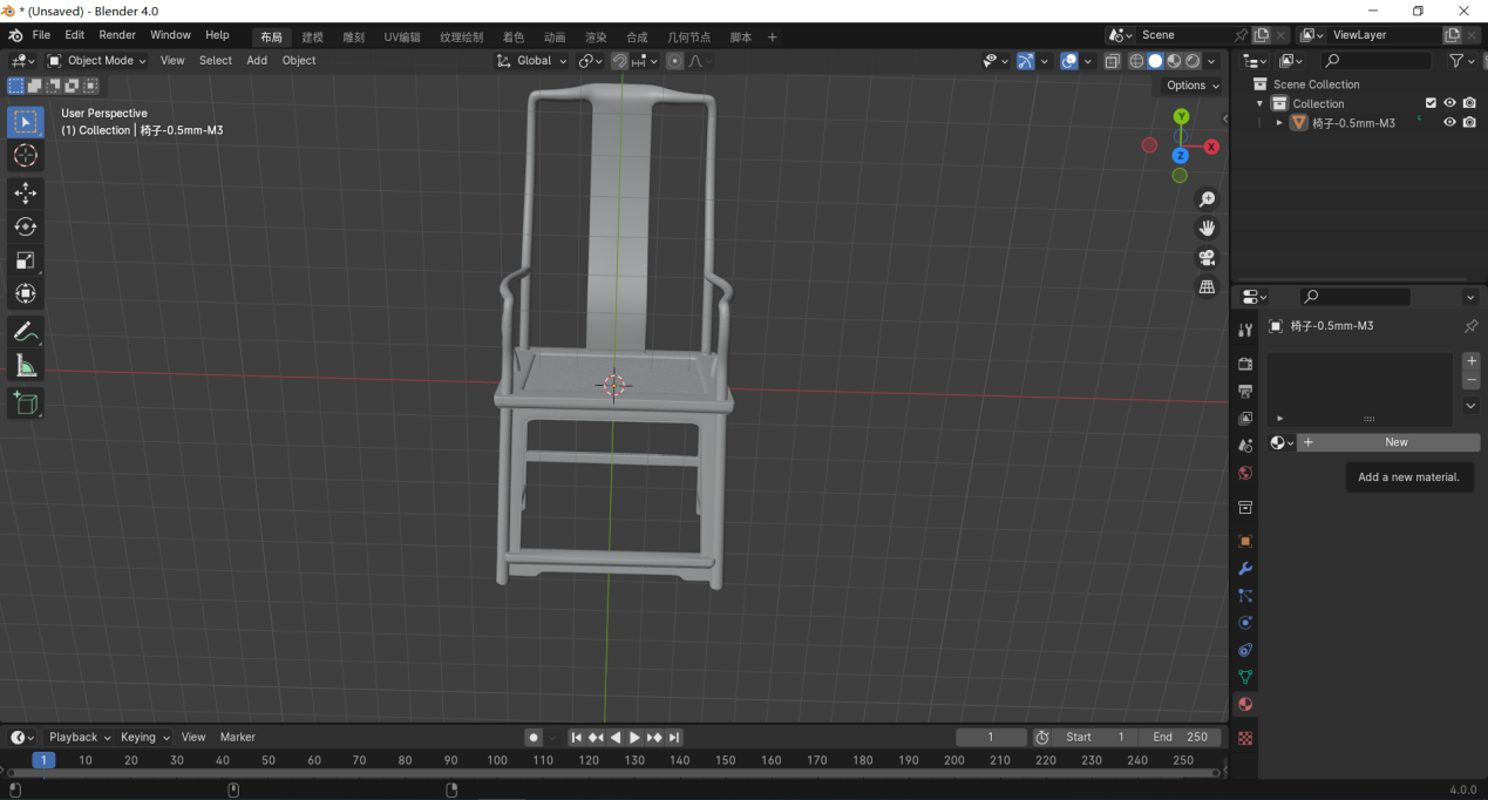
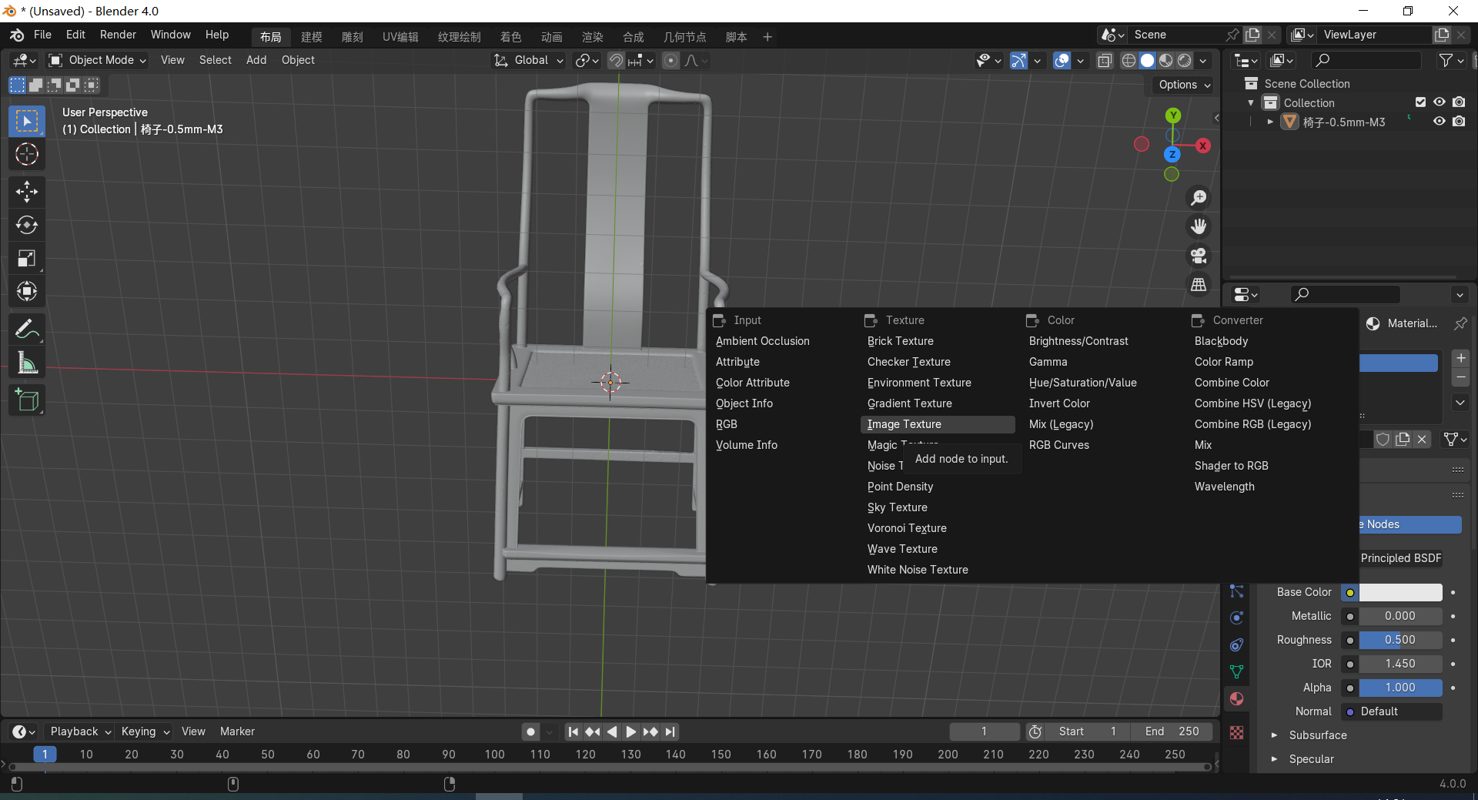
a. Return to the Layout workspace → Click the yellow dot next to Base Color → Select Image Texture → Import the downloaded texture.
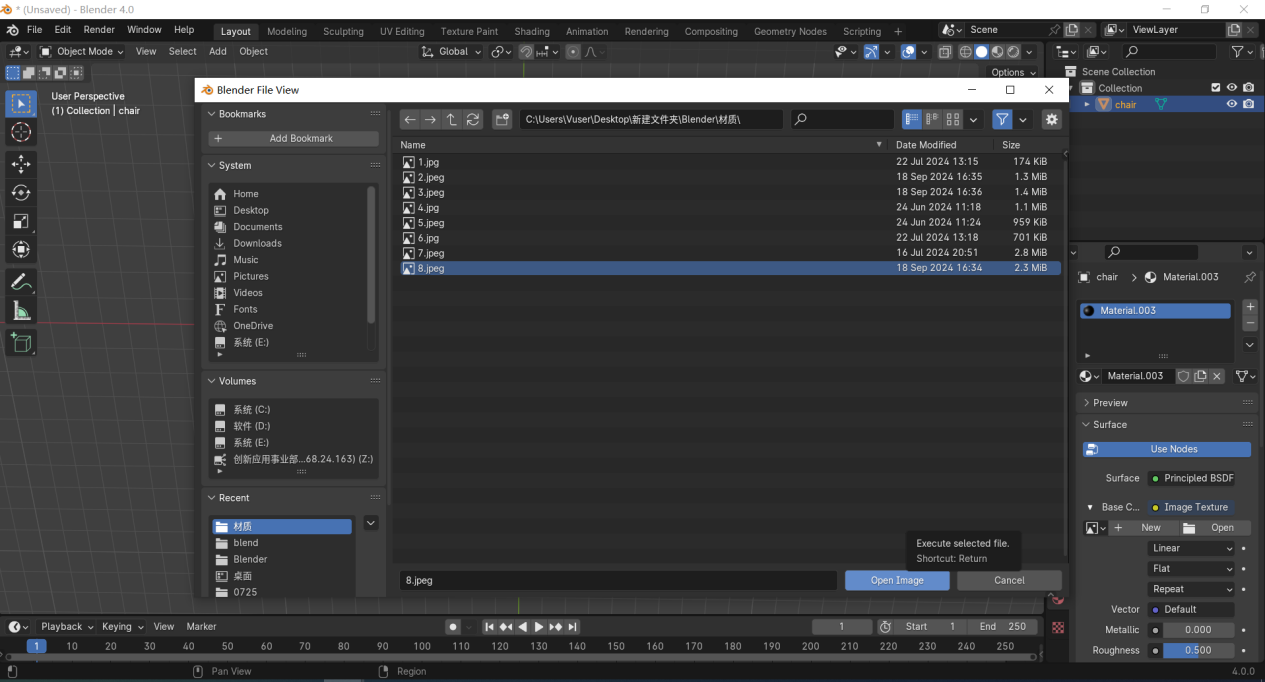
b.Click Open → Select the desired texture → Open Image.
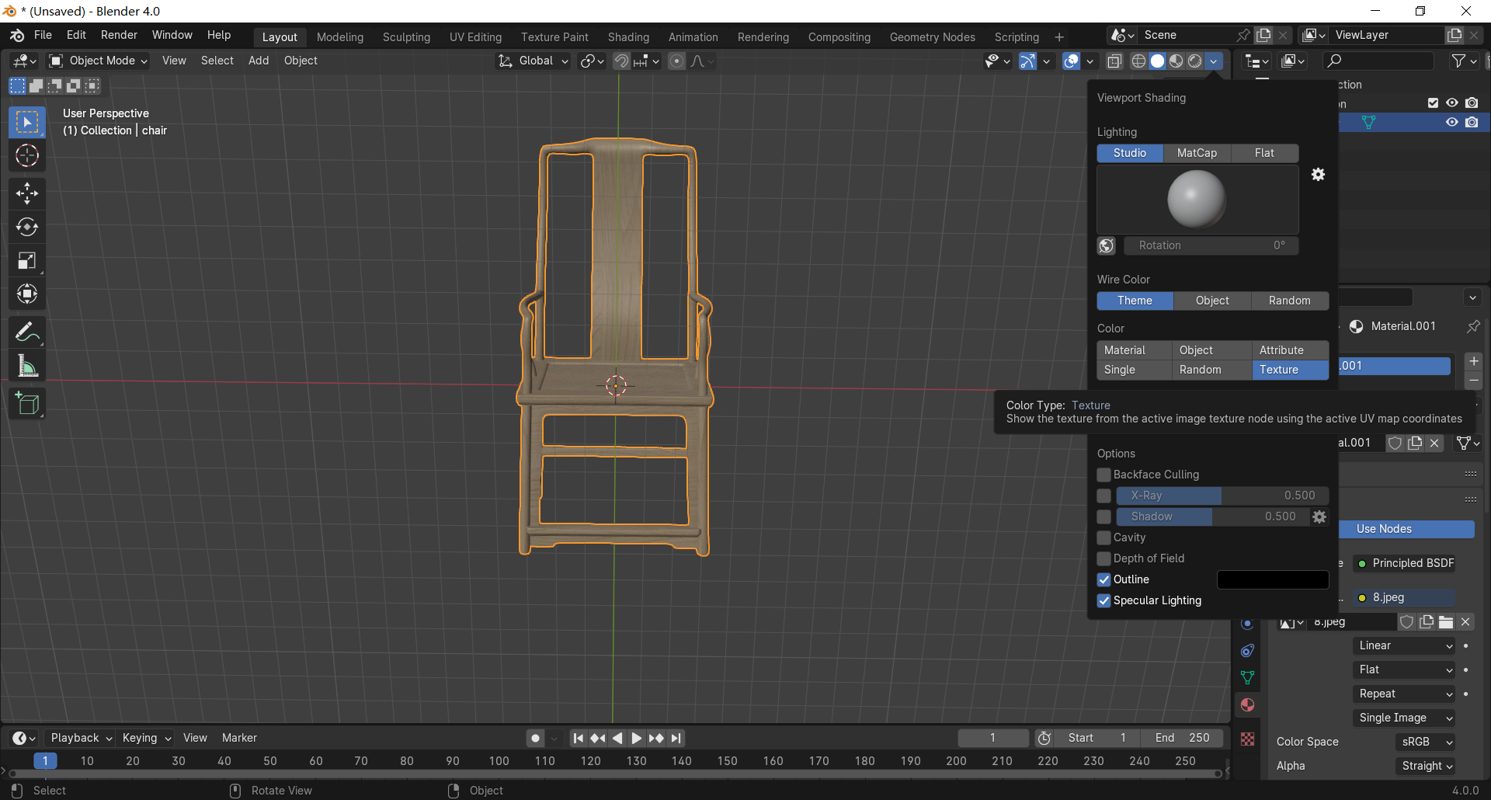
c.Click on the viewport shading mode → Check the Texture in the Color module to view the texture.
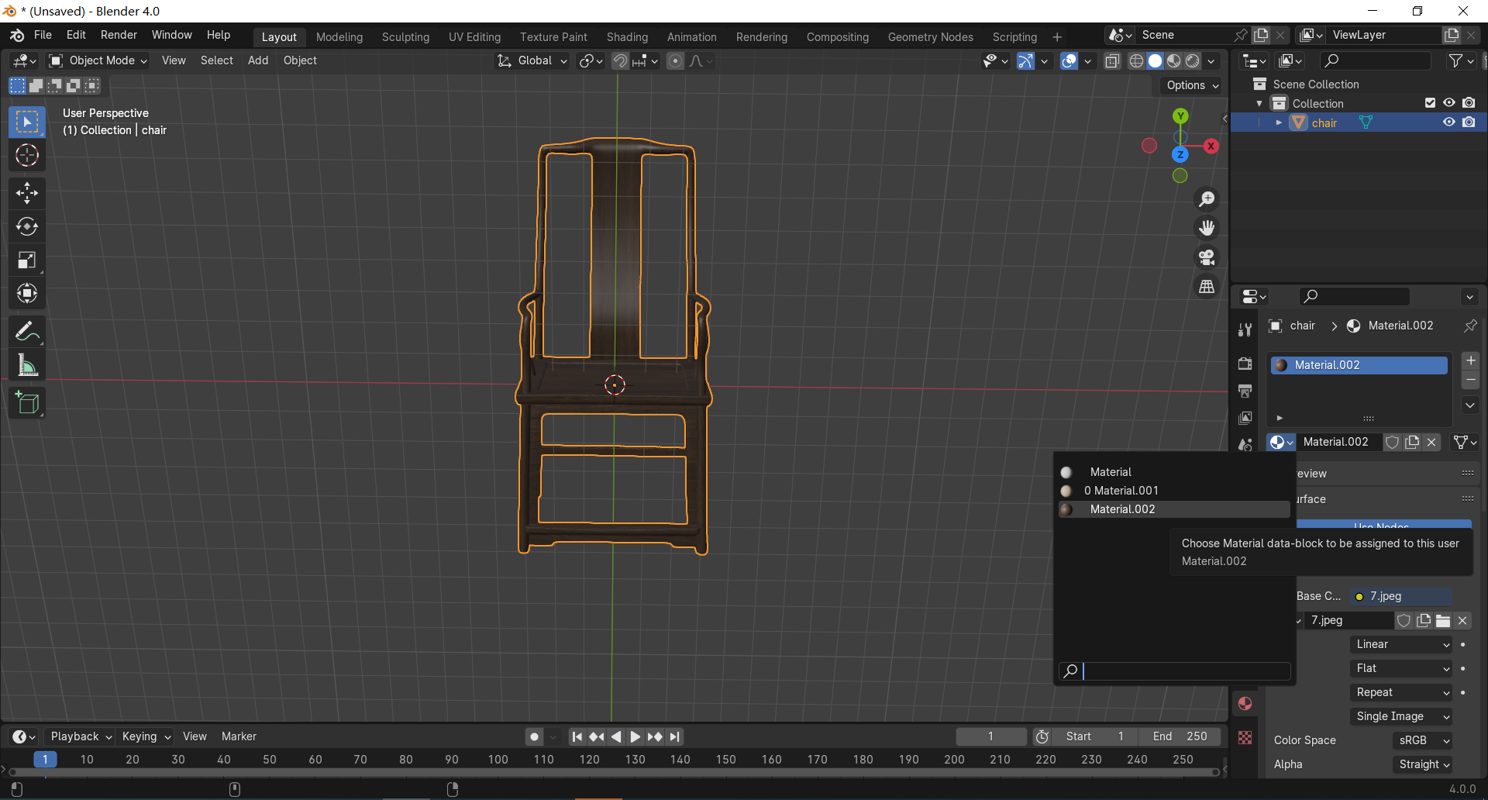
d.Follow the above steps to import the second texture→you can change the textures here, and the seamless texture is complete.
Related Articles
View Our Product


