Complete Guide to 3D Scanning Soft Objects: How to Accurately Scan Shoes and Obtain High-Precision 3D Models
05/07/26
When scanning soft objects with a 3D scanner, the process is often technically challenging. Shoes, in particular, have complex shapes, mixed materials, and are soft enough to deform easily. These features make it difficult to capture fine surface details and textures during scanning. Choosing the right scanning technique is therefore essential to obtaining high-quality 3D data. This article breaks down the key difficulties and techniques involved in 3D shoe scanning and shows how the 3DeVOK MT professional 3D scanner can help you easily create lifelike 3D digital models.
Three Core Challenges in 3D Shoe Scanning
Complex Surface Geometry, Prone to Dead Angles
The shape and structure of shoes are complex, especially sports shoes and boots, which have many details, holes, and occluded areas. Tread patterns, transitions between different materials on the upper, shoelaces, and eyelets can easily create blind spots, leading to incomplete 3D data capture.
Diverse Materials with Varying Reflectivity
Shoes are often made from a combination of materials like leather, fabric, rubber, and TPU. These materials have different reflectivity, transparency, and texture characteristics. The optical reflection properties vary significantly. Some materials (such as glossy leather or reflective strips) can cause reflections, leading to missing scan data.
Soft Uppers Prone to Deformation, Affecting Data Accuracy
The shoe upper is typically curved and soft. During handheld 3D scanning, slight pressure or changes in positioning can cause minor deformation of the upper. This deformation of soft objects is a primary cause of misaligned scan layers and registration failure.
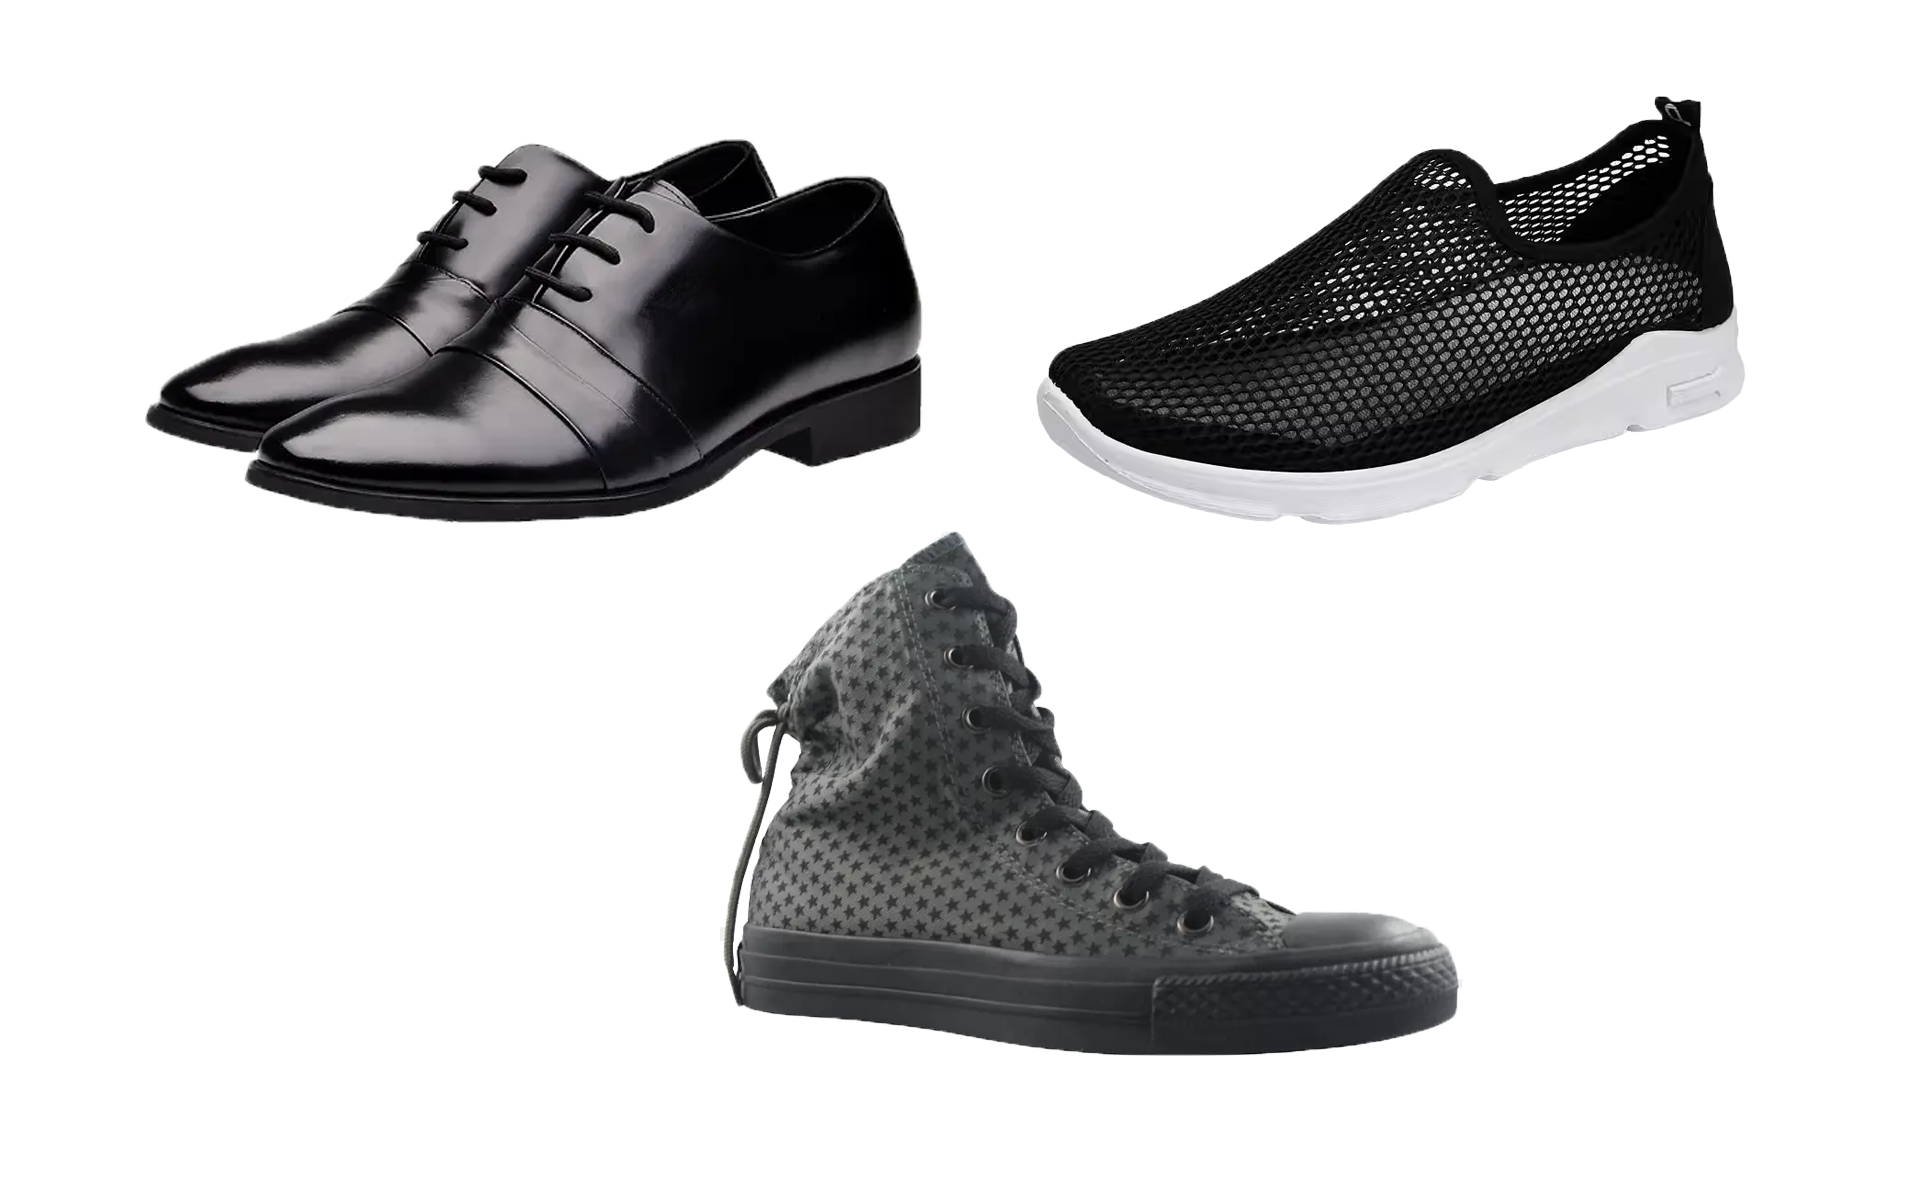 Figure 1: Challenges in Scanning Various Shoe Types
Preparations and Precautions for High-Precision Shoe Scanning
To ensure high-precision 3D data acquisition for shoes, pay close attention to the following:
Shoes often contain fine structures like laces, stitching, and logos, resulting in many blind spots. The scanning path should cover all detailed areas of the upper, ensuring the contours of the toe, heel, and collar are completely captured. Data for the sides of the shoe should also be as complete as possible.
Soft uppers (e.g., sports shoes, fabric shoes) are easily deformed by pressure during scanning and require special handling:
One-shot completion principle: Once a soft upper is deformed by pressure, it’s difficult to restore its original shape perfectly. Therefore, ensure data acquisition is completed in one go without squeezing the upper.
Lace handling: Untie the laces and tuck them inside the shoe before scanning to prevent them from creating noise or blocking key upper structures.
Internal support: For easily deformable soft uppers, fill the shoe with an appropriate amount of rigid filler (e.g., custom 3D-printed shoe tree, foam) before scanning to maintain its original 3D form. The filler should fit evenly against the inner wall of the upper to avoid local over-expansion and deformation.
The sole is usually rigid with complex anti-slip patterns and can be scanned separately. When scanning the sole, include the data of the sole’s side edges, as these will be used for registration.
Data Registration Principle: During post-processing, use the scan data of the rigid shoe side as a reference. Register the soft upper data to this reference to avoid registration errors caused by deformation of the soft parts.
Practical Operation: Complete 3D Shoe Scanning Workflow
Below, we demonstrate the complete shoe scanning process using the 3DeVOK MT scanner as an example.
Phase 1: Soft Upper Data Acquisition
Step 1: Upper Preprocessing and Support Filling
Tuck the shoelaces inside the shoe to avoid blocking the upper structure. For soft uppers, fill the shoe with rigid support (shoe tree, foam, or mold) to maintain its natural shape and prevent deformation during scanning. If necessary, apply markers on flat parts of the upper to ensure high-precision data capture.
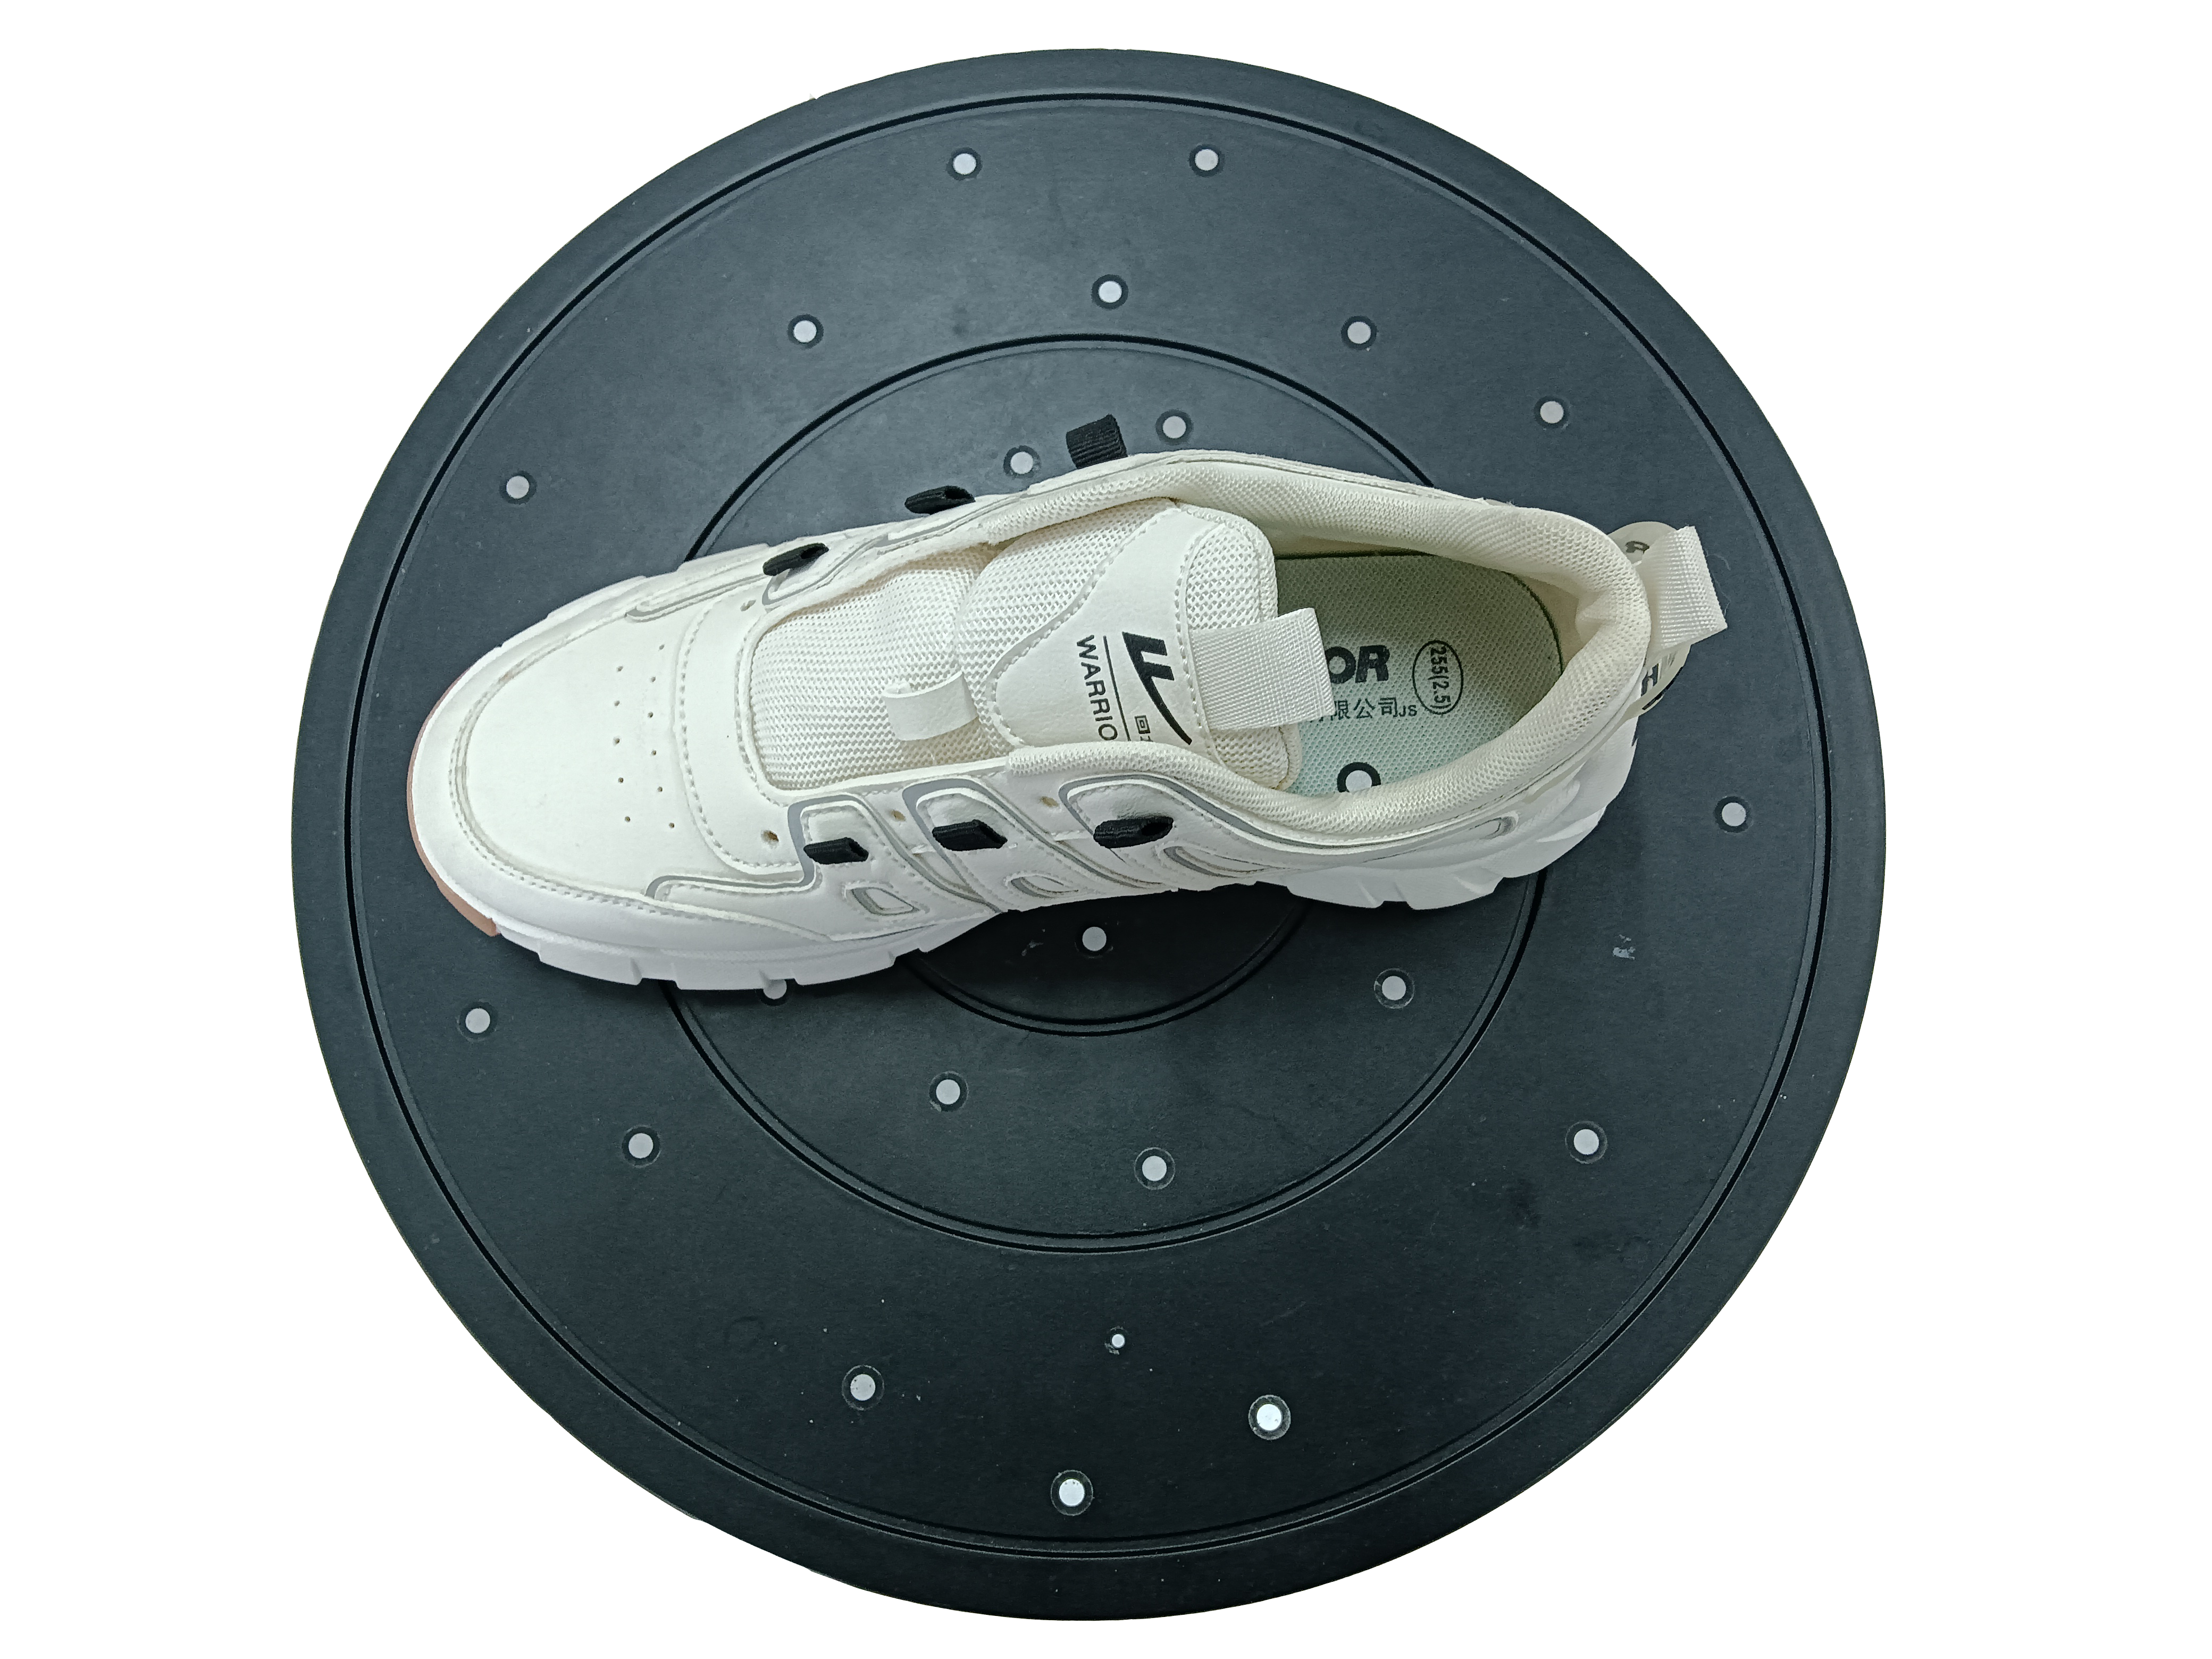 Figure 2: Upper Pre–treatment and Placement
Step 2: One-Shot Scanning of the Upper
Place markers on the desktop or around the turntable. Open the 3DeVOK Studio scanning software and select the Blue Laser – Marker mode. Set the resolution to 0.2mm for good detail.
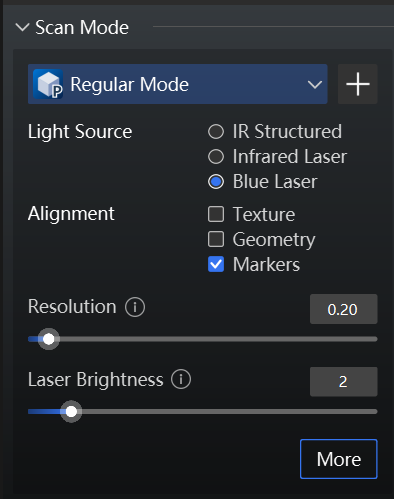 Figure 3: Recommended Scan Mode
If you need to capture color model data of the shoe, select “Color Small Object” mode in the Scan Mode Management module.
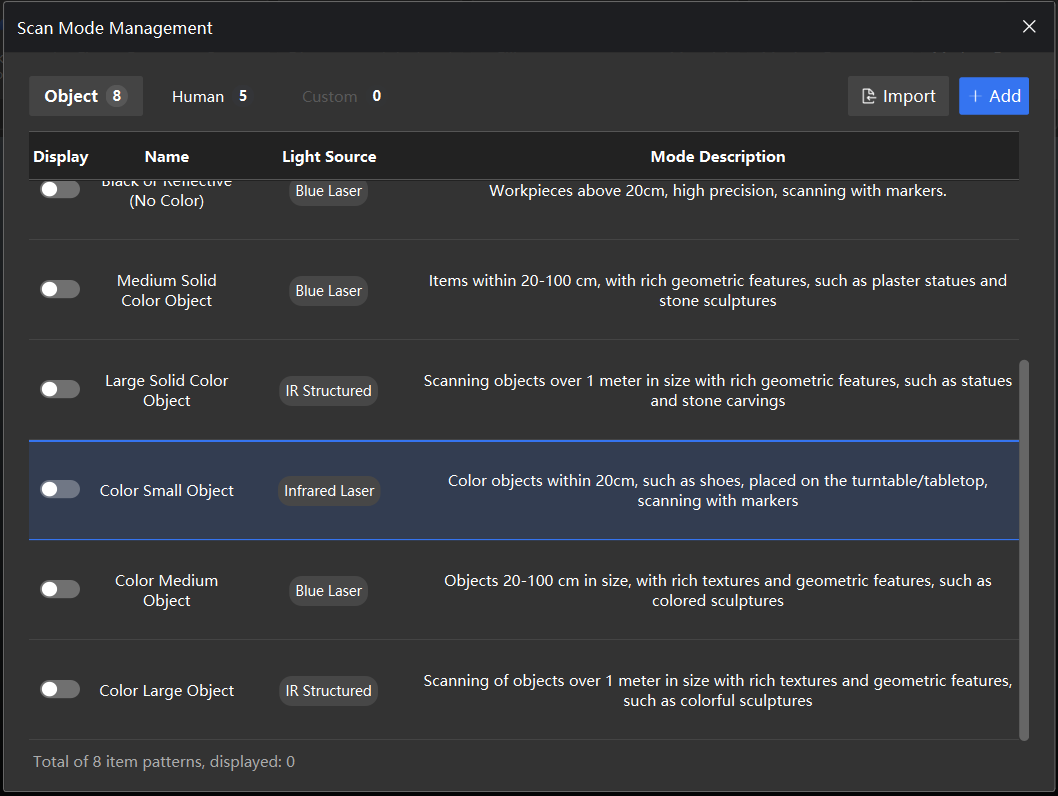 Figure 4: Recommended scan mode for color shoes
As the shoe upper material is soft, it is recommended to complete data acquisition in one continuous scan to minimize minor deformation errors caused by multiple movements.
Step 3: Preliminary Data Check
After scanning, inspect the upper data to ensure complete details and no significant holes or deformed areas. Re-scan any missed areas if necessary. When saving, remember to save the point cloud project file (.apj) for the upper to facilitate later point cloud registration with the sole data.
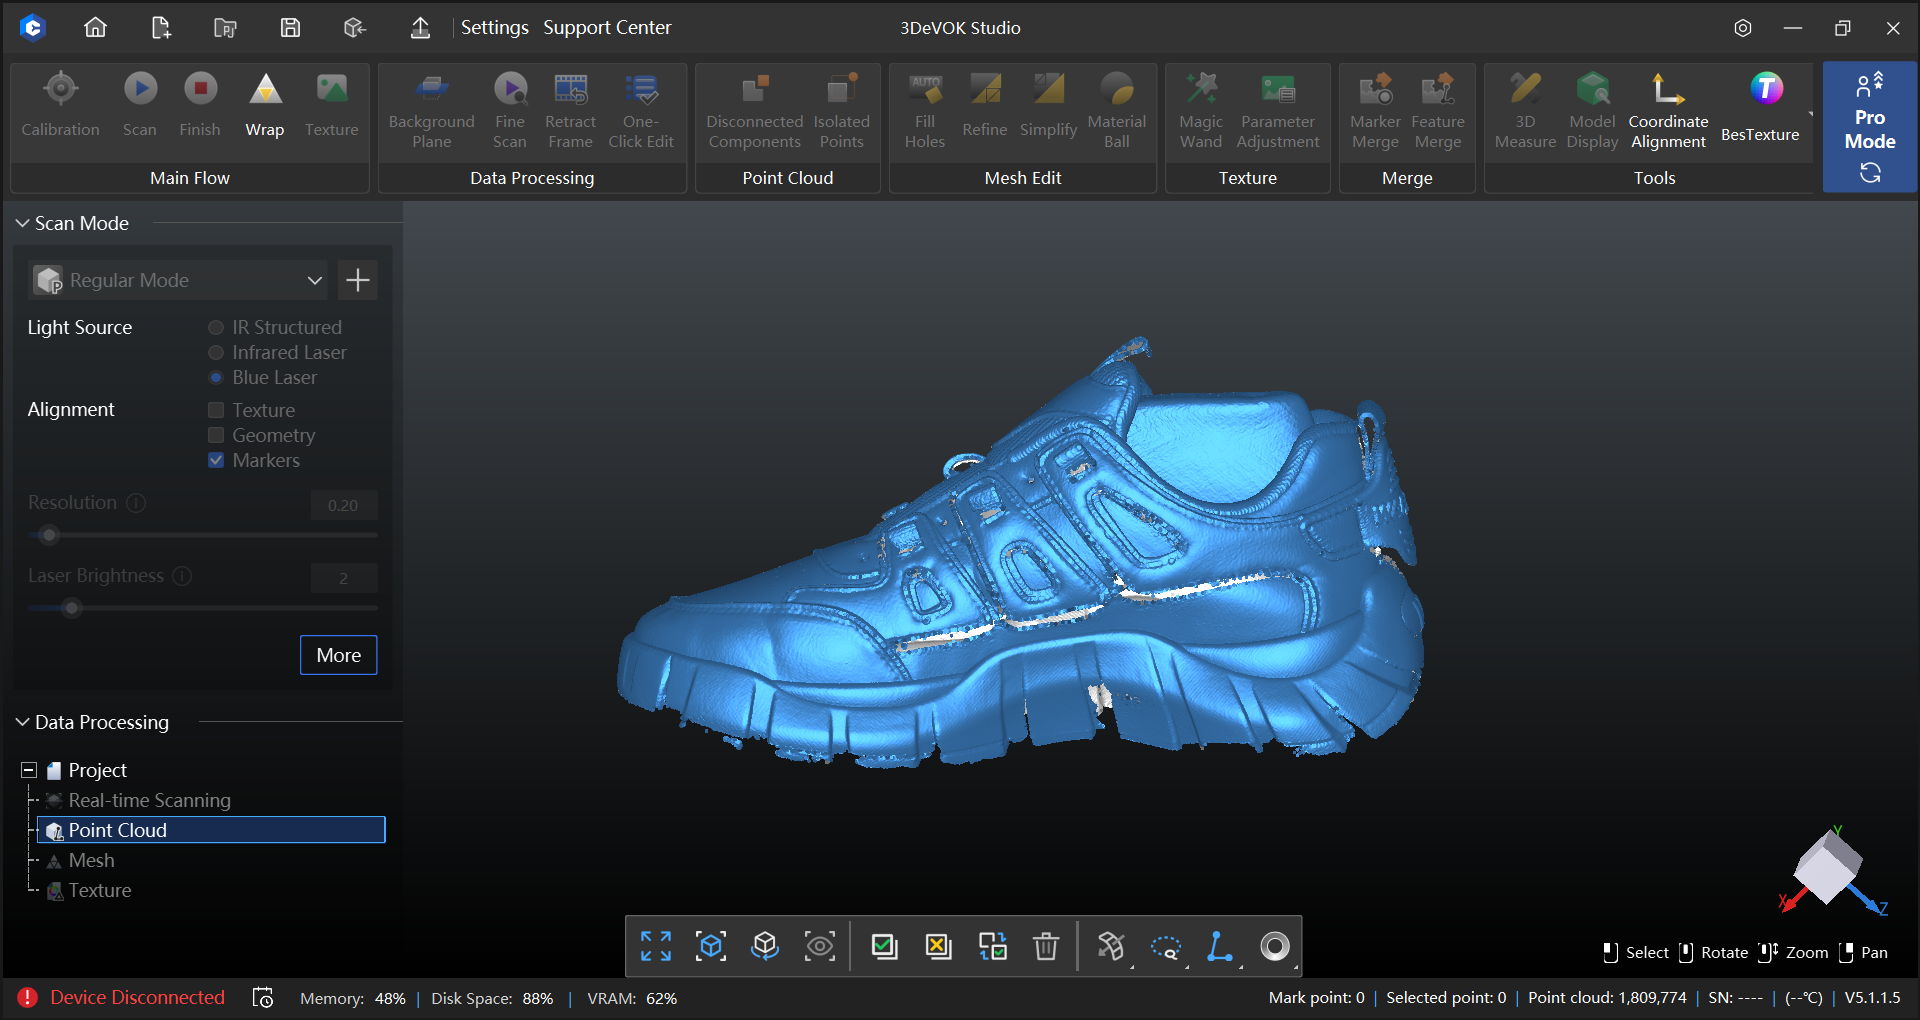 Figure 5: Upper Data Acquisition
Phase 2: Rigid Sole Data Acquisition
Step 1: Fix the Shoe with Sole Facing Up
Turn the shoe over and place it stably with the sole facing up. Due to the sole’s high rigidity and stable structure, no internal support is needed inside the shoe. However, ensure the shoe does not wobble during scanning; use support molds or Blu-Tack for auxiliary fixation. It is recommended to apply a few markers on the bottom or side of the shoe.
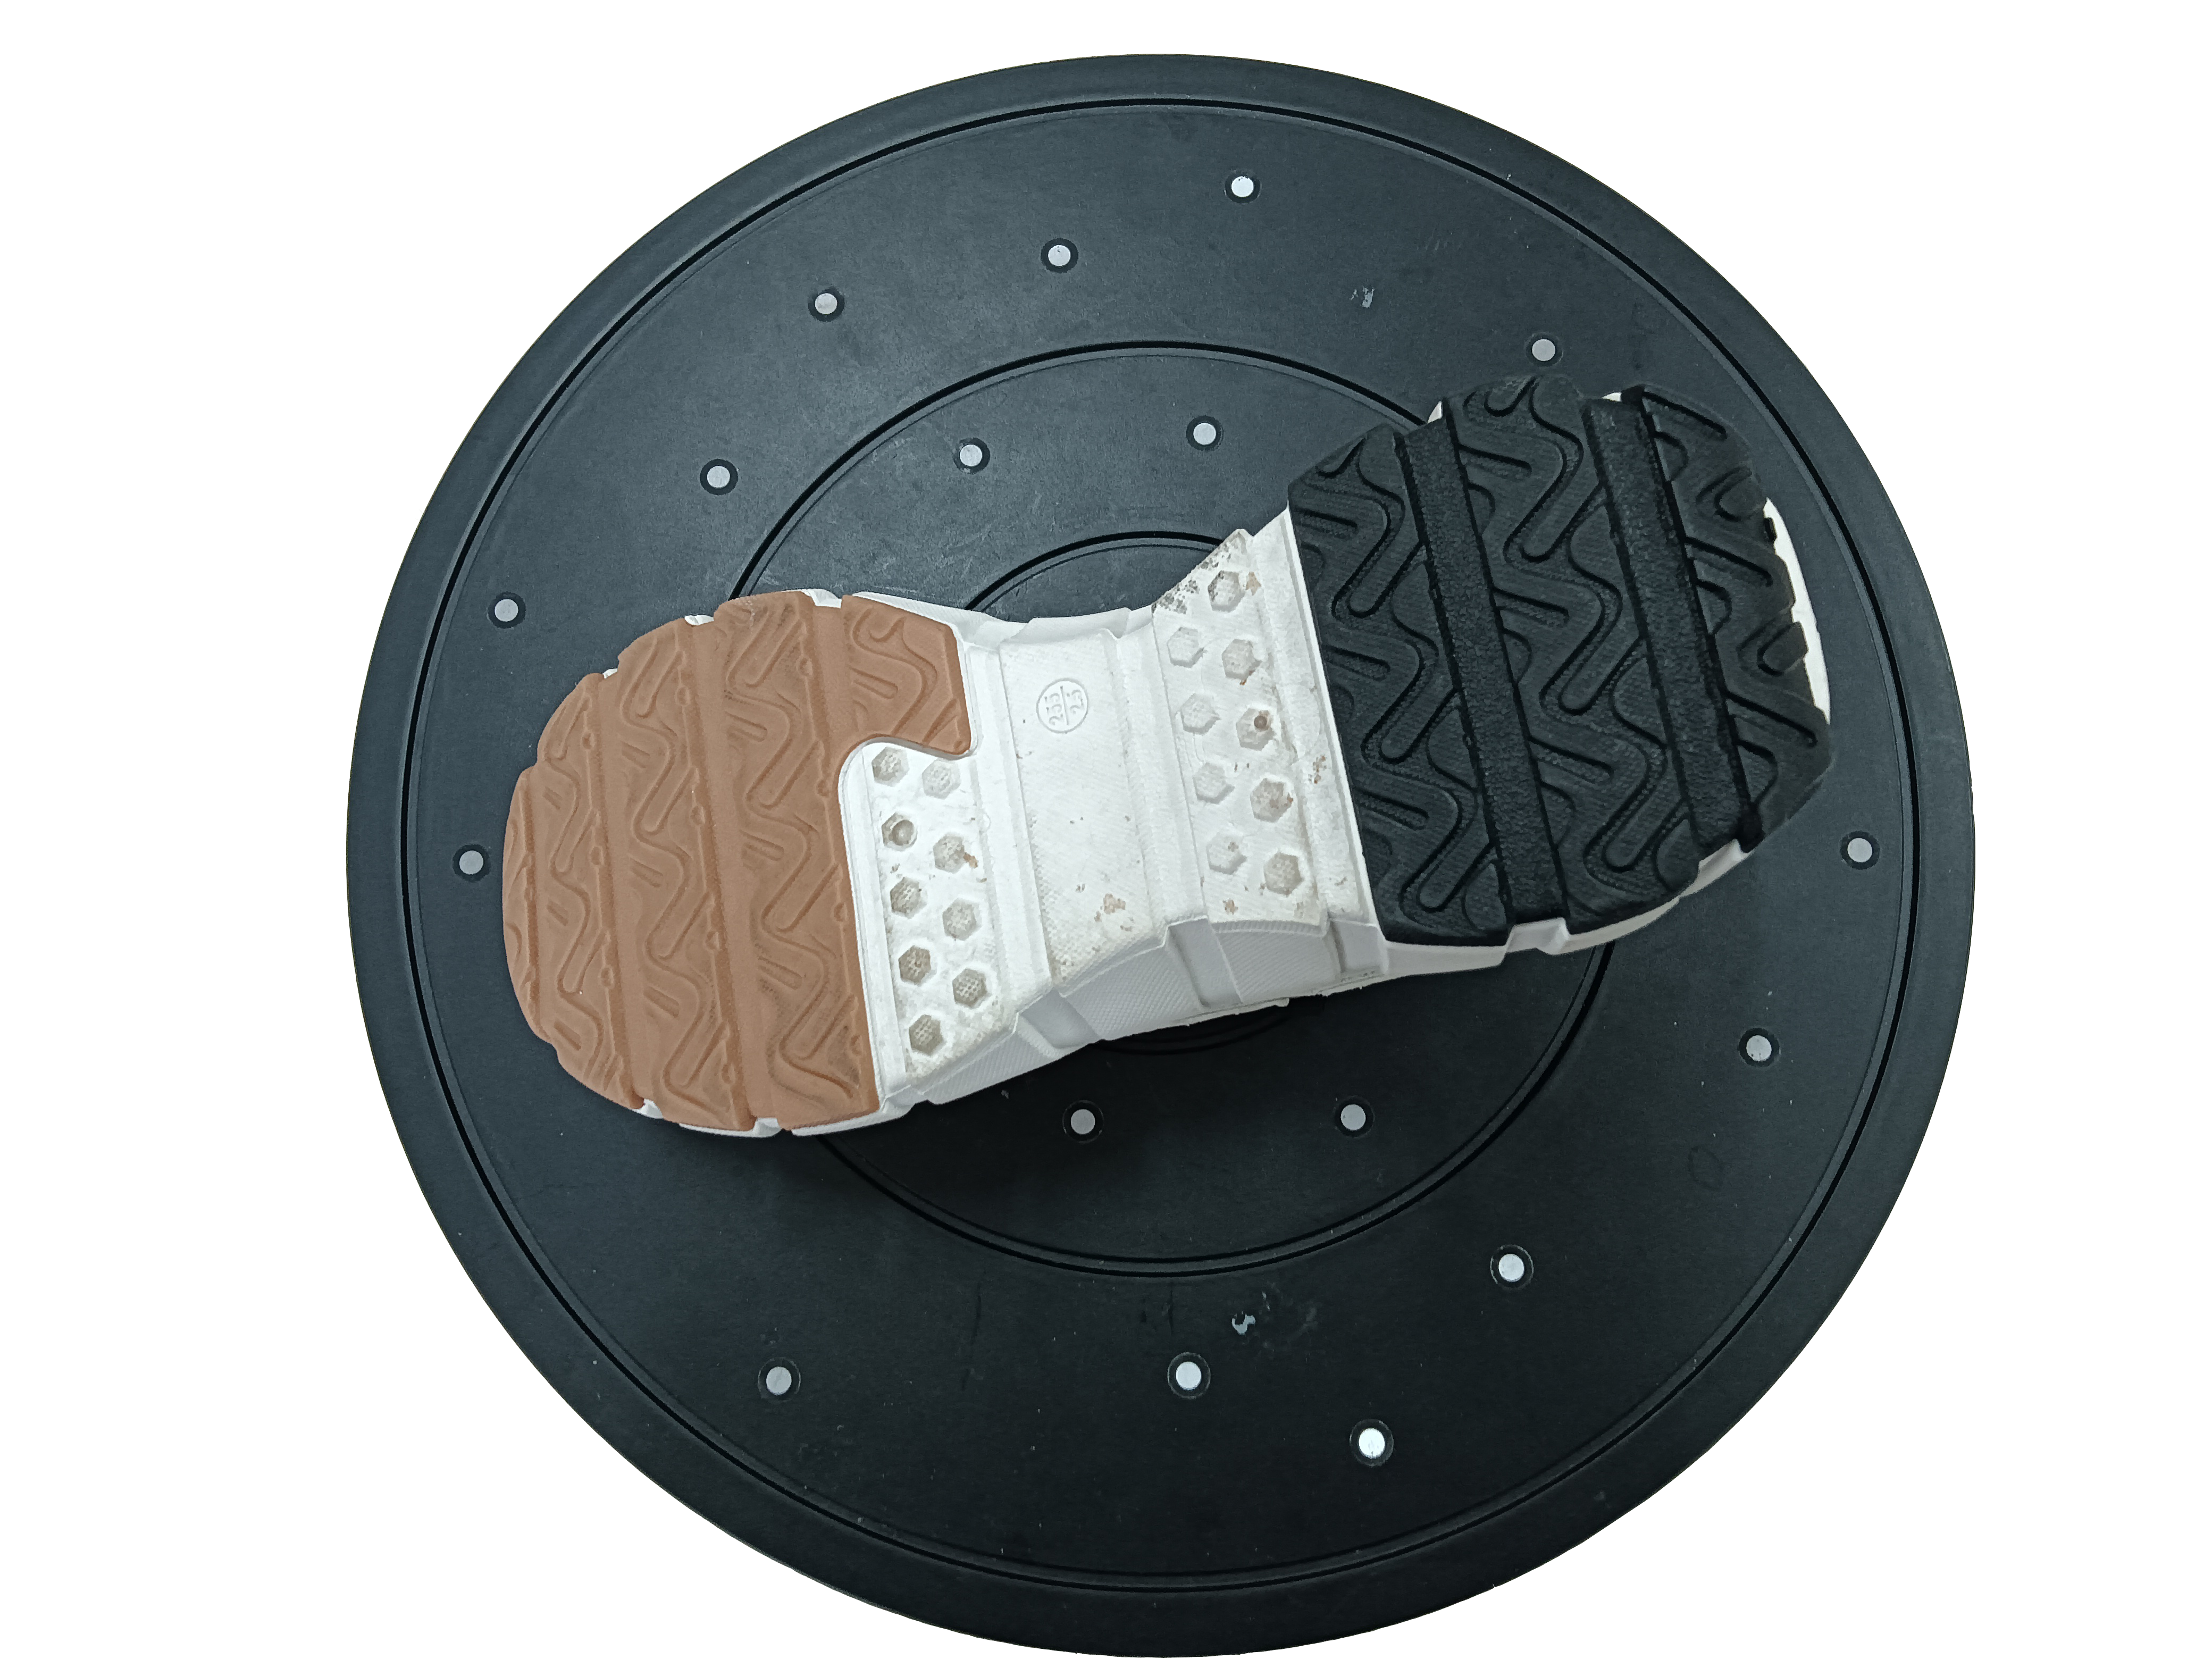 Figure 6: Sole Placement
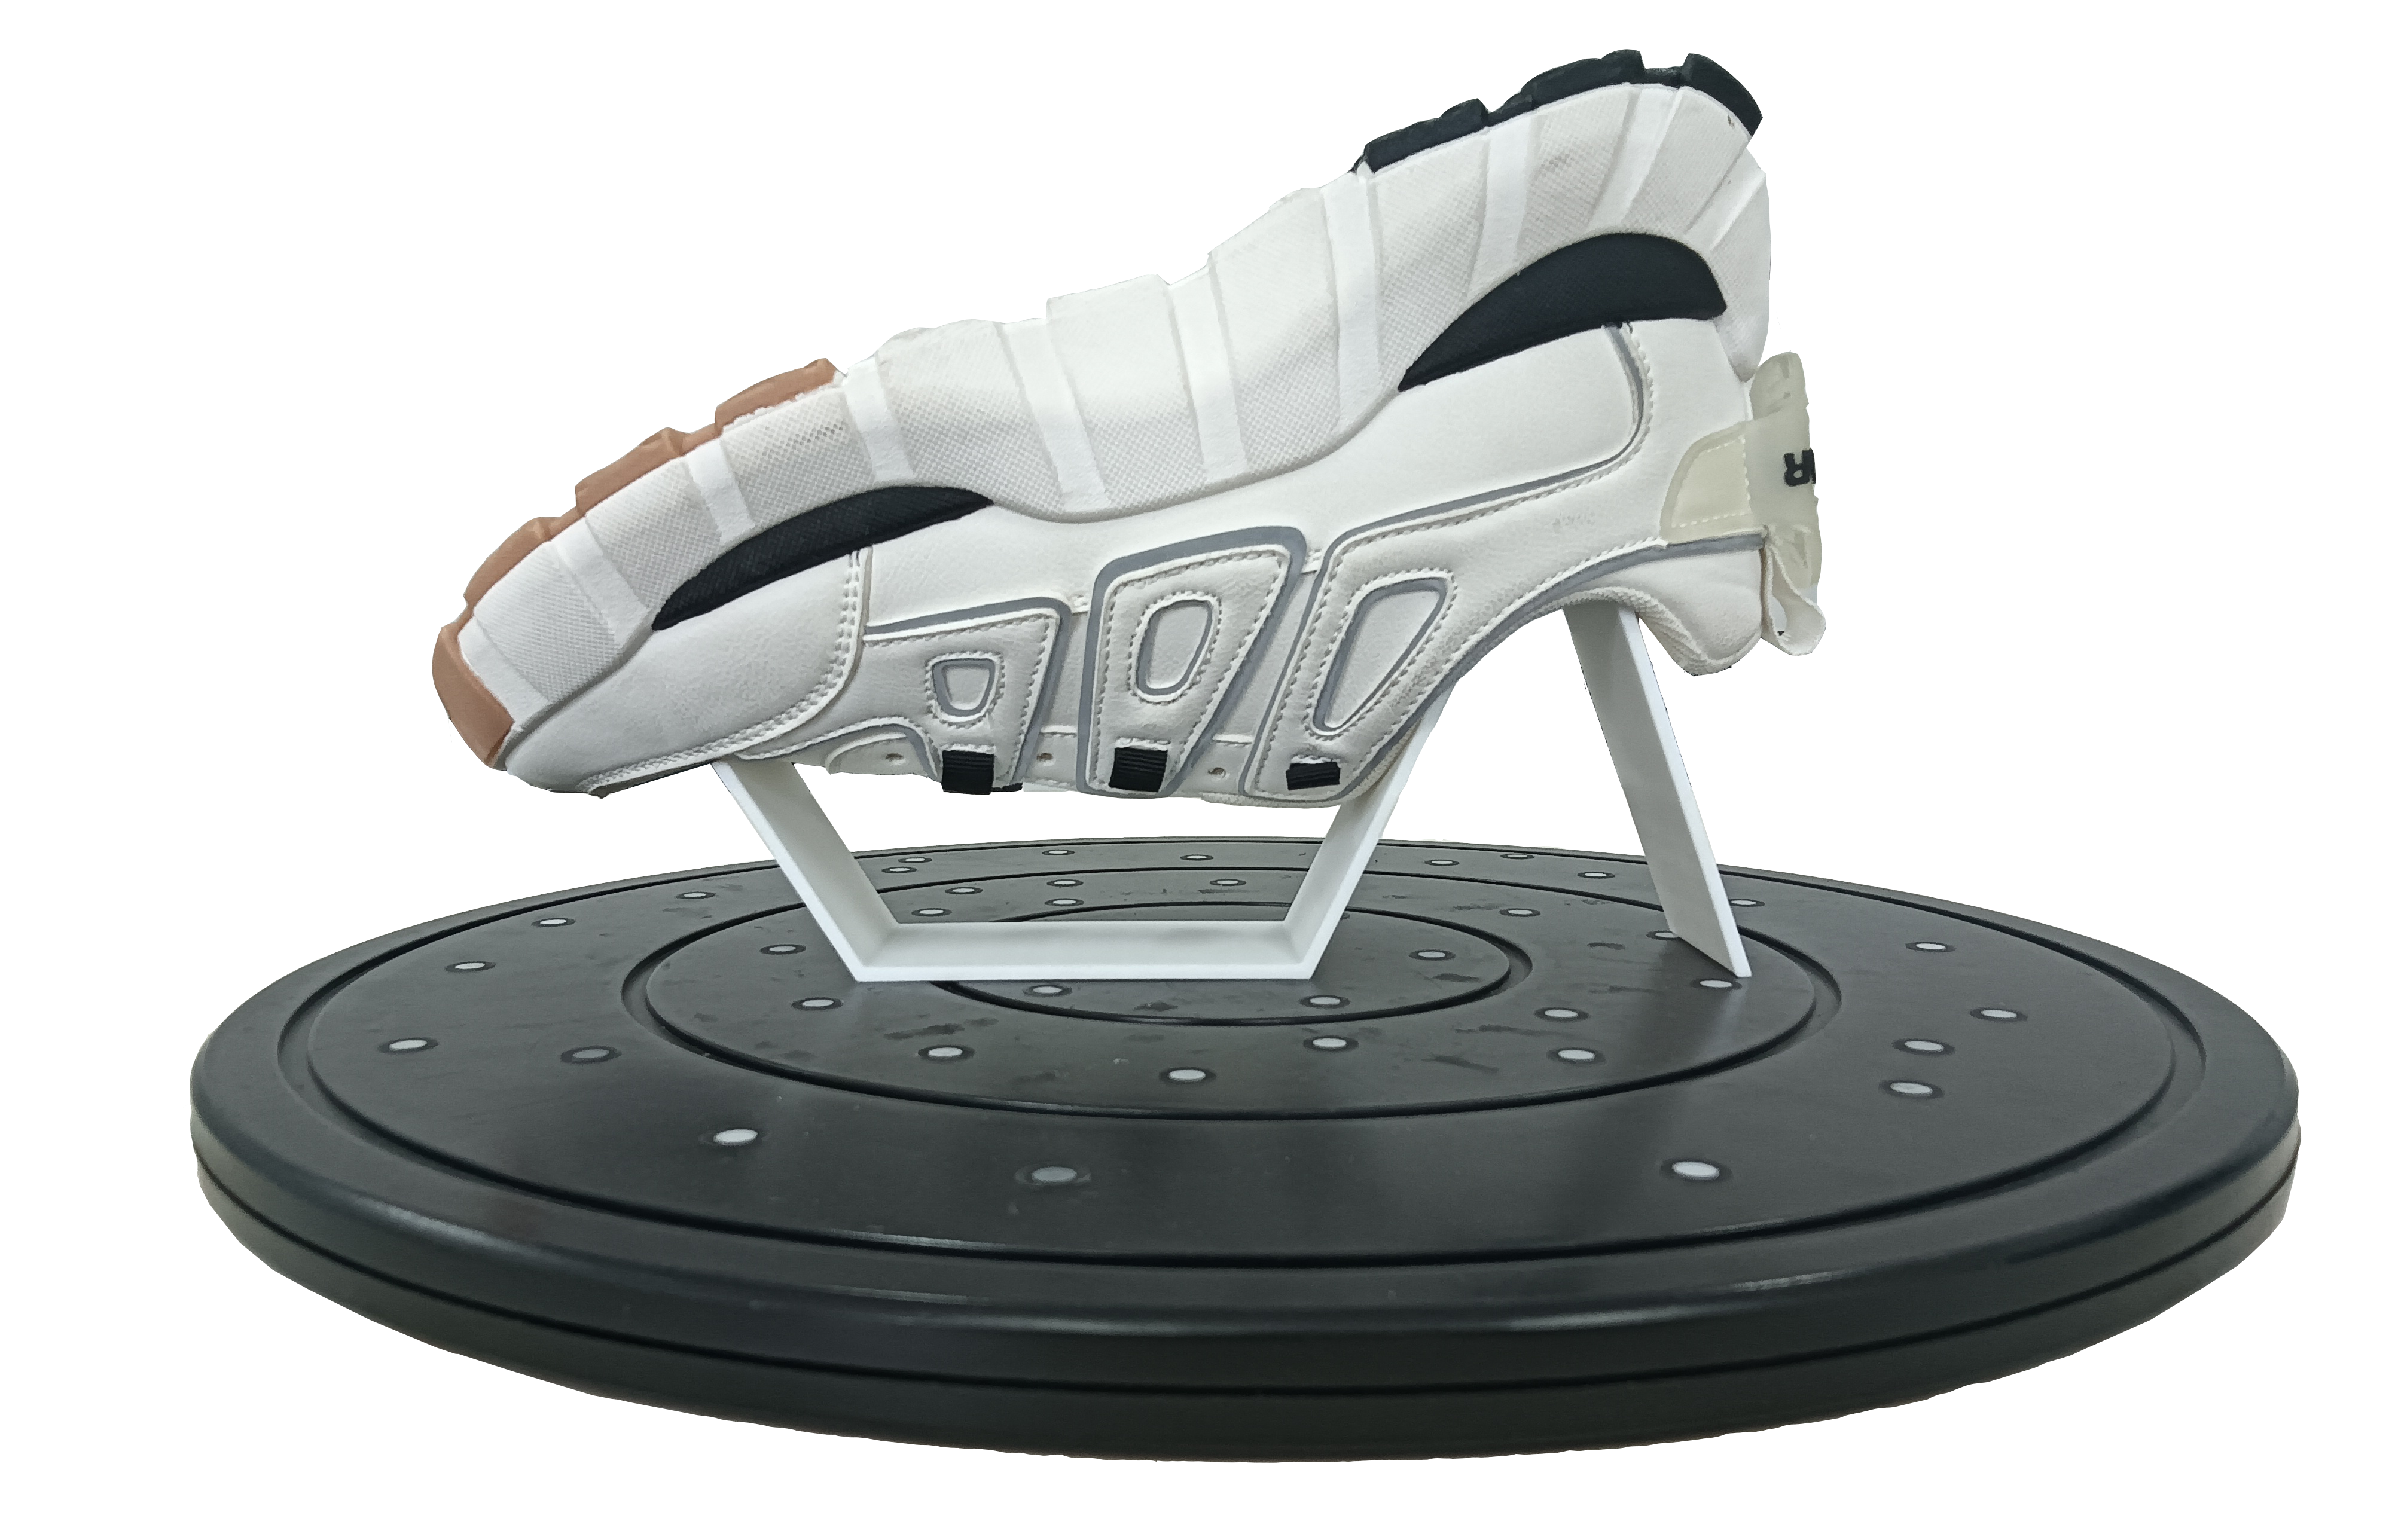 Figure 7: Sole Fixation Method
Step 2: One-Shot Scanning of the Sole
Use the 3DeVOK MT scanner to comprehensively capture data of the sole. Ensure the integrity of the tread patterns and the edges, especially the side transition areas, as these will serve as key features for later data registration.
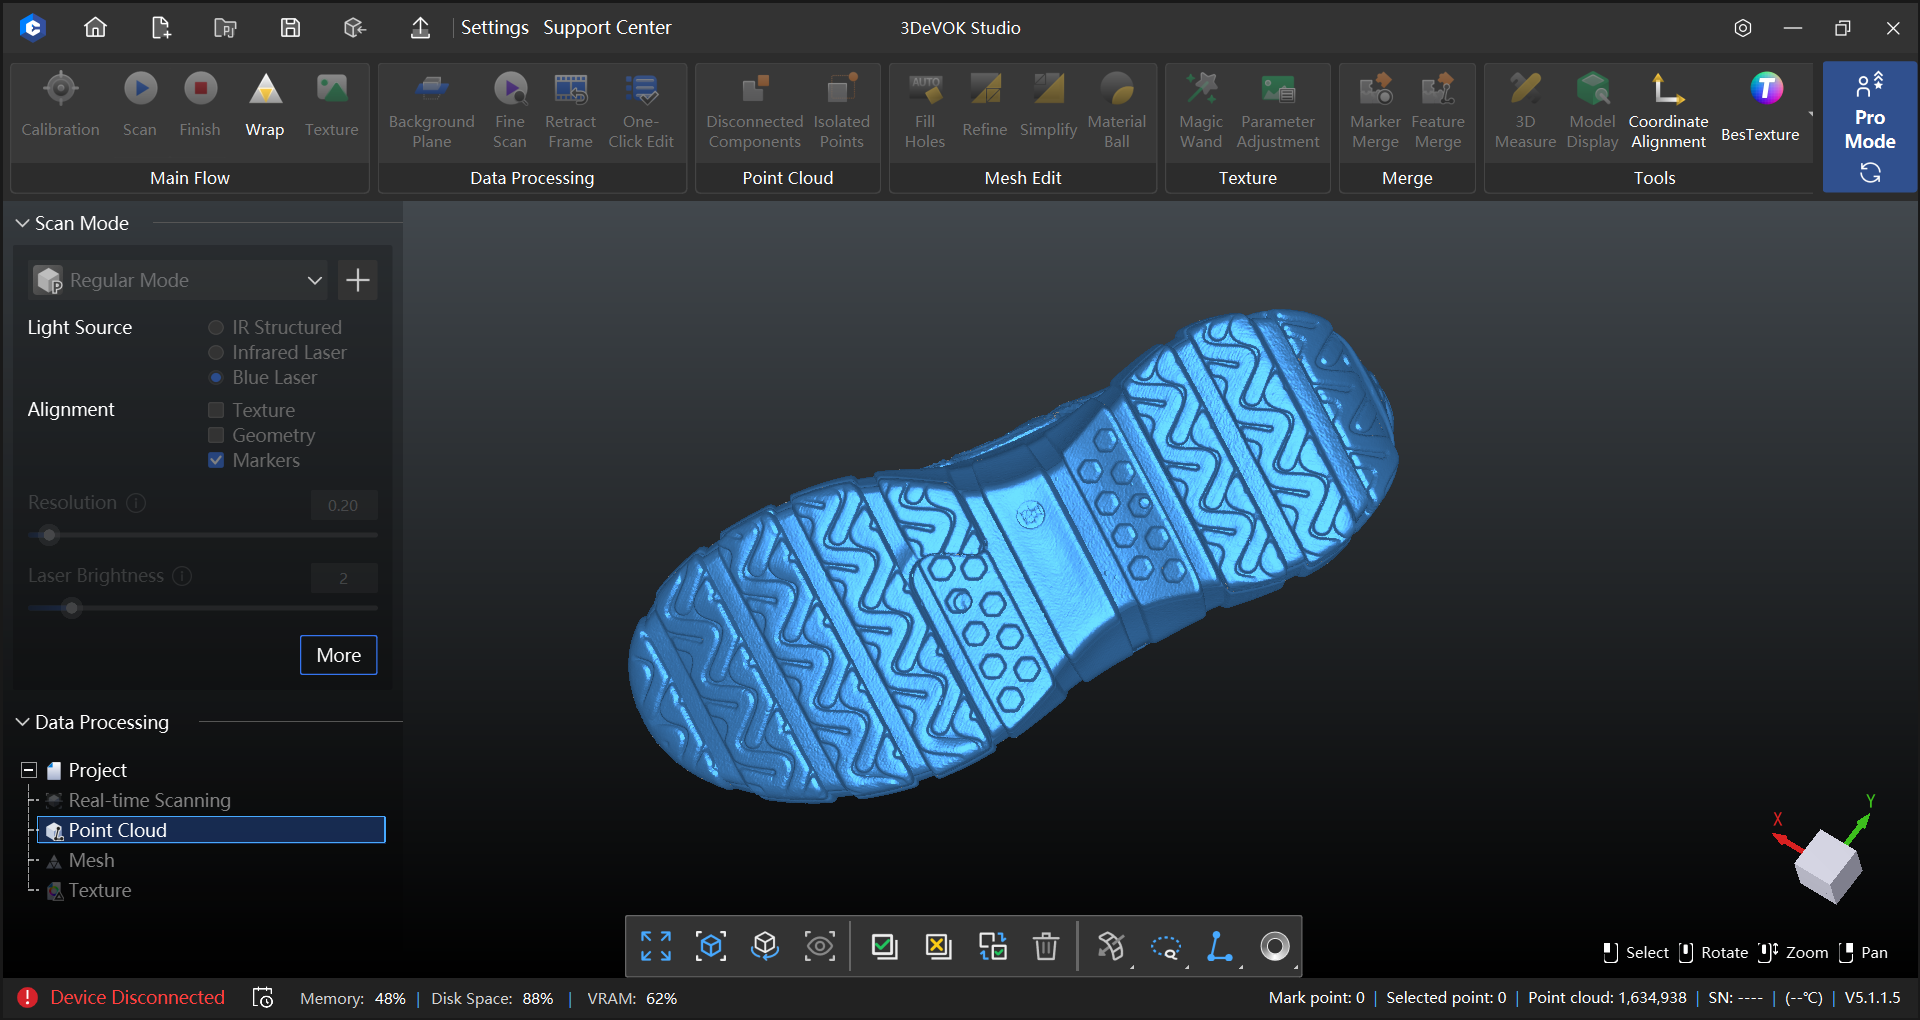 Figure 8: Sole Data Acquisition
Step 3: Data Pre–processing
After completing the sole scan, perform initial processing on the sole point cloud. Retain the edges and areas with prominent features (e.g., heel, toe, side transition surfaces) as reference features for later registration.
Special Note: Since the upper may have been deformed by pressure at this point, delete any soft upper data that was incidentally captured during the sole scan.
For subsequent multi-view alignment, use only the geometric features of the rigid sole’s side as the reference.
Step 4: Registering and Merging Upper and Sole Data
Click the “Feature Merge” button, then import the previously acquired upper point cloud project (.apj) and the sole point cloud project into the 3DeVOK Studio software on the left interface. Use the rigid sole’s side data as the base feature and perform automatic alignment to complete the registration and merging of the two parts.
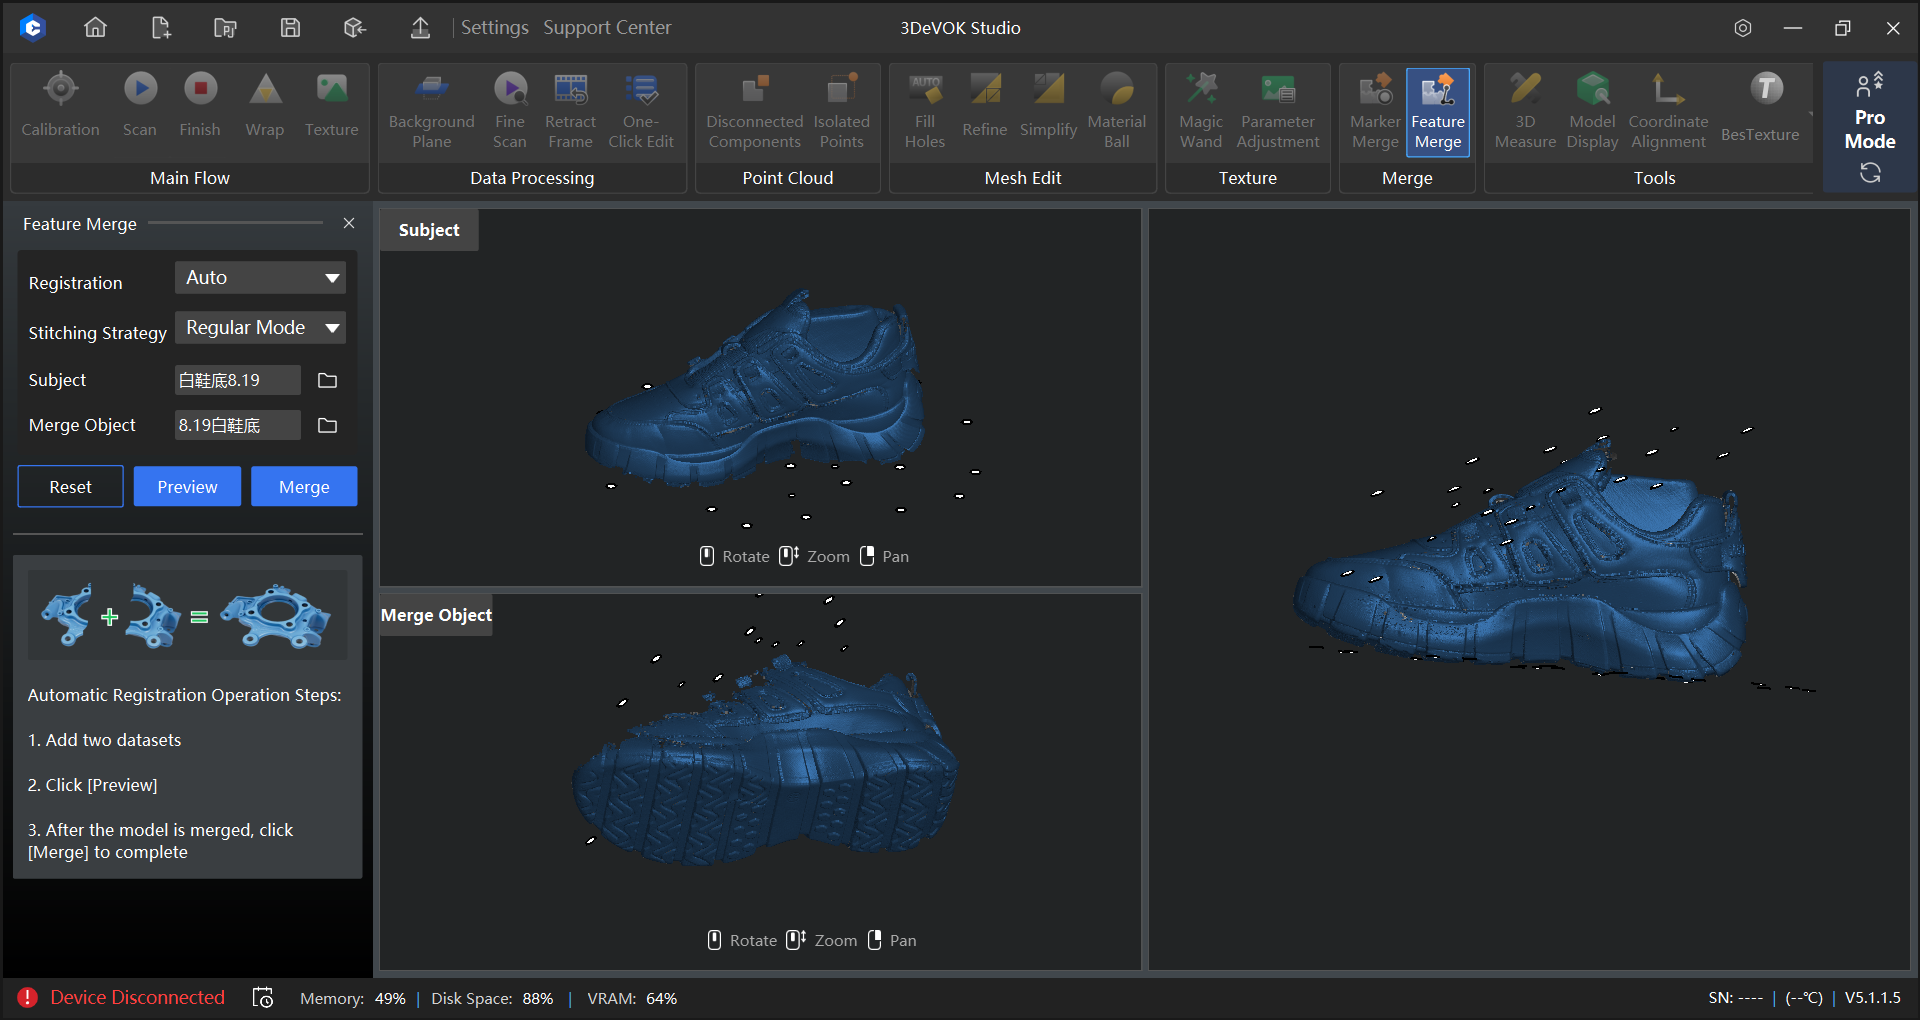 Figure 9: Auto Feature Merge
Step 5: Overall Optimization and Model Output
After registration, check if the seam is smooth. Perform local optimization if necessary or use the hole-filling tool to fill minor holes.
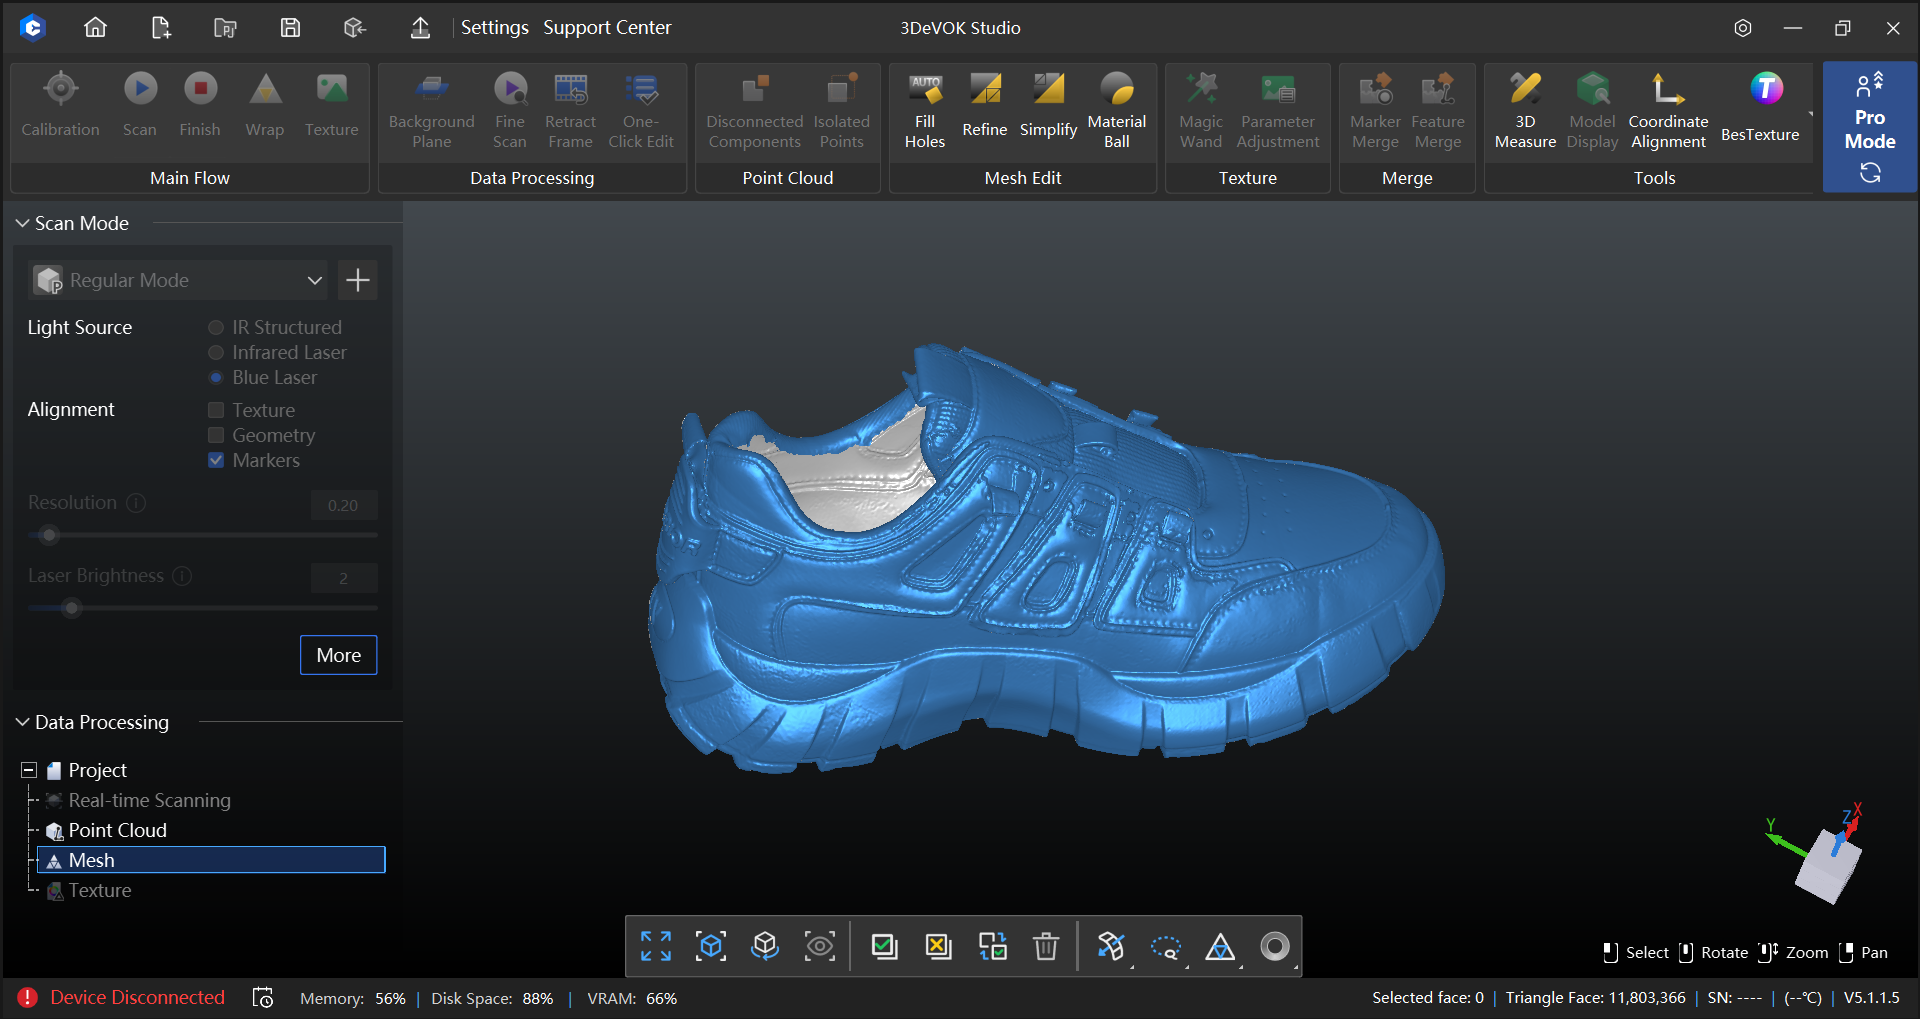 Figure 10: Complete Shoe Mesh Model
Finally, output a complete, closed, high-precision 3D shoe model suitable for subsequent design or production.
Conclusion
Mastering 3D scanning techniques for soft objects is key to obtaining high-precision digital models of shoes. Every step, from pre-scanning rigid support preparation, to staged data acquisition for the upper and sole, to post-scanning feature registration and mesh optimization, affects the realism and accuracy of the final 3D digital model. With the continuous iteration of 3D scanning technology, even when facing soft and structurally complex objects like shoes, we can easily overcome challenges of deformation and material reflectivity through a scientific scanning workflow, efficiently completing the digital transformation from physical object to data.
Related Articles


View Our Product
